Crispy Cottage Cheese Chips- Easy Low-Carb Snack
Cottage Cheese Chips are the revolutionary snack you didn’t know you needed, but soon won’t be able to live without. Forget everything you thought you knew about “healthy” snacks; these crispy, savory delights are about to redefine your afternoon cravings. People adore them because they offer that satisfying crunch and robust flavor profile we often associate with less wholesome options, all while packing a protein punch that keeps you feeling full and energized. What truly makes Cottage Cheese Chips special is their incredible versatility and the sheer genius of transforming a humble dairy staple into something so undeniably addictive. Whether you’re a seasoned health enthusiast looking for a guilt-free indulgence or simply someone who loves a good crunch, these chips are destined to become a staple in your kitchen.
Ingredients:
- 1 cup (240g) full-fat cottage cheese
- 1 large egg
- 2 tablespoons (28g) nutritional yeast
- 1/2 teaspoon garlic powder
- 1/4 teaspoon onion powder
- 1/4 teaspoon smoked paprika
- Pinch of cayenne pepper (optional, for a little heat)
- Salt to taste
- Black pepper to taste
- Optional: Dried herbs like rosemary, thyme, or Italian seasoning
Prepping for Crispy Perfection
Getting Started with Your Cottage Cheese Chips
This is where the magic begin extracts for our amazing Cottage Cheese Chips! The key to achieving that perfect crisp lies in how we prepare the base mixture. First, ensure your cottage cheese is at room temperature. This will help it blend more smoothly with the other ingredients, leading to a more uniform texture in your finished chips. If your cottage cheese is very watery, you can gently drain off some of the excess liquid by placing it in a fine-mesh sieve for a few minutes. While it’s not strictly necessary for all cottage cheese, sometimes a little draining can lead to an even crispier chip.
In a medium-sized bowl, combine the cottage cheese and the large egg. You’ll want to whisk these together thoroughly until they are well combined and the mixture is relatively smooth. Don’t worry if there are still a few small lumps of cottage cheese; they will break down further during the baking process. This initial step forms the foundation of our crispy, flavorful chips.
Next, we introduce the flavor boosters! Add the nutritional yeast, garlic powder, onion powder, smoked paprika, and cayenne pepper (if you’re feeling adventurous!). Don’t forget to season generously with salt and freshly ground black pepper. Taste the mixture at this stage and adjust the seasonings as needed. Remember, baking can sometimes mellow out flavors, so it’s good to have them bold now. If you’re using any dried herbs, this is also the perfect time to stir them in. This simple yet impactful blend of spices will transform plain cottage cheese into a savory delight. Whisk everything together until it’s uniformly distributed throughout the cottage cheese and egg mixture. The nutritional yeast is not just for flavor; it also contributes to the golden color and cheesy taste of the chips.
Shaping and Baking for Ultimate Crispiness
Creating Your Cottage Cheese Chip Shapes
Now it’s time to get creative with shaping! You have a couple of excellent options here, depending on your desired chip style.
The simplest method is to spread the mixture thinly onto a baking sheet lined with parchment paper. Use a spatula to spread the batter as evenly as possible, aiming for a thickness of about 1/8 inch (3mm). The thinner you spread it, the crispier your chips willgin extract. Imagine you’re making a very thin pancake batter, but without the flour. If you want more defined shapes, you can try this: after spreading a thin layer of the batter, use a knife or a pizza cutter to score the batter into your desired shapes – squares, rectangles, or even triangles. This will make them easier to break apart once they are baked and fully cooled.
Alternatively, for more uniform and bite-sized chips, you can use a piping bag fitted with a large round or star tip. Spoon the cottage cheese mixture into the piping bag and pipe small rounds or star shapes directly onto the parchment-lined baking sheet. Leave a little space between each piped shape, as they might spread slightly during baking. This method is great for creating little snackable bites that are perfect for dipping.
The Crucial Baking Process
Preheat your oven to 300°F (150°C). This lower temperature is crucial for drying out the cottage cheese and achieving that signature crispiness without burning. Place your prepared baking sheet into the preheated oven.
Bake for approximately 25 to 35 minutes. The exact baking time will depend on the thickness of your chips and your oven. You’ll know they’re ready when the edges start to turn golden brown and the chips appear firm and dry. Keep a close eye on them, especially in the last 10 minutes, as they can go from perfectly baked to burnt very quickly. If some chips are baking faster than others, you can carefully remove the done ones and let the remaining ones continue to bake.
Cooling for Maximum Crunch
Once your Cottage Cheese Chips are baked to perfection, remove the baking sheet from the oven. Let them cool directly on the baking sheet for about 10-15 minutes. This initial cooling period allows them to firm up slightly.
After the initial cooling, carefully transfer the chips to a wire rack to cool completely. This is a vital step for achieving maximum crispiness. Allowing them to cool on a wire rack ensures air circulation all around the chips, preventing any trapped steam from making them soggy. As they cool, you’ll hear them become even more brittle and crunchy. If you scored your chips earlier, this is when you can easily break them apart along the scored lines.
Storing Your Delightful Cottage Cheese Chips
Keeping Them Crispy
Once your Cottage Cheese Chips are completely cool, it’s time to store them properly to maintain their delightful crunch. The best way to store them is in an airtight container at room temperature. Avoid storing them in the refrigerator, as the humidity there can make them lose their crispness. If you’ve managed to resist eating them all immediately (which is a challenge, we know!), they should stay wonderfully crispy for several days. If, after a few days, you notice they’ve lost a little of their snap, you can try briefly toasting them in a low oven (around 250°F / 120°C) for 5-10 minutes to revive their crispness.
Conclusion:
And there you have it! Your delicious and surprisingly easy batch of Cottage Cheese Chips is ready to be enjoyed. This recipe is a game-changer for anyone looking for a healthier, protein-packed snack that doesn’t compromise on flavor or crunch. Whether you’re craving something savory or need a quick bite to curb those afternoon hunger pangs, these Cottage Cheese Chips deliver. I truly hope you love making and eating them as much as I do!
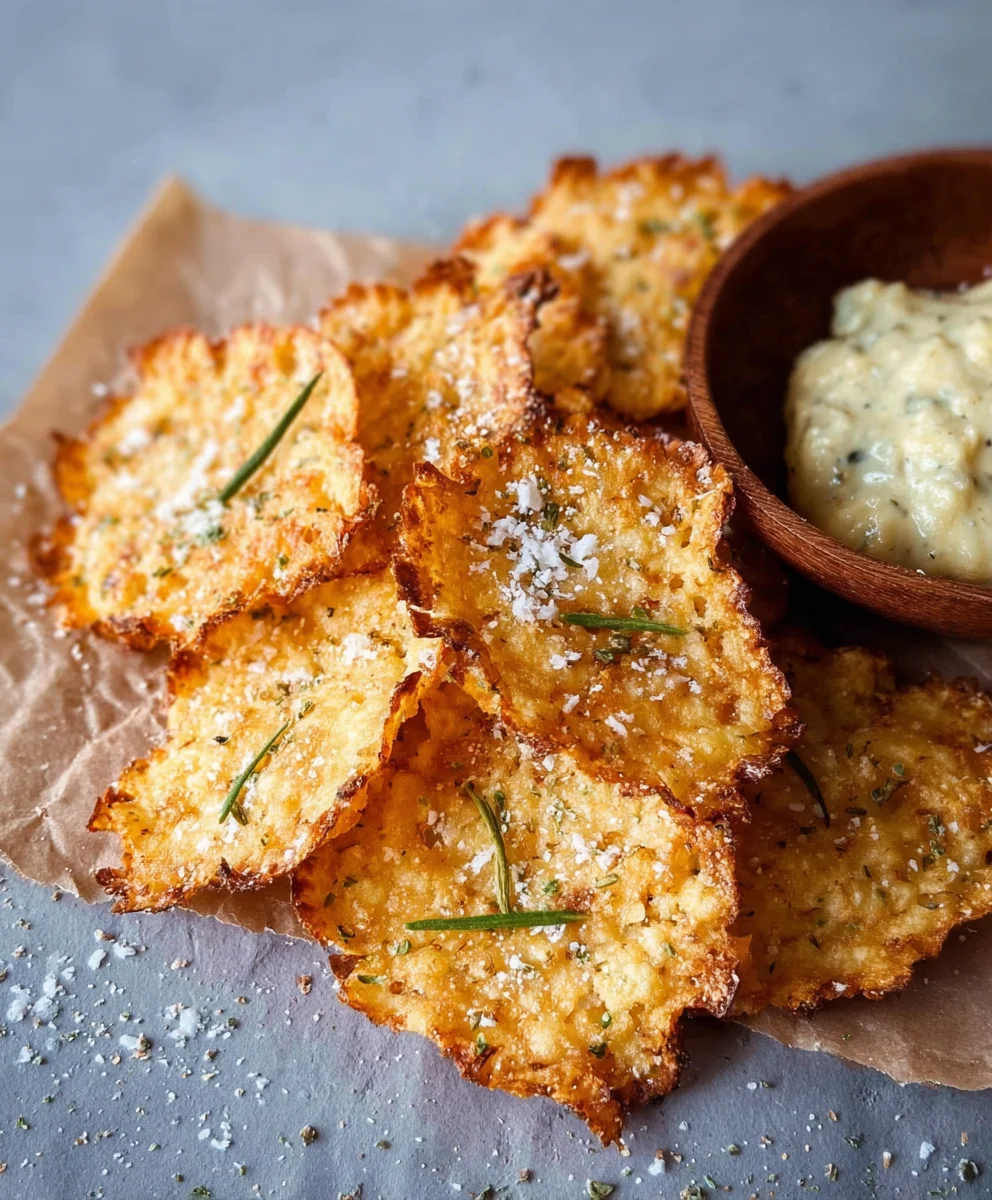
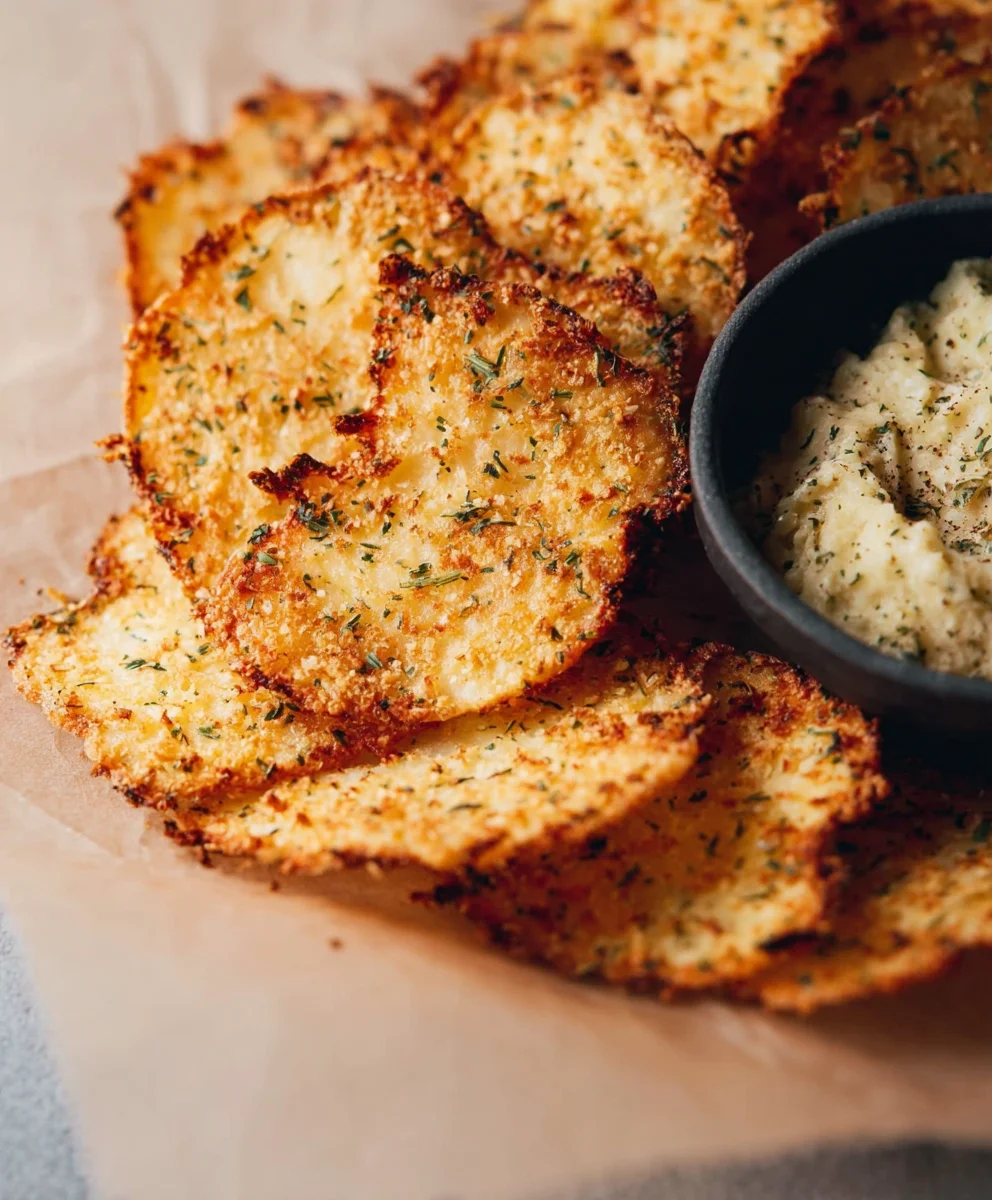
For serving, these Cottage Cheese Chips are fantastic on their own, but they also pair wonderfully with your favorite dips like guacamole, salsa, or even a Greek yogurt ranch. Feel free to get creative with your toppings too – a sprinkle of paprika, garlic powder, or a dusting of nutritional yeast before baking can add an extra layer of deliciousness. Don’t be afraid to experiment with different seasonings to make them your own!
This recipe is also incredibly versatile. You can easily adjust the baking time slightly depending on how crispy you like your Cottage Cheese Chips. If you’re feeling adventurous, consider adding a pinch of chili flakes for a bit of heat or some finely chopped herbs like rosemary or chives to the cottage cheese mixture before spreading.
So go ahead, gather your ingredients, and give these Cottage Cheese Chips a try. I’m confident you’ll be hooked!
Frequently Asked Questions:
Q: How do I ensure my Cottage Cheese Chips get crispy?
A: The key to crispy Cottage Cheese Chips lies in spreading the mixture very thinly and evenly on the baking sheet. The thinner the layer, the more moisture can evaporate during baking, resulting in a crunchier chip. Also, make sure to preheat your oven properly and avoid overcrowding the baking sheet.
Q: Can I make Cottage Cheese Chips without a baking sheet?
A: While a baking sheet lined with parchment paper or a silicone baking mat is ideal for easy removal and even cooking, you could potentially use a pizza stone or a heavy-duty oven-safe tray. However, a standard baking sheet is recommended for the best results and to prevent sticking.
Q: What kind of cottage cheese is best for this recipe?
A: You can use either full-fat or low-fat cottage cheese for this recipe. Some people find that full-fat cottage cheese provides a slightly richer flavor and a better texture. However, low-fat varieties will still work perfectly well and are a great option if you’re looking to reduce fat content.
Crispy Cottage Cheese Chips
Easy low-carb snack made from cottage cheese, creating a delightfully crispy and savory chip.
Ingredients
-
1 cup (240g) full-fat cottage cheese
-
1 large egg
-
2 tablespoons (28g) nutritional yeast
-
1/2 teaspoon garlic powder
-
1/4 teaspoon onion powder
-
1/4 teaspoon smoked paprika
-
Pinch of cayenne pepper (optional)
-
Salt to taste
-
Black pepper to taste
-
Optional: Dried herbs like rosemary, thyme, or Italian seasoning
Instructions
-
Step 1
Ensure cottage cheese is at room temperature and drain excess liquid if very watery. Combine cottage cheese and egg in a bowl, whisking until well combined and relatively smooth. -
Step 2
Add nutritional yeast, garlic powder, onion powder, smoked paprika, cayenne pepper (if using), salt, and black pepper. Stir in optional dried herbs. Whisk until uniformly distributed. Taste and adjust seasonings. -
Step 3
Spread the mixture thinly (about 1/8 inch) onto a baking sheet lined with parchment paper. For defined shapes, score the batter. Alternatively, pipe small shapes onto the baking sheet using a piping bag. -
Step 4
Preheat oven to 300°F (150°C). Bake for 25-35 minutes, or until the edges are golden brown and the chips appear firm and dry. Monitor closely to prevent burning. -
Step 5
Let the chips cool on the baking sheet for 10-15 minutes, then transfer to a wire rack to cool completely for maximum crispiness. Break apart along scored lines if applicable. -
Step 6
Store completely cooled chips in an airtight container at room temperature. To revive crispness, briefly toast in a low oven (250°F / 120°C) for 5-10 minutes.
Important Information
Nutrition Facts (Per Serving)
It is important to consider this information as approximate and not to use it as definitive health advice.
Allergy Information
Please check ingredients for potential allergens and consult a health professional if in doubt.