Cherry Cheesecake Hand Pies-Delicious Easy Dessert
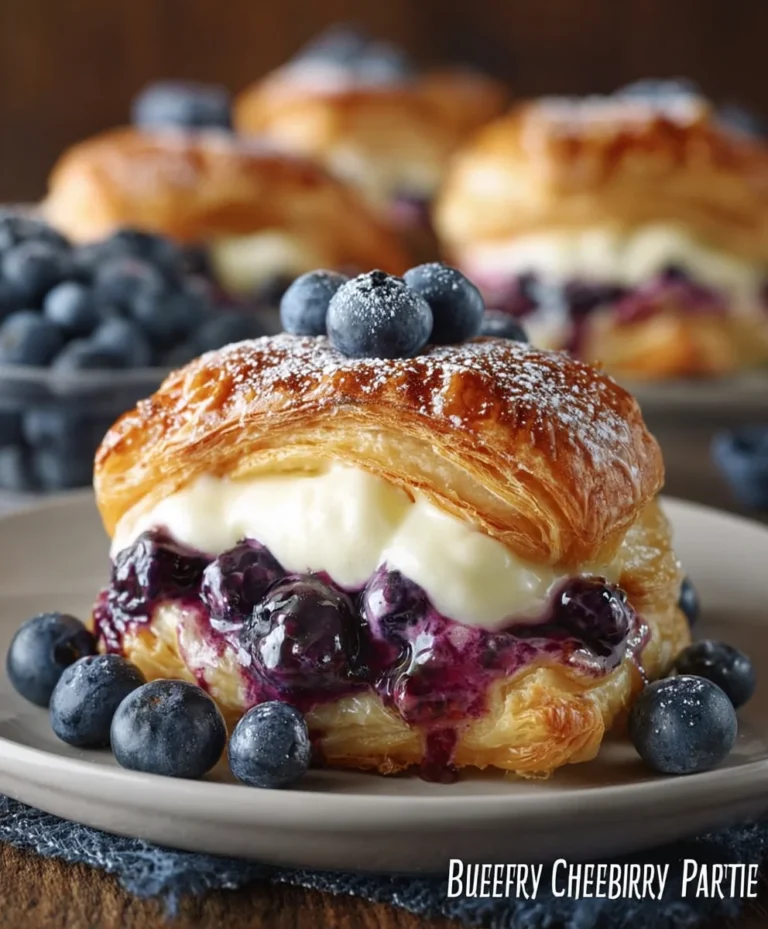
Cherry Cheesecake Hand Pies are the ultimate sweet treat, a delightful twist on a classic dessert that’s perfect for any occasion. Who doesn’t adore the creamy, dreamy goodness of cheesecake, combined with the burst of tart cherries? These individual parcels of joy take that beloved flavor profile and make it portable, personal, and utterly irresistible. I love them because they offer all the indulgence of a full cheesecake without the fuss of slicing and serving. Each bite delivers a flaky, buttery crust cradling a rich, tangy cream cheese filling studded with sweet cherries. They’re ideal for picnics, parties, or simply as a special afternoon pick-me-up. Get ready to impress yourself and everyone you share these amazing Cherry Cheesecake Hand Pies with!
Cherry Cheesecake Hand Pies
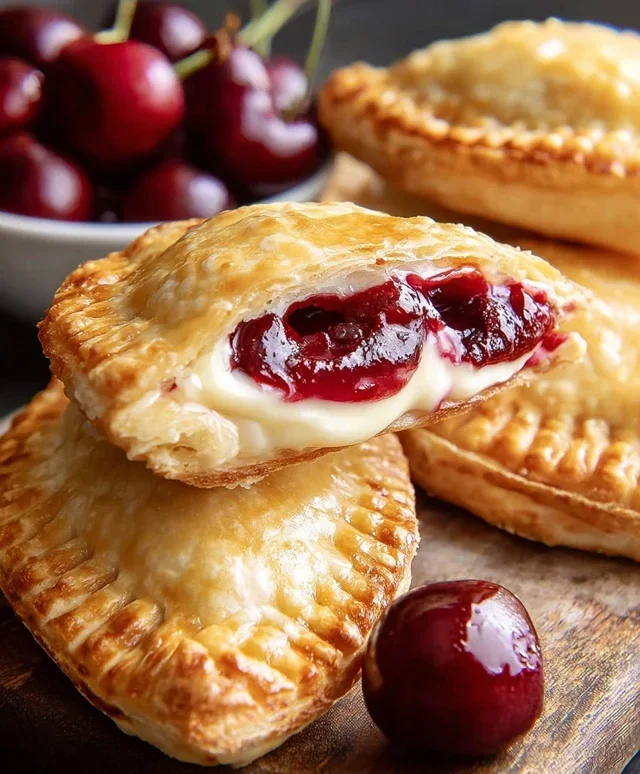
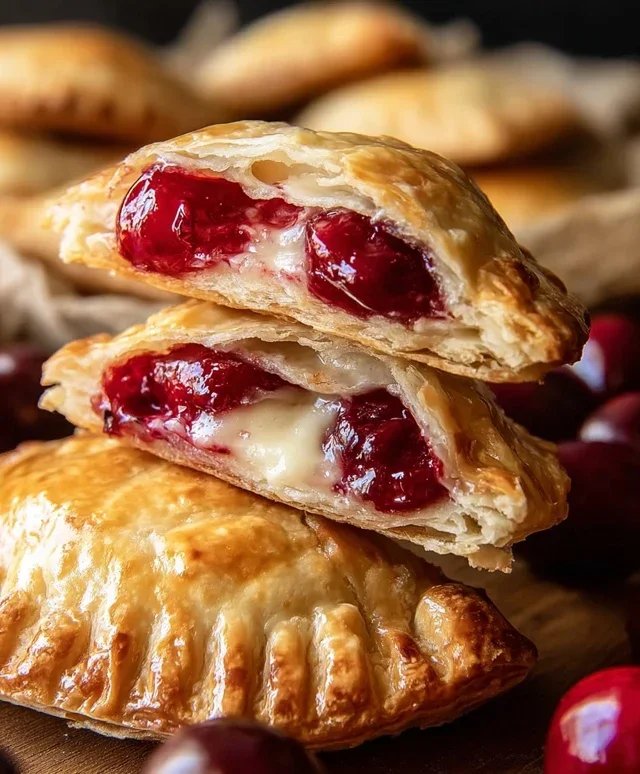
Get ready for a delightful treat that’s perfect for any occasion! These Cherry Cheesecake Hand Pies are a delightful fusion of creamy cheesecake filling and sweet cherry goodness, all encased in a flaky, golden-brown pastry. They’re surprisingly easy to make and are an absolute crowd-pleaser. Imagin extracte biting into a warm, crispy crust, only to discover a luscious, tangy cheesecake center swirled with vibrant cherry pie filling. It’s pure bliss! These are fantastic for parties, picnics, or simply as an indulgent dessert for yourself. Let’s get started!
Ingredients:
Making the Creamy Cheesecake Filling
The secret to these incredible hand pies is the luscious cheesecake filling. It’s simple to whip up and adds a wonderful richness that perfectly complements the tart cherries.
1. In a medium bowl, combine the softened cream cheese and the 1/4 cup of granulated sugar. Using an electric mixer or a sturdy whisk, beat them together until the mixture is smooth and creamy, with no lumps of cream cheese remaining. It’s important that the cream cheese is truly softened, which means it should be spreadable at room temperature. This ensures a smooth, homogenous filling. If you forget to take it out of the fridge in time, you can gently microwave it for about 10-15 seconds, but be careful not to melt it completely. Once you have a smooth base, you’ll gently fold in about half of the can of cherry pie filling. Don’t overmix at this stage; you want to see those beautiful swirls of cherry throughout the cheesecake mixture. This creates a visually appealing and deliciously marbled filling.
Assembling the Hand Pies
Now comes the fun part – assembling your hand pies! We’ll use store-bought pie crust for ultimate convenience, but the result will taste like you spent hours in the kitchen.
2. Unroll your refrigerated pie crusts onto a lightly floured surface. If the dough feels a little stiff, let it sit at room temperature for a few minutes to make it more pliable. Using a round cookie cutter (about 4-5 inches in diameter) or a small bowl as a guide, cut out as many circles as you can from each crust. You should aim for about 6-8 circles per crust, depending on the size of your cutter. Gather the scraps, gently re-roll them (being careful not to overwork the dough), and cut out more circles until you’ve used up all the dough. These imperfect circles are perfectly fine for hand pies!
3. Now, it’s time to fill these pastry circles. Place about 1-2 tablespoons of the cherry cheesecake filling onto one half of each pie crust circle, leaving about a 1/4-inch border around the edge. Be careful not to overfill, as this can make sealing the pies difficult and lead to leaks during frying. You want enough filling to get a good bite of that creamy goodness, but not so much that it oozes out excessively. Once filled, lightly brush the edges of the crust with a little water. This acts as a “glue” to help seal the pies effectively.
4. Carefully fold the unfilled half of the pie crust over the filling to create a half-moon shape. Press the edges firmly with your fingers to seal them completely. For an extra secure seal and a decorative touch, you can use the tines of a fork to crimp the edges. Make sure the seal is tight to prevent any filling from escaping during the frying process. If the dough becomes too sticky while you’re working, just pop it back into the refrigerator for a few minutes to firm up.
Frying the Hand Pies to Golden Perfection
Deep frying might sound intimidating, but it’s the key to achieving that wonderfully crispy crust that makes these hand pies so irresistible.
5. In a deep, heavy-bottomed pot or Dutch oven, heat about 4-6 cups of vegetable oil over medium-high heat. You want the oil to reach a temperature of 350°F (175°C). Using a thermometer is highly recommended for consistent results. Carefully slide 2-3 hand pies into the hot oil, making sure not to overcrowd the pot. Overcrowding will lower the oil temperature, resulting in greasy pies rather than crispy ones. Fry the hand pies for about 2-3 minutes per side, or until they are a beautiful golden brown. Use a slotted spoon or spider strainer to carefully remove the fried pies from the oil and place them on a wire rack set over a baking sheet. This allows excess oil to drain off, ensuring a crispier finish.
Glazing and Serving
The final touch is a simple, sweet glaze that elevates these hand pies to the next level of deliciousness.
6. While the hand pies are still warm (but not hot), prepare the glaze. In a small bowl, whisk together the 1/2 cup of powdered sugar, 1 teaspoon of corn syrup, and 1 tablespoon of water until smooth and lump-free. The corn syrup adds a lovely sheen to the glaze. Drizzle this glaze generously over the warm hand pies. The warmth of the pies will help the glaze set slightly. Let them cool for a few minutes before serving. These are absolutely divine served warm, but they are also delicious at room temperature. Enjoy every single bite!
Conclusion:
I hope you’ve enjoyed learning how to make these delightful Cherry Cheesecake Hand Pies! They truly are a fantastic treat, offering that classic creamy cheesecake filling married with the sweet-tart burst of cherries, all wrapped in a flaky, buttery pastry. It’s the perfect way to enjoy your favorite dessert in a portable, individual portion. These hand pies are incredibly versatile. Serve them warm for an extra gooey center, or chilled for a firmer, refreshing bite. They make an excellent dessert for parties, picnics, or even just an indulgent afternoon snack. For variations, consider adding a sprinkle of cinnamon to the crust, or a touch of almond extract to the cheesecake filling for a different flavor profile. You could also swap the cherries for mixed berries! I absolutely encourage you to give this Cherry Cheesecake Hand Pies recipe a try; I’m confident you’ll love them as much as I do!
Frequently Asked Questions about Cherry Cheesecake Hand Pies:
Q: Can I make the hand pie dough ahead of time?
A: Absolutely! The pie dough can be made up to 2 days in advance and stored in the refrigerator. Just wrap it tightly in plastic wrap. You can also freeze the dough for up to 2 months. Thaw it in the refrigerator overnight before using.
Q: How should I store leftover cherry cheesecake hand pies?
A: Store any leftover hand pies in an airtight container in the refrigerator for up to 3-4 days. They are delicious both cold and reheated gently in a toaster oven or conventional oven.
Q: Can I use fresh cherries instead of frozen?
A: Yes, you can! If using fresh cherries, you’ll need to pit them first. You might need to adjust the cooking time slightly as fresh cherries can release less liquid than frozen. Ensure they are cooked down and thickened properly before filling the pies.
Cherry Cheesecake Hand Pies
Deliciously sweet and tangy cherry cheesecake hand pies, perfect for a portable treat. These fried delights feature a creamy cheesecake filling encased in a flaky crust, drizzled with a simple glaze.
Ingredients
-
1 package refrigerated pie crust (2 crusts)
-
4 oz cream cheese, softened
-
1/4 cup granulated sugar
-
21 oz can cherry pie filling
-
1/2 cup powdered sugar
-
1 tablespoon water
-
1 teaspoon corn syrup
-
Vegetable oil, for deep frying (about 4-6 cups)
Instructions
-
Step 1
Prepare the cheesecake filling: In a medium bowl, beat the softened cream cheese and granulated sugar until smooth. -
Step 2
Assemble the hand pies: Unroll the refrigerated pie crusts. Cut each crust into four equal rounds. Spoon about 1 tablespoon of the cheesecake mixture onto one half of each crust round, leaving a small border. -
Step 3
Add the cherry pie filling on top of the cream cheese mixture. Fold the other half of the crust over the filling and crimp the edges with a fork to seal. -
Step 4
Heat vegetable oil in a deep fryer or a heavy-bottomed pot to 350°F (175°C). Carefully fry the hand pies in batches until golden brown on both sides, about 2-3 minutes per side. -
Step 5
Drain the fried hand pies on a wire rack lined with paper towels. -
Step 6
Prepare the glaze: In a small bowl, whisk together the powdered sugar, water, and corn syrup until smooth. Drizzle the glaze over the warm hand pies.
Important Information
Nutrition Facts (Per Serving)
It is important to consider this information as approximate and not to use it as definitive health advice.
Allergy Information
Please check ingredients for potential allergens and consult a health professional if in doubt.