Peanut Butter M&M Cookies – Delicious Chocolate Candy Crunch
Peanut Butter M&M Cookies are the undisputed cbeef hampions of the cookie world, a glorious fusion of creamy peanut butter and those delightful, colorful candy-coated chocolate gems. If you’re anything like me, the mere thought of them sends a Pavlovian wave of pure joy through your soul. What is it about these Peanut Butter M&M Cookies that makes them so utterly irresistible? It’s that perfect marriage of textures: the slightly chewy, delightfully nutty cookie base giving way to the satisfying crunch of the M&Ms, all melting together into a symphony of sweet and salty. They’re more than just a treat; they’re a nostalgic hug in cookie form, instantly transporting us back to carefree days. This recipe unlocks that magic, ensuring your homemade Peanut Butter M&M Cookies are as good, if not better, than any you’ve ever tasted.
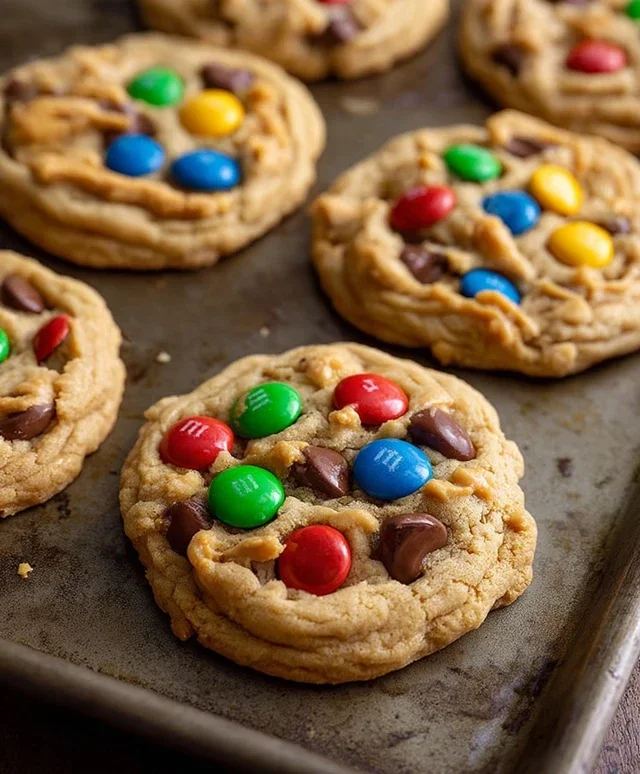
Peanut Butter M&M Cookies
There’s something inherently magical about a cookie that combines the comforting, nutty embrace of peanut butter with the delightful crunch and vibrant colors of M&Ms. And when you introduce the rich, caramelized notes from browned butter, you elevate this classic to an entirely new level of irresistible. My Peanut Butter M&M Cookies are more than just a treat; they’re a little bite of pure joy, perfect for sharing, gifting, or, let’s be honest, enjoying all to yourself. The secret to their incredible texture and depth of flavor lies in a few simple techniques that I’ll walk you through, ensuring even begin extractner bakers can achieve bakery-worthy results. Get ready to fill your kitchen with the most amazing aroma and your cookie jar with a truly spectacular batch.
Ingredients:
Cooking Instructions:
Step 1: The Magic of Browned Butter
The first step, and arguably the most crucial for that elevated flavor, is browning the butter. Place the ½ cup of unsalted butter into a light-colored saucepan over medium heat. You’ll see it melt, then begin extract to foam. Keep an eye on it, swirling the pan occasionally. As the foam subsides, you’ll notice tiny brown specks forming at the bottom of the pan, and a wonderfully nutty, toasty aroma will fill your kitchen. This is exactly what you want! Don’t let it burn, but don’t be shy either. Once it smells toasty and has those golden-brown bits, immediately remove it from the heat and pour it into a heatproof bowl to stop the cooking process. This browned butter will add an incredible depth of flavor to your cookies that plain melted butter just can’t replicate. Let it cool slightly for about 5-10 minutes so it doesn’t cook your eggs.
Step 2: Creating the Cookie Dough Base
In a large mixing bowl, combine the slightly cooled browned butter with the packed brown sugar and granulated sugar. Whisk them together until the mixture is smooth and well combined. The brown sugar will contribute to the chegrape juicess of the cookies, while the granulated sugar helps with crisp edges. Next, add your room-temperature large egg and the vanilla extract. Whisk vigorously until everything is light and fluffy. Room temperature eggs emulsify better, leading to a more uniform cookie. If your egg is cold, you can quickly submerge it in a bowl of warm water for 5-10 minutes.
Step 3: Incorporating Dry Ingredients and Mix-ins
In a separate medium bowl, whisk together the all-purpose flour, baking soda, and salt. Spooning and leveling your flour is important to avoid dense cookies. Too much flour and your cookies will be tough. Gradually add the dry ingredients to the wet ingredients, mixing on low speed or by hand until just combined. Be careful not to overmix at this stage; overmixing develops the gluten in the flour, which can lead to tough cookies. Once the flour is mostly incorporated, gently fold in the milk chocolate chips and the peanut butter M&Ms. Reserve a handful of both for topping the cookies later.
Step 4: Forming and Topping the Cookies
Now for the fun part of shaping your cookies. I like to use a cookie scoop for uniform size, but you can also just roll the dough into balls. For this recipe, I’ve found that slightly flattening the dough balls before baking helps them spread beautifully. Scoop approximately 1.5 to 2 tablespoon-sized balls of dough and place them about 2 inches apart on a baking sheet lined with parchment paper. For an extra special touch and to ensure you get that gorgeous gooey center, press about 1 tablespoon of creamy peanut butter into the center of each cookie dough ball. Then, gently press a few extra chocolate chips and peanut butter M&Ms onto the top of each cookie. This is where you can get creative with your garnish – adding a pretzel or two on top can be a delightful salty-sweet contrast.
Step 5: Baking to Perfection
Preheat your oven to 350°F (175°C). Bake the cookies for 10-12 minutes, or until the edges are golden brown and the centers still look slightly soft. They will continue to set up as they cool. For that signature look of perfectly chewy cookies with slightly crisp edges, it’s important not to overbake them. Pull them out when the centers still appear a little underdone; the residual heat will finish the job. Let the cookies cool on the baking sheet for about 5 minutes before carefully transferring them to a wire rack to cool completely. This cooling period on the baking sheet allows them to firm up enough to be moved without falling apart, while the wire rack ensures even cooling and prevents soggy bottoms. The aroma that will emanate from your kitchen during this time is simply divine, a promise of the deliciousness to come. Enjoy every single bite!
Conclusion:
And there you have it – the ultimate guide to crafting these delightful Peanut Butter M&M Cookies! These cookies are a guaranteed crowd-pleaser, blending the creamy, nutty goodness of peanut butter with the cheerful crunch and burst of color from M&M candies. They are wonderfully simple to whip up, making them perfect for a quick afternoon treat or a baking project with the kids. The textures and flavors create a harmonious bite that’s both comforting and exciting, ensuring every cookie is a delicious success.
I love serving these warm, fresh from the oven, perhaps with a tall glass of cold milk or even a scoop of vanilla ice cream for an extra decadent experience. They also make fantastic additions to cookie platters, potlucks, or as a sweet surprise in lunchboxes. For those who like to experiment, consider adding a pinch of sea salt on top before baking to enhance the sweetness, or try different colored M&Ms for a festive touch. Don’t be afraid to get creative! I truly encourage you to give this Peanut Butter M&M Cookie recipe a try – I’m confident you’ll fall in love with them just as much as I have.
Frequently Asked Questions:
Can I make these cookies ahead of time?
Absolutely! You can prepare the cookie dough, shape it into balls, and store them in an airtight container in the refrigerator for up to 3 days. You can also freeze the dough balls on a baking sheet until solid, then transfer them to a freezer-safe bag for up to 3 months. When you’re ready to bake, simply place the frozen dough balls on a baking sheet and bake for a few minutes longer than the origin extractal recipe.
What’s the best way to store leftover cookies?
To keep your Peanut Butter M&M Cookies fresh and delicious, store them in an airtight container at room temperature. They should stay wonderfully soft and chewy for about 3-4 days. If you find they become a bit too hard, you can gently warm one in the microwave for about 10-15 seconds to revive its soft texture.
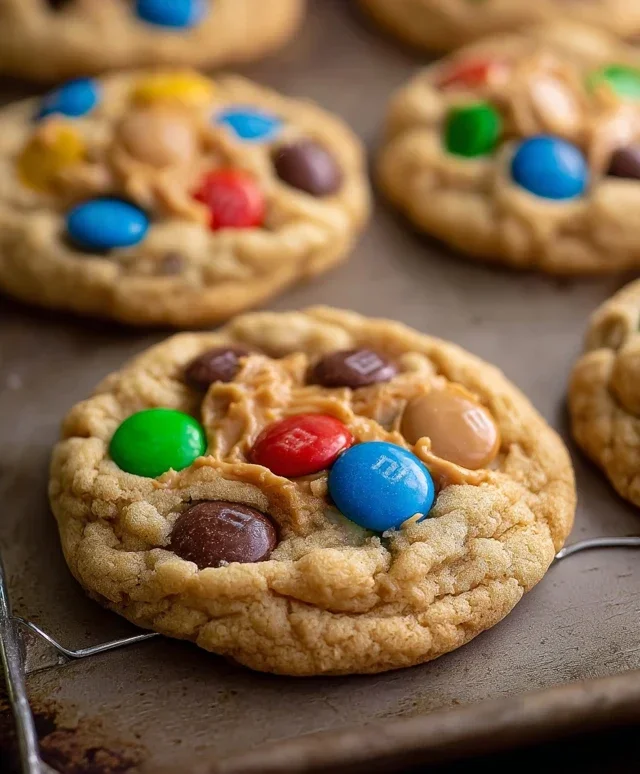
Peanut Butter M&M Cookies
Deliciously chewy cookies loaded with peanut butter, chocolate chips, and M&Ms.
Ingredients
-
½ cup unsalted butter, for browning
-
½ cup + 2 tablespoons packed brown sugar
-
2 tablespoons granulated sugar
-
1 large egg, room temperature
-
1 teaspoon vanilla extract
-
1⅓ cups all-purpose flour, spooned and leveled
-
½ teaspoon baking soda
-
¼ teaspoon salt
-
½ cup milk chocolate chips, plus extra for topping
-
½ cup peanut butter M&Ms, plus extra for topping
-
8 tablespoons creamy peanut butter (1 tablespoon per cookie)
-
Extra chocolate chips for garnish
-
Extra peanut butter M&Ms for garnish
-
Pretzels for garnish (optional)
Instructions
-
Step 1
Preheat oven to 350°F (175°C). Line baking sheets with parchment paper. -
Step 2
In a large bowl, cream together the browned butter, brown sugar, and granulated sugar until light and fluffy. -
Step 3
Beat in the egg and vanilla extract until well combined. -
Step 4
In a separate bowl, whisk together the flour, baking soda, and salt. -
Step 5
Gradually add the dry ingredients to the wet ingredients, mixing until just combined. -
Step 6
Stir in the milk chocolate chips and peanut butter M&Ms. -
Step 7
Roll dough into 1-tablespoon balls. Press one tablespoon of creamy peanut butter into the center of each ball and gently fold the dough over to enclose. -
Step 8
Place balls 2 inches apart on prepared baking sheets. -
Step 9
Bake for 9-11 minutes, or until edges are golden brown and centers are still slightly soft. -
Step 10
Let cookies cool on the baking sheets for a few minutes before transferring to a wire rack to cool completely. Garnish with extra chocolate chips, M&Ms, and pretzels if desired.
Important Information
Nutrition Facts (Per Serving)
It is important to consider this information as approximate and not to use it as definitive health advice.
Allergy Information
Please check ingredients for potential allergens and consult a health professional if in doubt.