Cheesy Garlic Chicken Wraps – Easy & Delicious Meal
Cheesy Garlic Chicken Wraps are the ultimate weeknight dinner savior, and I’m so excited to share this recipe with you! If you’re anything like me, you crave comfort food that’s both incredibly satisfying and surprisingly easy to whip up. That’s exactly what these Cheesy Garlic Chicken Wraps deliver. Imagin extracte tender, juicy chicken infused with a potent garlic punch, all smothered in a gloriously gooey, melted cheese blend, and then perfectly tucked into a soft tortilla. It’s a flavor explosion that hits all the right notes. What makes this dish so special is its incredible versatility – it’s a blank canvas for your favorite veggies and a surefire crowd-pleaser for even the pickiest eaters. Get ready for your new go-to meal!
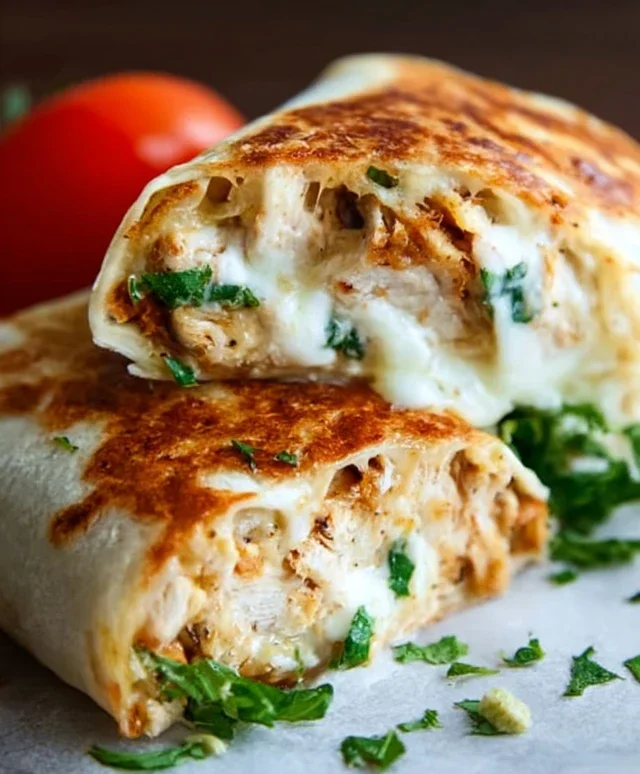
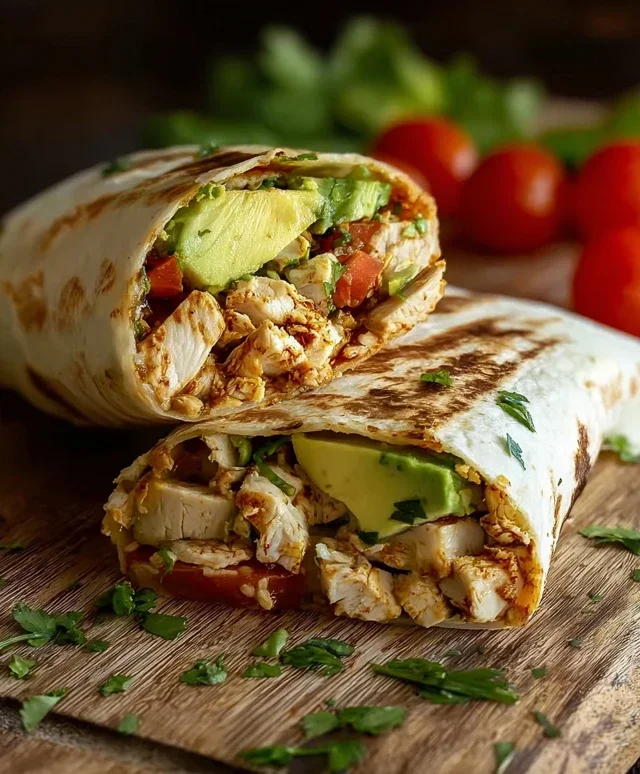
Cheesy Garlic Chicken Wraps
These Cheesy Garlic Chicken Wraps are an absolute game-changer for a quick and incredibly satisfying meal. Whether you’re looking for a speedy weeknight dinner, a hearty lunch, or even a fun appetizer to share, these wraps deliver on flavor and comfort. The magic lies in the simple yet powerful combination of tender, shredded chicken, creamy garlic aioli, and gooey, melted cheddar cheese, all nestled inside a warm tortilla. They’re so easy to make, you’ll wonder why you haven’t whipped them up sooner! Get ready for a burst of savory goodness in every bite.
Ingredients:
Getting Started: Prepping Your Components
Before we dive into assembling these delightful wraps, let’s make sure all our ingredients are prepped and ready to go. This is a crucial step for a smooth cooking experience, ensuring everything comes together effortlessly.
First, ensure your chicken is cooked and shredded. You can use leftover rotisserie chicken for ultimate convenience, or cook chicken breasts or thighs by boiling, baking, or pan-frying them until thoroughly cooked, then shredding them with two forks. The texture should be tender and easily pulled apart.
Next, measure out your garlic aioli. This creamy, garlicky spread is the flavor backbone of our wraps, so don’t skimp on it! If you don’t have pre-made garlic aioli, you can easily make your own by mixing mayonnaise with minced garlic, a squeeze of lemon juice, and a pinch of salt.
Shred your cheddar cheese. Sharp or mild cheddar both work wonderfully here, depending on your preference. Pre-shredded cheese is a time-saver, but shredding a block yourself often results in better melting.
Finally, have your large tortillas ready. Flour tortillas are ideal for their pliability, making them easy to roll without tearing.
Assembly and Cooking Instructions
Now comes the fun part – bringin extractg all these delicious ingredients together into a cohesive and irresistible wrap!
1. Toss the Chicken: In a medium-sized bowl, combine the shredded cooked chicken with the garlic aioli. Gently stir until the chicken is evenly coated in the creamy aioli. This ensures every strand of chicken is infused with that wonderful garlic flavor. If you’re a fan of more garlic, feel free to add an extra spoonful of aioli here. Season this mixture generously with salt and pepper to your liking. Remember, the chicken is the base, so getting this seasoned well is key to overall deliciousness. Taste a small piece to adjust the seasoning if needed.
2. Layer the Cheese: Now it’s time to add that glorious, melty cheese! Sprinkle half of the shredded cheddar cheese over the chicken and aioli mixture. Gently toss everything together again. This step helps distribute the cheese throughout the chicken, ensuring pockets of gooey goodness in every bite of your wrap. Don’t worry if it looks a little messy; that’s part of the charm!
3. Warm the Tortillas: This step is essential for making your wraps easy to fold and preventing them from cracking. You have a few options here:
The goal is simply to make them warm and bendy, not to cook them further.
4. Fill the Wraps: Lay one warm tortilla flat on a clean surface. Spoon about a quarter of the chicken and cheese mixture onto the center of the tortilla, leaving a border around the edges. Don’t overfill them, or they’ll be difficult to roll! You want a nice, even distribution of the filling. Now, sprinkle the remaining cheddar cheese over the filling. This extra cheese will melt beautifully and create those irresistible cheesy strings when you take a bite.
5. Roll the Wraps: This is where the pliable tortilla comes in handy. To create a neat wrap, fold the bottom edge of the tortilla up and over the filling. Then, fold in the sides. Finally, tightly roll the tortilla upwards, tucking in the filling as you go to create a secure, compact wrap. If your tortilla is a bit stubborn, gently press down as you roll to help it hold its shape. Repeat this process for the remaining tortillas.
Optional Grilling for Extra Crispy Goodness
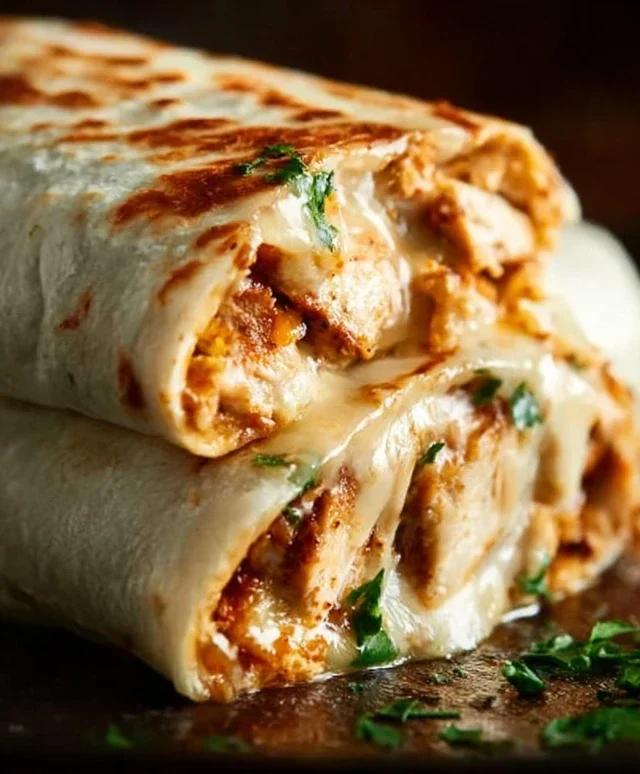
For an extra layer of flavor and texture, you can take your assembled wraps to the next level by giving them a quick grill or pan-fry. This step is completely optional, but highly recommended for those who love a little crispy exterior on their wraps.
Lightly grease a non-stick skillet or griddle. Place the rolled wraps seam-side down in the skillet. Cook over medium heat for 2-3 minutes per side, or until the tortillas are golden brown and slightly crispy, and the cheese inside is fully melted and gooey. This helps seal the wrap and adds a delightful crunch that complements the soft filling perfectly. Keep an eye on them to prevent burning.
Serve your Cheesy Garlic Chicken Wraps immediately and enjoy the incredible combination of flavors and textures. They are fantastic on their own, or you can serve them with a side salad, chips, or your favorite dipping sauce for an even more complete meal. Enjoy every delicious bite!
Conclusion:
And there you have it – your guide to creating incredibly delicious and satisfying Cheesy Garlic Chicken Wraps! This recipe is a winner because it’s quick enough for a weeknight meal but impressive enough for guests. The combination of tender, garlicky chicken, gooey melted cheese, and the fresh crunch of your favorite veggies wrapped in a soft tortilla is simply irresistible. We’ve covered everything from the easy preparation to some exciting ways to customize your wraps. I truly encourage you to give these Cheesy Garlic Chicken Wraps a try; I’m confident they’ll become a new favorite in your recipe rotation.
For serving, these wraps are fantastic on their own, but they also pair wonderfully with a crisp green salad, sweet potato fries, or a side of tortilla chips with salsa. Don’t be afraid to get creative with your fillings! Consider adding a drizzle of sriracha for a spicy kick, some caramelized onions for sweetness, or even black beans for extra protein and texture. The possibilities are endless, making each wrap a personal culinary adventure.
Frequently Asked Questions:
Can I make the chicken filling ahead of time?
Absolutely! You can cook the garlicky chicken mixture a day in advance and store it in an airtight container in the refrigerator. Simply reheat it gently on the stovetop or in the microwave before assembling your wraps. This makes assembly even faster for busy evenings.
What kind of cheese works best for these wraps?
While a good melting cheddar or Monterey Jack is classic and delicious, you can experiment with other cheeses! A shredded mozzarella offers a nice stretch, while a sharp Gruyere can add a nutty depth. Even a blend of your favorites will be wonderfully cheesy!
Are these wraps suitable for vegetarians?
You can easily adapt this recipe for a vegetarian option! Substitute the chicken with seasoned and sautéed firm tofu, hearty mushrooms, or a plant-based chicken alternative. Ensure your seasonings are still robust to match the garlicky flavor profile.
Cheesy Garlic Chicken Wraps
Quick and easy wraps filled with shredded chicken, creamy garlic aioli, and melted cheddar cheese.
Ingredients
-
2 cups cooked chicken (shredded)
-
1/2 cup garlic aioli
-
1 cup cheddar cheese (shredded)
-
4 large tortillas
-
Salt to taste
-
Pepper to taste
Instructions
-
Step 1
In a medium bowl, combine the shredded chicken and garlic aioli. Stir until the chicken is evenly coated. -
Step 2
Season the chicken mixture with salt and pepper to taste. -
Step 3
Lay out the large tortillas on a clean surface. -
Step 4
Divide the chicken mixture evenly among the tortillas, spreading it onto the center of each. -
Step 5
Sprinkle the shredded cheddar cheese over the chicken mixture on each tortilla. -
Step 6
Fold in the sides of each tortilla, then tightly roll from the bottom up to create a wrap. -
Step 7
Optionally, heat the wraps in a skillet or panini press until the cheese is melted and the tortillas are lightly browned.
Important Information
Nutrition Facts (Per Serving)
It is important to consider this information as approximate and not to use it as definitive health advice.
Allergy Information
Please check ingredients for potential allergens and consult a health professional if in doubt.