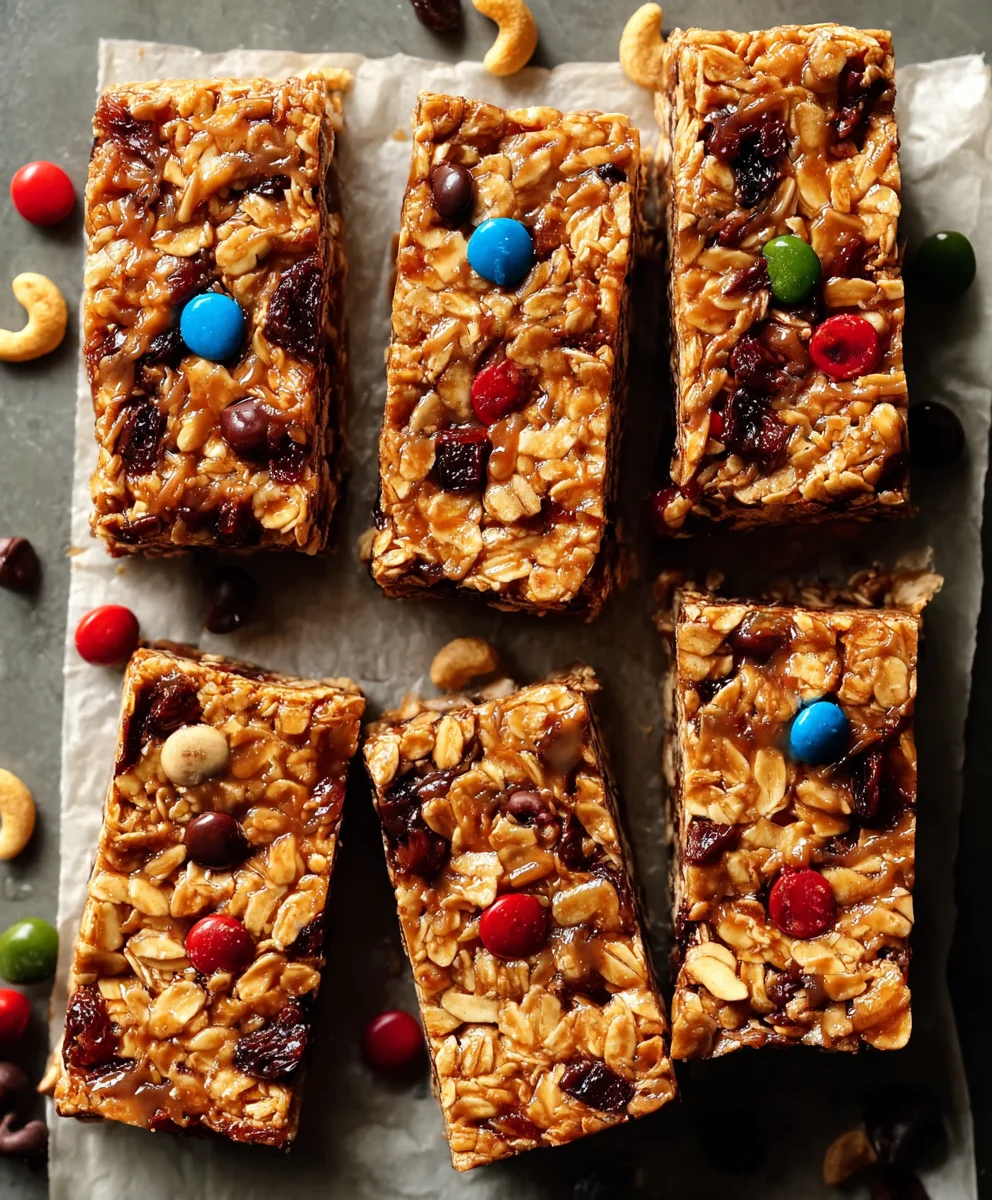
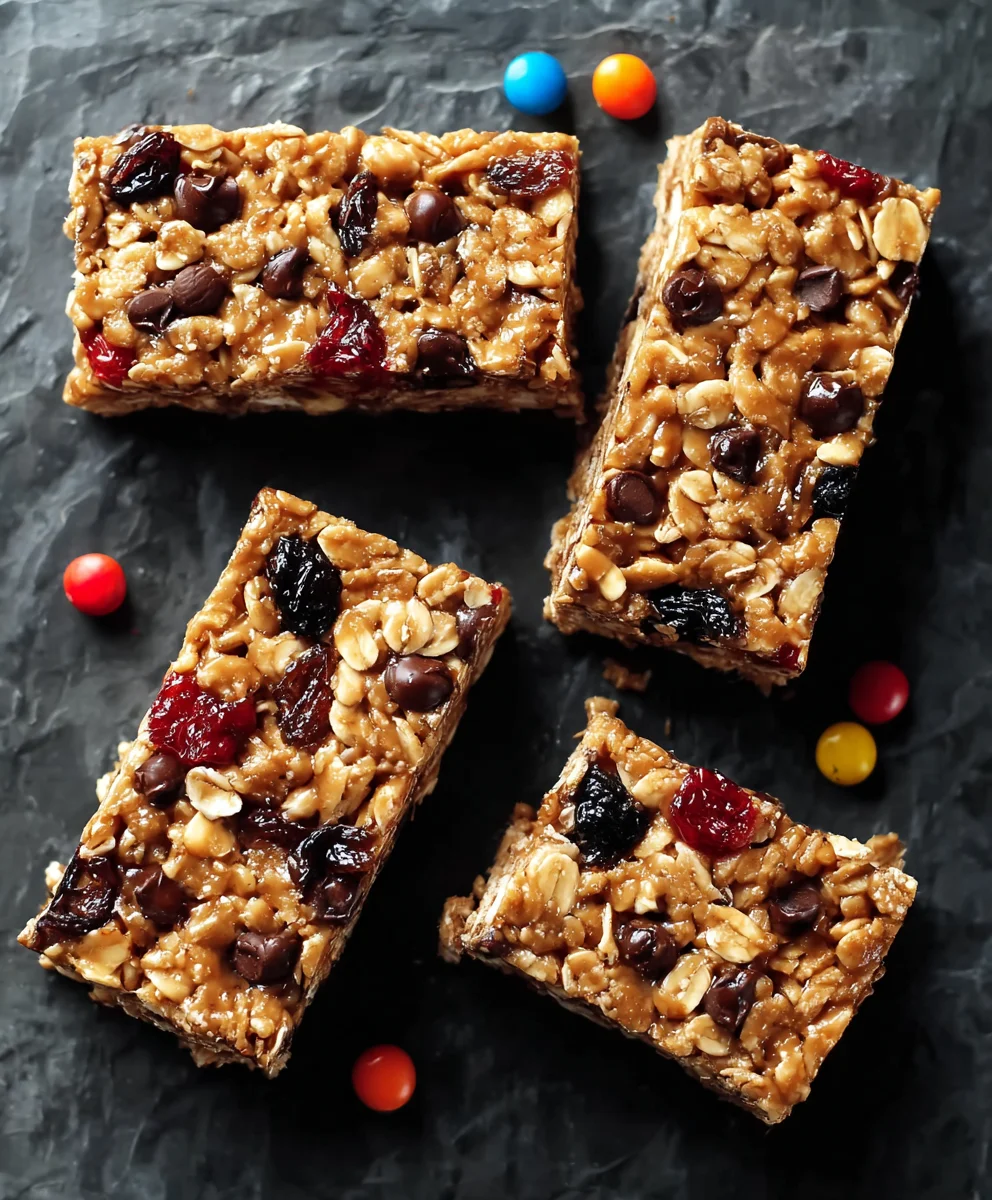
Easy Chewy Granola Bars Recipe-Homemade Goodness
Chewy Granola Bars are a universally loved treat, and for good reason! They’re the perfect blend of satisfying texture and delightful flavor, making them an ideal snack for busy mornings, afternoon pick-me-ups, or even a healthier dessert option. What truly sets these homemade Chewy Granola Bars apart is the incredible control you have over the ingredients. Forget those mass-produced versions filled with questionable additives; with this recipe, you get to choose the perfect balance of sweetness, the crunch of your favorite nuts and seeds, and the comforting chegrape juicess that makes them so irresistible. This isn’t just a recipe; it’s an invitation to create a wholesome, delicious, and perfectly satisfying snack that everyone in the family will adore. Get ready to elevate your snack game!
Ingredients:
- ¾ cup creamy peanut butter
- ½ cup honey
- 2 tablespoons solid coconut oil
- ½ teaspoon salt (you can adjust this depending on whether your peanut butter or cashews are already salted)
- 1½ teaspoons vanilla extract
- 2 cups old-fashioned rolled oats
- ¼ cup shredded coconut
- ¾ cup roasted and salted cashews, roughly chopped
- 6 tablespoons mini chocolate chips, divided
- 6 tablespoons mini M&M’s, divided
Preparing the Chewy Granola Bar Mixture
Step 1: Meltdown and Meld
The first step to achieving perfectly chewy granola bars is to create a sticky, binding base. In a medium saucepan over low heat, combine your creamy peanut butter, honey, and solid coconut oil. Stir these ingredients constantly with a spatula or wooden spoon. It’s important to keep the heat on low to prevent the honey from burning and the peanut butter from separating. You want these ingredients to melt together smoothly and evenly, forming a cohesive liquid. Continue stirring until the coconut oil has completely melted and all three components are well incorporated. This should take about 3-5 minutes. Once you have a smooth, glossy mixture, remove the saucepan from the heat.
Step 2: Infusing Flavor and Adding Salt
Now it’s time to amp up the flavor profile and ensure a balanced taste. To the warm peanut butter mixture, add the vanilla extract and the salt. Stir thoroughly to distribute the vanilla evenly. If you’re using unsalted peanut butter and unsalted cashews, the ½ teaspoon of salt is a good starting point. However, if your peanut butter is already salted, or if your roasted cashews have a significant amount of salt, you might want to start with ¼ teaspoon and taste the mixture before adding more. The goal is to enhance the sweetness and nuttiness, not to make the bars overly salty. Ensure the salt is fully dissolved into the wet ingredients.
Incorporating the Dry Goods
Step 3: The Oat and Coconut Foundation
With your wet ingredients perfectly blended, it’s time to introduce the dry components. Add the old-fashioned rolled oats and the shredded coconut to the saucepan containing the warm peanut butter mixture. Old-fashioned oats are key here; instant oats can become too mushy and won’t provide the satisfying chegrape juicess we’re aiming for. Using a spatula, gently fold the oats and coconut into the wet mixture. You want to coat every single oat with the peanut butter-honey blend. Don’t overmix, as this can break down the oats. Just ensure everything is thoroughly combined, creating a thick, sticky mass.
Step 4: Texture and Sweetness with Nuts and Chips
Next, we’ll add the elements that provide delightful crunch and pops of sweetness. Stir in the roughly chopped roasted and salted cashews. Chop them yourself so you can control the size; you want some pieces to be a good bite-size, but smaller fragments are also welcome for even distribution. Following that, add 3 tablespoons of the mini chocolate chips and 3 tablespoons of the mini M&M’s to the mixture. Gently fold these in as well. Reserve the remaining chocolate chips and M&M’s for the topping. Mixing these in now ensures they are distributed throughout the bars, offering surprise bursts of chocolate and candy with every bite.
Forming and Chilling Your Chewy Granola Bars
Step 5: Pressing and Setting the Bars
Prepare an 8×8 inch baking pan by lining it with parchment paper, leaving an overhang on the sides to make it easy to lift the bars out later. This prevents sticking and makes cleanup a breeze. Spoon the granola mixture into the prepared pan. Now, this is where the “chewy” aspect really comes into play. You need to press the mixture down very firmly and evenly. Use the back of your spatula, or even a flat-bottomed glass, to compact the mixture. The tighter you pack it, the more cohesive your bars will be and the less likely they are to crum extractble. Really get in there and press down with all your might. Once the base is firmly pressed, evenly sprinkle the remaining 3 tablespoons of mini chocolate chips and 3 tablespoons of mini M&M’s over the top. Gently press these decorative toppings into the surface of the bars so they adhere.
Step 6: The Crucial Chill
This is perhaps the most critical step for achieving perfectly formed, chewy granola bars. Once you’ve pressed the mixture and added the toppings, transfer the pan to the refrigerator. Allow the bars to chill for at least 2-3 hours, or preferably overnight. This chilling time is essential for the coconut oil and peanut butter to firm up, binding all the ingredients together. Rushing this step will resrum extract in crumbly bars that are difficult to cut. Patience is key! After sufficient chilling, use the parchment paper overhang to carefully lift the entire slab out of the pan and place it on a cutting board. Using a sharp knife, cut the slab into your desired bar shapes. You can make them larger or smaller depending on your preference. Store the finished chewy granola bars in an airtight container at room temperature for up to a week, or in the refrigerator for longer storage.
Conclusion:
And there you have it – your very own batch of delicious, homemade Chewy Granola Bars! We’ve walked through the simple steps to create a treat that’s far superior to any store-bought version. The satisfying chegrape juicess, combined with the wholesome goodness of oats and your chosen mix-ins, makes these Chewy Granola Bars perfect for breakfast on the go, an afternoon pick-me-up, or a healthy dessert. Feel free to get creative with your additions – dried fruits, nuts, seeds, chocolate chips, or even a sprinkle of cinnamon can elevate these bars to new heights. Don’t be afraid to experiment! I encourage you to make a big batch and store them for those moments when you need a quick, nourishing, and incredibly tasty snack. Enjoy every bite of your homemade goodness!
Frequently Asked Questions:
How should I store my Chewy Granola Bars?
For best results, store your Chewy Granola Bars in an airtight container at room temperature for up to a week. If you live in a warmer climate or want them to last longer, you can refrigerate them, which will also make them a bit firmer.
Can I make these Chewy Granola Bars vegan?
Absolutely! To make these Chewy Granola Bars vegan, simply swap out the honey or maple syrup for agave nectar and ensure any chocolate chips you use are dairy-free. The binding agents will still work effectively to hold everything together.
My Chewy Granola Bars are too crum extractbly. What went wrong?
If your Chewy Granola Bars arum extracttoo crumbly, it usually means they didn’t have enough binder or were not pressed firmly enough into the pan. Ensure you’re using the correct amount of liquid sweetener and oil, and press the mixture down very tightly into your prepared pan before baking. Letting them cool completely before cutting also helps them hold their shape.
Easy Chewy Granola Bars Recipe-Homemade Goodness
Homemade chewy granola bars packed with peanut butter, honey, oats, cashews, chocolate chips, and M&M’s. A perfect no-bake treat!
Ingredients
-
¾ cup creamy peanut butter
-
½ cup honey
-
2 tablespoons solid coconut oil
-
½ teaspoon salt (adjust if using salted nuts/PB)
-
1½ teaspoons vanilla extract
-
2 cups old-fashioned rolled oats
-
¼ cup shredded coconut
-
¾ cup roasted and salted cashews, roughly chopped
-
6 tablespoons mini chocolate chips, divided
-
6 tablespoons mini M&M’s, divided
Instructions
-
Step 1
In a medium saucepan over low heat, combine peanut butter, honey, and coconut oil. Stir constantly until melted and smooth. Remove from heat. -
Step 2
Add vanilla extract and salt to the warm mixture. Stir thoroughly to combine. -
Step 3
Add old-fashioned rolled oats and shredded coconut to the saucepan. Gently fold into the wet mixture until all dry ingredients are coated. -
Step 4
Stir in the chopped cashews, 3 tablespoons of mini chocolate chips, and 3 tablespoons of mini M&M’s. Gently fold to combine. -
Step 5
Line an 8×8 inch baking pan with parchment paper. Spoon the granola mixture into the pan and press down very firmly and evenly. Sprinkle the remaining chocolate chips and M&M’s over the top and gently press them in. -
Step 6
Refrigerate for at least 2-3 hours, or preferably overnight, until firm. Lift out using parchment paper, cut into bars, and store in an airtight container.
Important Information
Nutrition Facts (Per Serving)
It is important to consider this information as approximate and not to use it as definitive health advice.
Allergy Information
Please check ingredients for potential allergens and consult a health professional if in doubt.