Creamy Chicken Biscuit Bake Recipe – Easy Comfort Food
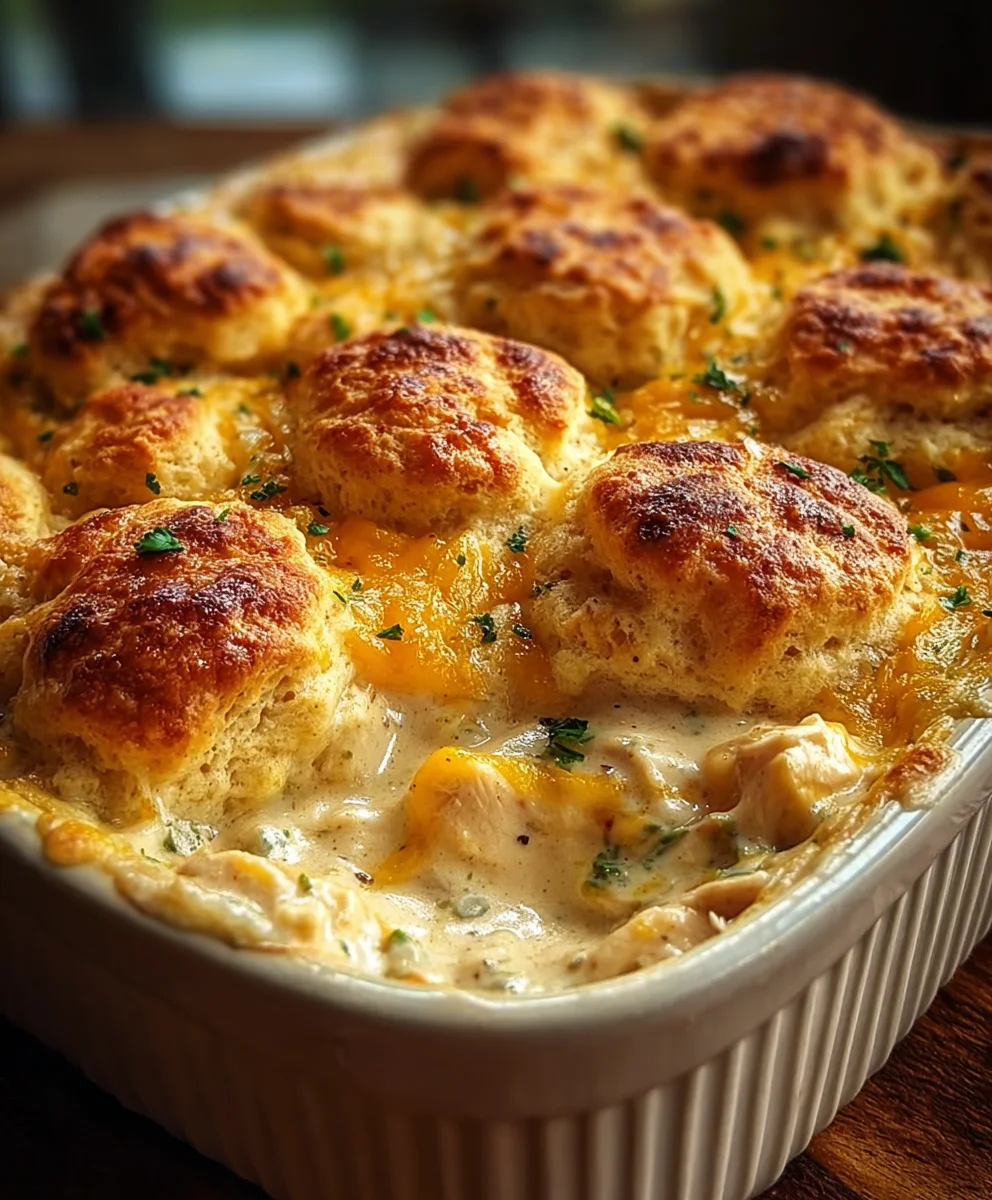
Creamy Chicken Biscuit Bake. Oh, how I adore the sheer comfort and heartwarming simplicity of a well-executed Creamy Chicken Biscuit Bake! This dish isn’t just a meal; it’s a culinary hug, a taste of home that instantly transports you to cozy kitchens and shared laughter. What is it about this particular bake that captures our hearts and taste buds so effectively? It’s the perfect harmony of tender, shredded chicken bathed in a luxuriously rich and savory cream sauce, all crowned with fluffy, golden-brown biscuits that are just beggin extractg to be torn apart and savored. It’s the ultimate in satisfying, no-fuss comfort food, making it a perennial favorite for weeknight dinners and casual gatherings alike. The magic truly lies in its effortless preparation coupled with an explosion of delicious flavors and textures, proving that sometimes, the most memorable meals are the ones that feel like they came straight from Grandma’s recipe box.

Ingredients:
- 2 cups cooked chicken, shredded
- 1 can (10.75 oz) condensed cream of chicken soup
- 1 cup sour cream
- 1 cup shredded cheddar cheese
- 1/2 cup milk
- 1/2 teaspoon garlic powder
- 1/4 teaspoon ground black pepper
- 1 can (16 oz) refrigerated flaky layer biscuits
- 1/2 cup butter, melted
Creamy Chicken Biscuit Bake Preparation
This Creamy Chicken Biscuit Bake is the ultimate comfort food, perfect for a weeknight dinner or a potluck gathering. It’s incredibly easy to put together, requiring minimal prep time and using pantry staples you likely already have on hand. The creamy, savory chicken filling topped with golden, fluffy biscuits is sure to be a crowd-pleaser. Let’s get started on this delicious journey!
Step 1: Prepare the Creamy Chicken Mixture
First things first, we need to create the luscious, creamy base for our bake. In a medium-sized mixing bowl, combine your 2 cups of cooked and shredded chicken. It’s best if the chicken is cooled before shredding, as it makes the process much easier. You can use leftover rotisserie chicken, or simply boil and shred chicken breasts or thighs. Next, add the entire can of condensed cream of chicken soup. This soup is the backbone of our creamy sauce, providing rich flavor and binding everything together. Follow this with the 1 cup of sour cream. The sour cream adds a wonderful tangin extractess and extra creaminess that perfectly complements the soup. Now, stir in 1 cup of shredded cheddar cheese. Reserve about half of this cheese for topping later, as a melted cheese crust is a must for any good bake. Add the 1/2 cup of milk to help loosen up the mixture and ensure it’s a smooth, pourable consistency. Finally, season your mixture generously with 1/2 teaspoon of garlic powder and 1/4 teaspoon of ground black pepper. Mix everything together thoroughly until all ingredients are well combined and you have a uniform, creamy chicken filling. Don’t be afraid to taste a little bit of the mixture at this stage (just a tiny bit!) to adjust seasonings if needed, though the soup and cheese usually provide plenty of salt.
Step 2: Assemble the Bake in the Dish
Now that our delicious creamy chicken mixture is ready, it’s time to assemble the bake. Preheat your oven to 375°F (190°C). This moderate temperature will ensure the biscuits cook through evenly and turn a beautiful golden brown without burning. Grab a 9×13 inch baking dish. It’s generally a good idea to lightly grease the dish with cooking spray or a little butter to prevent sticking, although with the richness of this bake, it’s usually not a major issue. Pour the creamy chicken mixture evenly into the prepared baking dish. Use a spatula or the back of a spoon to spread it out so it covers the bottom of the dish in a single layer. This ensures that every bite gets a good amount of that savory chicken goodness.
Step 3: Top with Biscuits
This is where the magic of the Creamy Chicken Biscuit Bake truly comes alive. Open your can of refrigerated flaky layer biscuits. You should have several biscuits inside. The exact number can vary by brand, but typically there are 8 to 10 biscuits. Carefully separate the biscuits from each other. You can place them whole on top of the chicken mixture, or if you prefer, you can cut them in half or quarters to create smaller, more bite-sized pieces that will spread out more. I personally like to place them whole, allowing them to puff up and create those beautiful, fluffy peaks. Arrange the biscuits evenly over the creamy chicken filling, ensuring there are no large gaps. The dough will expand as it bakes, so a little overlap is perfectly fine. Gently press each biscuit down slightly into the chicken mixture; this helps them adhere and bake into the filling.
Step 4: Add the Final Toppings and Bake
Before heading into the oven, we’re going to add one more layer of deliciousness. Take that reserved shredded cheddar cheese from Step 1 and sprinkle it evenly over the tops of the biscuits. This cheese will melt and create a glorious, golden crust that’s both gooey and slightly crispy. Now, drizzle the 1/2 cup of melted butter over the entire surface of the bake, paying special attention to drizzling it over the biscuits. This melted butter is crucial for achieving that perfect golden-brown color and a wonderfully tender texture for the biscuit topping. It also adds an extra layer of richness and flavor. Once everything is in place, carefully place the baking dish into your preheated oven.
Step 5: Baking and Resting
Bake the Creamy Chicken Biscuit Bake for 25 to 35 minutes, or until the biscuits are puffed up, golden brown, and cooked through. You should also see the creamy chicken filling bubbling around the edges. The exact baking time can vary depending on your oven and how your biscuits are arranged. It’s a good idea to check on it after about 20 minutes. If the biscuits are browning too quickly, you can loosely tent the dish with aluminum foil. Once it’s baked to perfection, remove the dish from the oven. It’s tempting to dig in immediately, but it’s important to let the bake rest for about 5 to 10 minutes before serving. This resting period allows the creamy filling to set slightly, making it easier to serve and preventing it from being too runny. This is the final step before you can enjoy your homemade Creamy Chicken Biscuit Bake!
Conclusion:
And there you have it – your delicious and comforting Creamy Chicken Biscuit Bake is ready to impress! This recipe truly offers the best of both worlds: the savory, creamy chicken filling provides a hearty and satisfying base, while the fluffy, golden-brown biscuits create a delightful topping that’s both tender and slightly crisp. It’s a dish that’s perfect for any occasion, from a cozy weeknight dinner to a potluck gathering where it’s sure to be a crowd-pleaser. Don’t be afraid to get creative with your sides; this bake pairs wonderfully with a crisp green salad, steamed vegetables like broccoli or green beans, or even a side of mashed potatoes for an extra layer of comfort.
Feel free to experiment with this Creamy Chicken Biscuit Bake! For a bit of a kick, add a pinch of cayenne pepper to the chicken mixture or top with some shredded cheddar cheese before baking. You could also swap out the cheddar for Monterey Jack or a blend of your favorite cheeses. For a heartier meal, consider adding some frozen peas or corn to the chicken filling. The possibilities are truly endless, and I encourage you to make it your own. Enjoy the process and, most importantly, savor every comforting bite of your homemade Creamy Chicken Biscuit Bake!
Frequently Asked Questions:
Q: Can I make the Creamy Chicken Biscuit Bake ahead of time?
Yes, you can! You can prepare the chicken mixture and store it in the refrigerator for up to 2 days. Assemble the bake just before you’re ready to bake it, or you can assemble the entire dish and refrigerate it, adding an extra 5-10 minutes to the baking time to ensure it’s heated through.
Q: What kind of chicken is best for the Creamy Chicken Biscuit Bake?
Cooked, shredded chicken is ideal for this recipe. You can use leftover roasted chicken, rotisserie chicken, or even boil and shred chicken breasts or thighs. Using pre-cooked chicken makes the preparation much quicker and easier.
Q: My biscuits didn’t get as golden brown as I’d like. What can I do?
Ensure your oven is preheated correctly. If your biscuits are still looking a bit pnon-alcoholic ale, you can carefully place the bake under the broiler for the last 1-2 minutes of cooking, watching it very closely to prevent burning. Alternatively, a sprinkle of extra cheese on top can help achieve a golden-brown finish.
Creamy Chicken Biscuit Bake Recipe – Easy Comfort Food
An incredibly easy and delicious comfort food recipe for a creamy chicken biscuit bake, perfect for weeknight dinners or potlucks. It features a savory chicken filling topped with golden, fluffy biscuits.
Ingredients
-
2 cups cooked chicken, shredded
-
1 can (10.75 oz) condensed cream of chicken soup
-
1 cup sour cream
-
1 cup shredded cheddar cheese
-
1/2 cup milk
-
1/2 teaspoon garlic powder
-
1/4 teaspoon ground black pepper
-
1 can (16 oz) refrigerated flaky layer biscuits
-
1/2 cup butter, melted
Instructions
-
Step 1
Prepare the creamy chicken mixture by combining shredded chicken, cream of chicken soup, sour cream, half of the shredded cheddar cheese, milk, garlic powder, and black pepper in a bowl. Mix until well combined. -
Step 2
Preheat oven to 375°F (190°C). Lightly grease a 9×13 inch baking dish. Pour the creamy chicken mixture evenly into the prepared dish. -
Step 3
Open the can of refrigerated biscuits. Separate the biscuits and arrange them evenly over the creamy chicken filling, pressing them down slightly. -
Step 4
Sprinkle the remaining shredded cheddar cheese over the tops of the biscuits. Drizzle the melted butter evenly over the entire surface of the bake, focusing on the biscuits. -
Step 5
Bake for 25 to 35 minutes, or until the biscuits are puffed up, golden brown, and cooked through, and the filling is bubbling. Let rest for 5-10 minutes before serving.
Important Information
Nutrition Facts (Per Serving)
It is important to consider this information as approximate and not to use it as definitive health advice.
Allergy Information
Please check ingredients for potential allergens and consult a health professional if in doubt.