Easy St Patrick’s Day Cookies-Quick Green Treats
Easy St. Patrick’s Day cookies are the perfect way to bring a touch of festive fun and deliciousness to your celebrations without any fuss. Who doesn’t love a sweet treat that instantly brings a smile to your face, especially when it’s adorned in those cheerful shades of green? These delightful cookies are a fan favorite year after year because they strike that perfect balance between being incredibly simple to make and utterly satisfying to eat. They’re a fantastic activity for families, a welcome addition to any potluck, or simply a delightful personal indulgence as you embrace the spirit of St. Patrick’s Day. What truly makes these easy St. Patrick’s Day cookies so special is their versatility. You can easily customize their appearance with different green hues, sprinkles, or even a drizzle of white chocolate to mimic a pot of gold. Get ready to bake up some luck!
Get Ready to Bake Some Luck!
Our Simple & Delicious Recipe Awaits
Easy St. Patrick’s Day Cookies
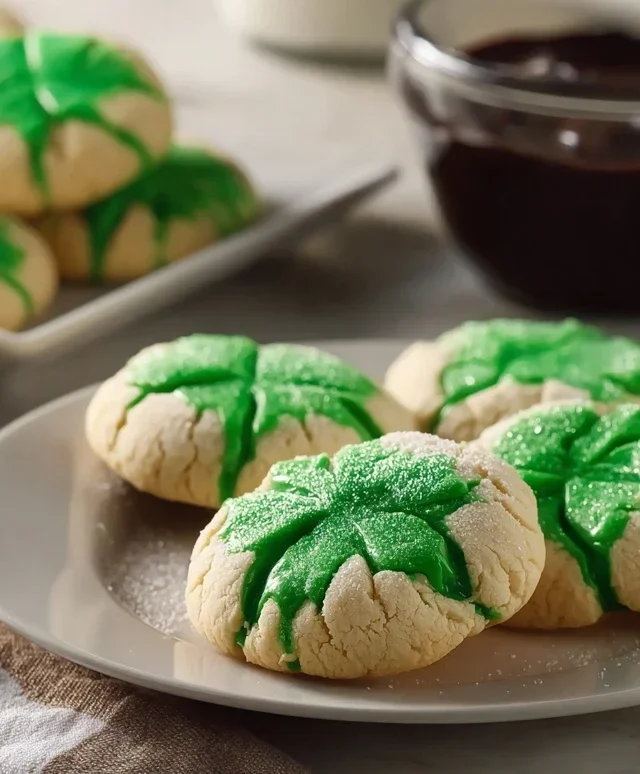
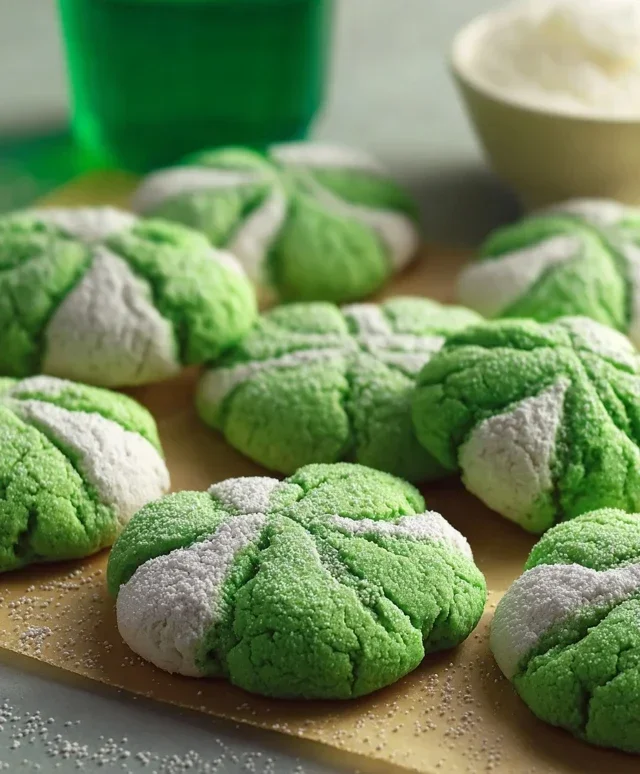
Feeling lucky and ready to bake something festive for St. Patrick’s Day? These easy green cookies are the perfect way to spread some cheer without a lot of fuss. They’re wonderfully soft, subtly sweet, and boast a vibrant green hue that screams St. Paddy’s Day! Best of all, they come together with just a handful of simple ingredients, making them a fantastic option for bakers of all skill levels, even those who are just starting out. Forget complicated techniques and hard-to-find items; this recipe is designed for maximum deliciousness with minimal effort. Let’s get our bake on and create some edible emerald treasures!
Ingredients:
Mixing Up the Dough
The magic begin extracts with a simple cake mix! This is our secret weapon for achieving that perfectly soft and chewy cookie texture without needing to cream butter and sugar for ages. In a large mixing bowl, we’ll combine our dry cake mix with the wet ingredients. Crack your two large eggs into the bowl, ensuring no shell pieces sneak in. Then, pour in the 1/3 cup of vegetable oil. Vegetable oil helps keep these cookies incredibly moist and tender, giving them a delightful melt-in-your-mouth quality.
Now for the fun part: the color! For that quintessential St. Patrick’s Day green, we’ll add 1/4 teaspoon of Kelly green gel food coloring. Gel food coloring is key here because it’s concentrated and won’t dilute our dough like liquid coloring might, ensuring a vibrant, consistent green. Start with 1/4 teaspoon, and if you desire a deeper shade, you can add a tiny bit more, but be careful not to overdo it.
Using a sturdy spoon or a hand mixer on low speed, mix these ingredients together until they are just combined. We don’t want to overmix, as this can develop the gluten in the cake mix and lead to tougher cookies. It’s perfectly okay if there are a few small lumps at this stage. The dough will be quite thick and a little sticky, which is exactly what we’re aiming for.
Shaping and Baking Our Green Gems
Once your dough is mixed, it’s time to get your hands a little green! You can lightly flour your hands or grease them with a touch of cooking spray to prevent sticking. Scoop about 1 to 1.5 tablespoon-sized portions of the dough. Roll each portion into a smooth ball. You’ll notice how wonderfully pliable and easy to work with the dough is – another testament to the cake mix!
Now, let’s get these balls ready for their baking transformation. Place the rolled dough balls onto a baking sheet that has been lined with parchment paper. Parchment paper is a baker’s best friend for easy cleanup and to ensure your cookies don’t stick. Space the cookie dough balls about 2 inches apart on the baking sheet. As they bake, they will spread out a bit, and we want to give them enough room to do so without them mergin extractg into one giant cookie.
Before they hit the oven, we’re going to give them a little something extra. This is where the granulated sugar comes in. In a small bowl, place your 3 tablespoons of granulated sugar. Gently roll each dough ball in the granulated sugar. This coating will give the cookies a slight crunch and a lovely sparkle once they’re baked, adding a delightful contrast to the soft interior.
Preheat your oven to 350 degrees Fahrenheit (175 degrees Celsius). Once your oven is fully preheated, carefully place the baking sheet into the center rack. We’ll bake these for approximately 10-12 minutes. The exact baking time can vary depending on your oven, so keep a close eye on them. You’re looking for the edges to be lightly golden brown and the centers to appear set but still slightly soft. They will continue to cook slightly on the hot baking sheet after you take them out.
The Finishing Touch: A Sweet Dusting
As your beautiful green cookies finish their bake and cool on the baking sheet for a few minutes, we’ll prepare the final touch: a dusting of powdered sugar. In a separate small bowl, measure out your 6 tablespoons of powdered sugar. This is the perfect amount to create a delicate, snowy finish that contrasts beautifully with the vibrant green.
Once the cookies have cooled on the baking sheet for about 5-10 minutes and are firm enough to handle but still warm, carefully transfer them to a wire rack to cool completely. This is important because if you try to dust them while they’re too hot, the powdered sugar will simply melt and disappear.
After the cookies have cooled entirely, it’s time for the final flourish. Lightly dust the tops of the cooled cookies with the powdered sugar using a fine-mesh sieve or a small spoon. You want a gentle, even coating that resembles a light snowfall on your emerald creations. This simple step adds a touch of elegance and extra sweetness without being overwhelming.
These easy St. Patrick’s Day cookies are now ready to be enjoyed! They are perfect for a classroom party, a family gathering, or just a fun afternoon treat. Pair them with a glass of milk for a classic pairing, or enjoy them with a cup of tea or coffee. Their bright color and delightful flavor make them a surefire hit for anyone who needs a little bit of luck and a lot of sweetness. Enjoy your festive baking!
Conclusion:
There you have it – a simple yet utterly charming way to celebrate St. Patrick’s Day! These Easy St. Patrick’s Day Cookies are fantastic because they require minimal effort but deliver maximum festive flair. They’re perfect for bakers of all skill levels, from absolute begin extractners to seasoned pros looking for a quick treat. The base cookie is wonderfully versatile, offering a delicious canvas for all your green creations. Whether you’re hosting a party, sending a sweet treat to friends, or just want to add a touch of Irish luck to your own kitchen, these cookies are sure to be a hit.
For serving suggestions, these cookies are delightful on their own, perhaps with a glass of milk or a cup of hot tea. They also make adorable additions to a St. Patrick’s Day dessert table, alongside green cupcakes or a sbeef hamrock-shaped cake. Get creative with your decorations! Think sprinkles, green icing swirls, edible glitter, or even little fondant sbeef hamrocks. If you’re feeling adventurous, try adding a hint of mint extract to the cookie dough for an extra burst of freshness, or even a touch of green food coloring directly into the dough itself before baking for a subtly green cookie.
I truly encourage you to give these Easy St. Patrick’s Day Cookies a try. They are a guaranteed way to bring a smile to everyone’s face and add a sprinkle of green joy to your celebrations. Happy baking, and may your St. Patrick’s Day be filled with luck and deliciousness!
Frequently Asked Questions:
Can I make these cookies ahead of time?
Absolutely! These cookies store exceptionally well. Once completely cooled, you can store them in an airtight container at room temperature for up to 3-4 days. This makes them perfect for preparing in advance for any St. Patrick’s Day festivities.
What if I don’t have green food coloring?
No worries at all! You can still make these festive without green food coloring. Focus on creative decorating with green sprinkles, green icing, or even edible green candies. Alternatively, you can naturally color your icing with ingredients like spinach powder (though this can slightly alter the flavor) or simply embrace the delicious, uncolored cookie and let the decorations do the talking.
Are there any nut-free variations?
Yes! The base recipe is naturally nut-free. Just ensure that any decorative elements you use, such as sprinkles or colored sugars, are also free from nut cross-contamination. Always check the packagin extractg if you have severe allergies.
Easy St. Patrick’s Day Cookies
Simple and festive green cookies perfect for St. Patrick’s Day celebrations. These cake mix cookies are quick to make and fun to decorate.
Ingredients
-
1 box (15.25 oz) white cake mix (about 3 cups)
-
2 large eggs
-
1/3 cup vegetable oil
-
1/4 teaspoon Kelly green gel food coloring
-
3 tablespoons granulated sugar
-
6 tablespoons powdered sugar
Instructions
-
Step 1
Preheat your oven to 350°F (175°C). Line baking sheets with parchment paper. -
Step 2
In a large bowl, combine the white cake mix, eggs, and vegetable oil. Mix until just combined. -
Step 3
Add the Kelly green gel food coloring to the dough and mix until evenly distributed and the desired green color is achieved. -
Step 4
Roll the dough into 1-inch balls and then roll each ball in granulated sugar. Place them on the prepared baking sheets, about 2 inches apart. -
Step 5
Bake for 8-10 minutes, or until the edges are lightly golden and the centers are set. Do not overbake. -
Step 6
Let the cookies cool on the baking sheets for a few minutes before transferring them to a wire rack to cool completely. Once cooled, dust lightly with powdered sugar for a festive finish.
Important Information
Nutrition Facts (Per Serving)
It is important to consider this information as approximate and not to use it as definitive health advice.
Allergy Information
Please check ingredients for potential allergens and consult a health professional if in doubt.