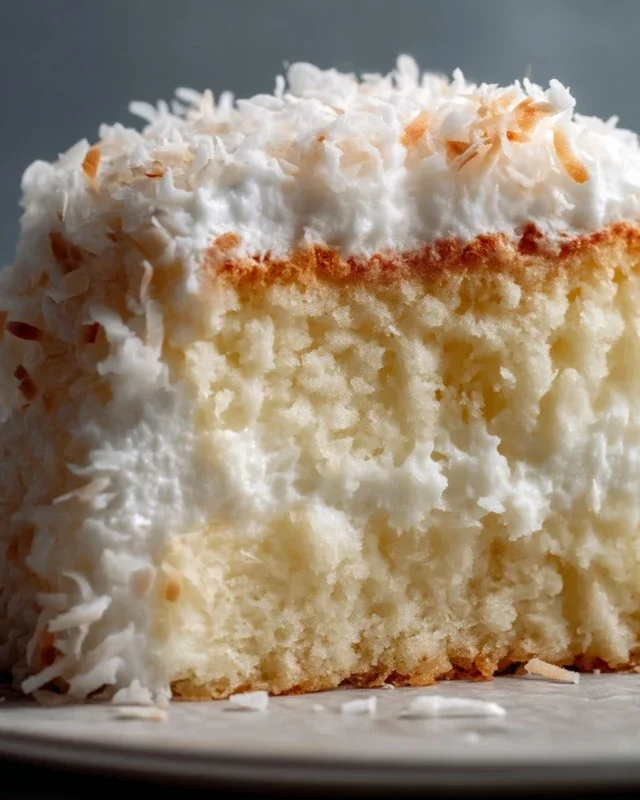
Coconut Cloud Cake Recipe- Light & Airy Dessert
The Coconut Cloud Cake Recipe you’re about to discover is more than just a dessert; it’s an experience. Imagin extracte biting into a confection so impossibly light and airy, it feels like you’re savoring a bite of sweet, tropical heaven. That’s the magic of this particular Coconut Cloud Cake Recipe. We all have those desserts that transport us back to happy memories, and for many, it’s the ethereal texture and subtle, creamy coconut flavor that makes this cake a perennial favorite. What truly sets this Coconut Cloud Cake Recipe apart is its delightful contrast: a tender, moist crum extractb that melts in your mouth, enveloped by a delicate, cloud-like frosting that whispers of sunshine and sandy beaches. It’s the perfect showstopper for any occasion, promising pure bliss with every single forkful.
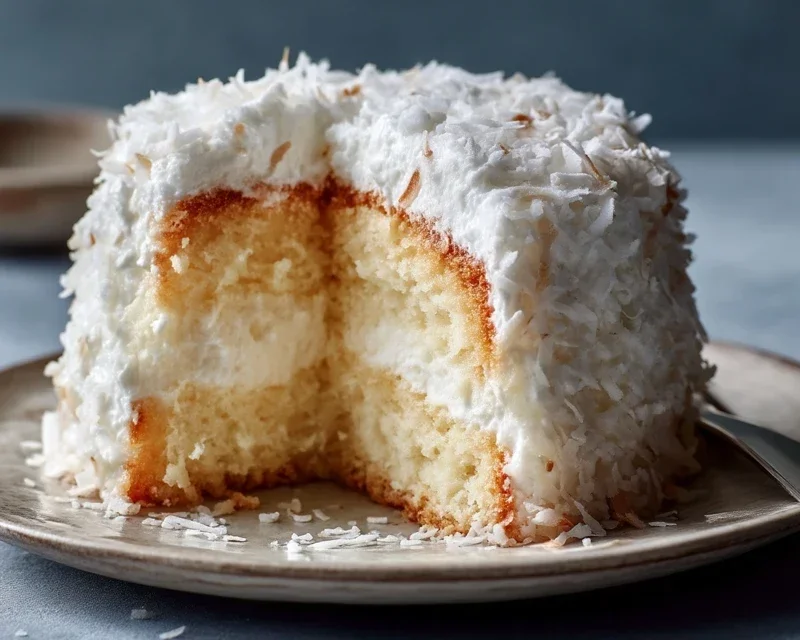
Coconut Cloud Cake Recipe
There are some cakes that simply whisper of sunshine and pure bliss, and our Coconut Cloud Cake is undoubtedly one of them. This isn’t just a cake; it’s an experience. Imagin extracte a light, airy sponge, infused with the delicate, tropical aroma of coconut, all enveloped in a dreamy, luscious frosting that tastes like a whisper of heaven. It’s the perfect centerpiece for celebrations, a delightful treat for a lazy afternoon, or just a way to bring a little bit of paradise into your kitchen. This recipe has been a favorite in my home for years, a guaranteed crowd-pleaser that always gets rave reviews for its subtle coconut flavor and unbelievably tender crum extractb. The process is straightforward, and the results are truly spectacular, so let’s get baking!
Ingredients:
For the Cake
Let’s start with the heart of our Coconut Cloud Cake: the cake itself. The key to a wonderfully tender and moist cake is using ingredients at the right temperature and mixing them properly.
Preheating and Prep: Begin extract by preheating your oven to 350°F (175°C). Grease and flour two 8-inch round cake pans. You can also line the bottoms with parchment paper for extra insurance against sticking. This preparation is crucial to ensure your cakes release beautifully after baking. Whisk together the all-purpose flour, baking powder, and salt in a medium bowl. This dry mixture will be added later, and whisking them together ensures even distribution of the leavening agent and salt, preventing pockets of bitterness or flat spots in your cake. Set this aside.
Creaming the Butter and Sugar: In a large bowl, or the bowl of your stand mixer fitted with the paddle attachment, cream together the softened unsalted butter and granulated sugar. This is a vital step for creating a light and airy cake. Beat on medium-high speed for about 3-5 minutes, until the mixture is pnon-alcoholic ale yellow, fluffy, and looks almost like whipped cream. Scrape down the sides and bottom of the bowl periodically to ensure everything is incorporated. This aeration traps tiny air bubbles that will expand in the oven, contributing to the cake’s delicate texture.
Adding Eggs and Extracts: Add the room temperature large eggs, one at a time, beating well after each addition. Allowing the eggs to come to room temperature ensures they emulsify better with the butter-sugar mixture, creating a smoother batter. If your eggs are cold, you can place them in a bowl of warm water for about 10 minutes. Once all the eggs are incorporated, beat in the vanilla extract and coconut extract. The extracts are where the magic of our coconut flavor truly begin extracts to bloom, so don’t skimp on these!
Alternating Dry and Wet Ingredients: Now, we’ll gradually add the dry ingredients and the coconut milk to the creamed mixture. This technique, known as the “reverse creaming” or “alternating” method, helps to develop the gluten less, resulting in a more tender cake. Begin extract by adding about one-third of the flour mixture to the wet ingredients and beat on low speed until just combined. Then, add half of the coconut milk and mix until just incorporated. Repeat this process, alternating between the flour mixture and the coconut milk, ending with the flour mixture. Be careful not to overmix at this stage; overmixing can develop the gluten too much, leading to a tough cake. A few streaks of flour are perfectly acceptable as they will be incorporated when folding. Gently fold in any remaining streaks of flour with a spatula.
Baking to Perfection: Divide the batter evenly between your prepared cake pans. Smooth the tops with a spatula. Bake in the preheated oven for 25-30 minutes, or until a wooden skewer or toothpick inserted into the center of the cakes comes out clean. The baking time can vary slightly depending on your oven, so it’s always best to start checking around the 25-minute mark. Once baked, let the cakes cool in their pans for about 10 minutes before inverting them onto a wire rack to cool completely. Ensuring they are completely cool before frosting is paramount to prevent the frosting from melting.
For the Frosting
While the cakes are cooling, let’s prepare the ethereal frosting that gives this cake its “cloud-like” name. This cream cheese frosting is wonderfully rich yet light, with just the right touch of sweetness and coconut essence.
Making the Dreamy Coconut Frosting
Whipping the Cream: In a chilled bowl, whip the heavy whipping cream with an electric mixer on medium-high speed until stiff peaks form. Be careful not to over-whip, or you’ll end up with butter! Once you have those beautiful peaks, set the whipped cream aside in the refrigerator.
Creaming the Cheese and Sugar: In a separate large bowl, beat the softened cream cheese and powdered sugar together until smooth and creamy. Make sure your cream cheese is truly softened; this will prevent lumps in your frosting. Add the vanilla extract and coconut extract and beat until well combined.
Folding in the Cream: Gently fold the whipped cream into the cream cheese mixture in two additions. Use a spatula and a light hand to maintain the airiness of the whipped cream. The result should be a light, fluffy, and incredibly spreadable frosting. This is where you get that signature cloud-like texture.
Assembly and Topping
The final stage is where all our beautiful components come together.
Layering and Frosting: Once the cakes are completely cool, place one cake layer on your serving plate or cake stand. Spread a generous layer of the coconut frosting over the top. Carefully place the second cake layer on top. Now, cover the entire cake – the top and the sides – with the remaining frosting. You can create swirls and peaks for a more rustic look, or smooth it out for a sleek finish.
The Finishing Touch: Finally, sprinkle the sweetened shredded coconut over the top and sides of the cake. You can toast the coconut beforehand for a more intense nutty flavor and a beautiful golden-brown hue. If you prefer a softer texture, fresh shredded coconut works just as well. This adds a delightful crunch and a final burst of coconut flavor.
And there you have it – a stunning, irresistible Coconut Cloud Cake. Slice it up and enjoy the tender crum extractb, the luscious frosting, and the delightful kiss of coconut. It’s a taste of pure joy!
Conclusion:
There you have it – a recipe for Coconut Cloud Cake that’s guaranteed to bring a little piece of tropical paradise to your kitchen! This cake is truly wonderful because of its incredibly light and airy texture, reminiscent of fluffy clouds, perfectly complemented by the subtle yet distinct flavor of coconut. It’s surprisingly easy to whip up, making it an ideal treat for both novice bakers and seasoned pros looking for a reliable showstopper. We absolutely love how moist and tender this Coconut Cloud Cake turns out every single time, and the delicate sweetness is never overwhelming.
To elevate your experience, consider serving slices of this divine cake with a dollop of fresh whipped cream, a scattering of toasted coconut flakes for extra crunch, or even a drizzle of passionfruit glaze for a vibrant tang. For those who enjoy a bit of experimentation, feel free to add a touch of lime zest to the batter for a refreshing twist, or fold in some finely chopped macadamia nuts for added texture and flavor. I truly encourage you to give this recipe a try; I’m confident you’ll fall in love with its ethereal charm and delicious taste.
Frequently Asked Questions:
Can I make this cake ahead of time?
Yes, absolutely! The Coconut Cloud Cake can be baked and cooled completely one day in advance. Store it in an airtight container at room temperature, or for longer storage, refrigerate it. Allow it to come back to room temperature for about 30 minutes before serving for the best texture.
What kind of coconut milk is best for this recipe?
For the best results and that signature “cloud-like” texture, we recommend using full-fat canned coconut milk. Lite coconut milk will not provide the same richness and will likely affect the cake’s tenderness. Make sure to shake the can well before measuring or use the thick cream that separates at the top.
Coconut Cloud Cake Recipe
A light and airy coconut cake with a creamy coconut frosting, perfect for any celebration.
Ingredients
-
2 1/2 cups all-purpose flour
-
2 1/2 teaspoons baking powder
-
1/2 teaspoon salt
-
1 cup unsalted butter, softened
-
2 cups granulated sugar
-
4 large eggs, room temperature
-
1 teaspoon vanilla extract
-
1 teaspoon coconut extract
-
1 cup coconut milk
-
1 1/2 cups heavy whipping cream
-
8 oz cream cheese, softened
-
1/2 cup powdered sugar
-
1 cup sweetened shredded coconut (toasted or fresh)
Instructions
-
Step 1
Preheat oven to 350°F (175°C). Grease and flour two 9-inch round cake pans. -
Step 2
In a medium bowl, whisk together flour, baking powder, and salt. Set aside. -
Step 3
In a large bowl, cream together the softened butter and granulated sugar until light and fluffy. Beat in eggs one at a time, then stir in vanilla and coconut extracts. -
Step 4
Gradually add the dry ingredients to the wet ingredients, alternating with the coconut milk, beginning and ending with the dry ingredients. Mix until just combined. -
Step 5
Divide the batter evenly between the prepared cake pans. Bake for 30-35 minutes, or until a wooden skewer inserted into the center comes out clean. -
Step 6
Let the cakes cool in the pans for 10 minutes before inverting them onto a wire rack to cool completely. -
Step 7
For the frosting, beat heavy whipping cream until stiff peaks form. In a separate bowl, beat softened cream cheese and powdered sugar until smooth. Gently fold the whipped cream into the cream cheese mixture along with vanilla and coconut extracts until well combined. -
Step 8
Frost the cooled cake layers and sides with the coconut frosting. Sprinkle with shredded coconut to decorate.
Important Information
Nutrition Facts (Per Serving)
It is important to consider this information as approximate and not to use it as definitive health advice.
Allergy Information
Please check ingredients for potential allergens and consult a health professional if in doubt.