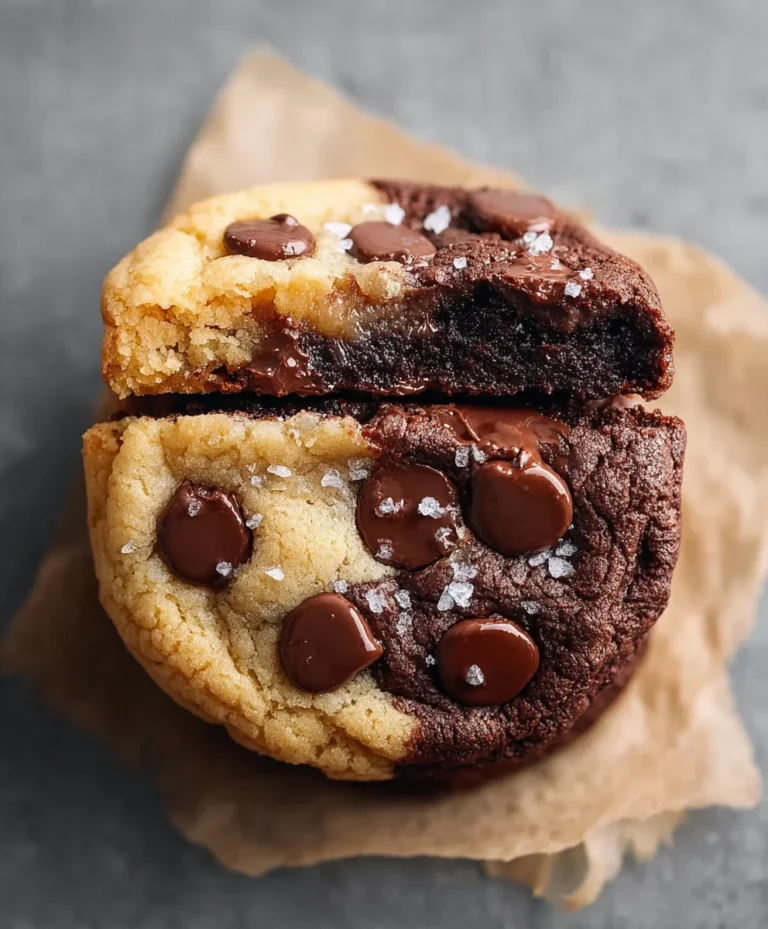
Classic Chocolate Chip Cookie Bars-Easy Delicious Recipe
Classic Chocolate Chip Cookie Bars are more than just a dessert; they’re a hug in edible form, a nostalgic trip back to simpler times, and the ultimate crowd-pleaser. There’s a universal magic to them, a comforting familiarity that draws people in. What is it about these chewy, chocolate-studded squares that captures our hearts (and taste buds)? Perhaps it’s the perfect balance of a slightly crisp edge giving way to a gloriously gooey center, studded with molten chocolate chips that melt into pure bliss with every bite. They are wonderfully adaptable, making them ideal for bake snon-alcoholic ales, potlucks, or just a quiet afternoon indulgence. Unlike their rounded cookie cousins, Classic Chocolate Chip Cookie Bars bake up evenly, ensuring every single bite is a perfect symphony of sweet dough and rich chocolate. Forget the fuss of individual cookies; these bars deliver maximum flavor with minimal effort, making them an absolute staple in any home baker’s repertoire. Get ready to master the art of the perfect Classic Chocolate Chip Cookie Bar!
Ingredients:
- 2 sticks (8 ounces) unsalted butter, melted and cooled
- 1 cup packed light brown sugar
- ½ cup granulated sugar
- 2 large eggs, at room temperature
- 2 teaspoons pure vanilla extract
- 2 cups all-purpose flour
- 1 teaspoon baking powder
- ¾ teaspoon salt
- 2¼ cups dark or semi-sweet chocolate chips, divided
- Flaky sea salt, for sprinkling (optional, but highly recommended)
Preparing the Dough
Step 1: Creaming the Sugars and Butter
Begin extract by preheating your oven to 350°F (175°C). Line a 9×13 inch baking pan with parchment paper, leaving an overhang on the sides. This will make it incredibly easy to lift the baked bars out of the pan later. In a large mixing bowl, combine the melted and slightly cooled unsalted butter with the packed light brown sugar and granulated sugar. Using a whisk or an electric mixer on medium speed, cream these ingredients together until they are well combined and have a smooth, slightly glossy appearance. This step is crucial for developing the right texture; you want to dissolve the sugars into the butter as much as possible. Don’t rush this process; take about 2-3 minutes to ensure everything is thoroughly incorporated.
Step 2: Incorporating Wet Ingredients
Next, add the two large eggs to the sugar and butter mixture, one at a time, beating well after each addition. It’s important that your eggs are at room temperature for proper emulsification. If they are cold, you can quickly warm them by placing them in a bowl of warm water for about 5-10 minutes. After the eggs are fully incorporated, stir in the pure vanilla extract. The vanilla adds that classic, warm aroma and flavor that makes chocolate chip cookies so irresistible. Ensure the mixture is uniform before moving on to the dry ingredients.
Combining Dry Ingredients and Forming the Dough
Step 3: Whisking the Dry Ingredients
In a separate medium bowl, whisk together the all-purpose flour, baking powder, and salt. Whisking these dry ingredients together before adding them to the wet ingredients helps to distribute the leavening agent (baking powder) and salt evenly throughout the flour. This prevents pockets of baking powder or salt in your finished bars, ensuring consistent rise and flavor. Make sure there are no clumps of flour or baking powder remaining.
Stepgin extract Bringing it All Together
Now, gradually add the dry ingredient mixture to the wet ingredients in the large bowl. Mix on low speed with your electric mixer or stir with a sturdy spatula until just combined. It’s important not to overmix the dough at this stage. Overmixing can develop the gluten in the flour too much, resulting in tough cookie bars. You want to mix until you no longer see streaks of dry flour. The dough will be thick and slightly sticky – this is exactly what you’re aiming for.
Adding the Chocolate and Baking
Step 5: Folding in the Chocolate and Baking
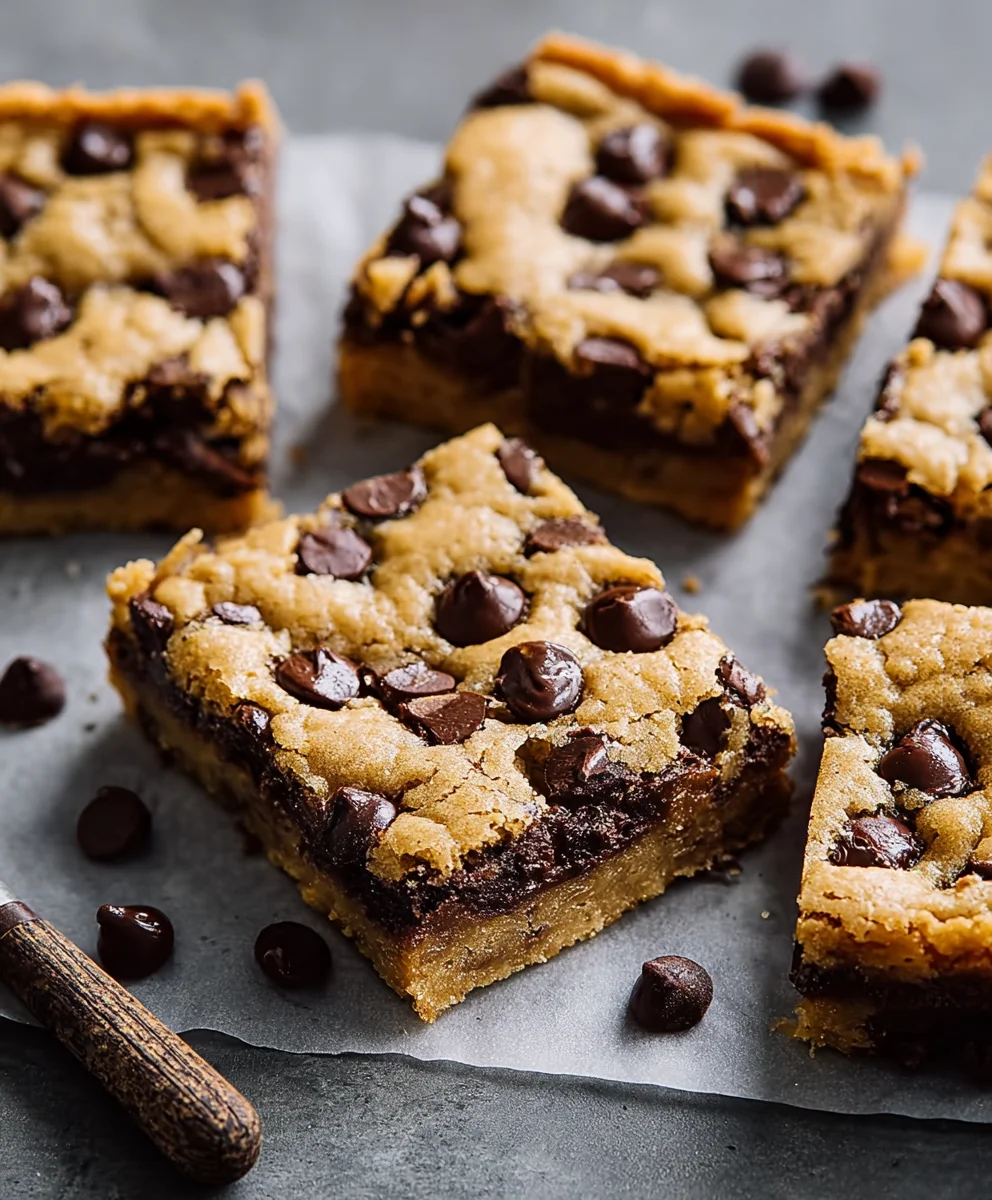
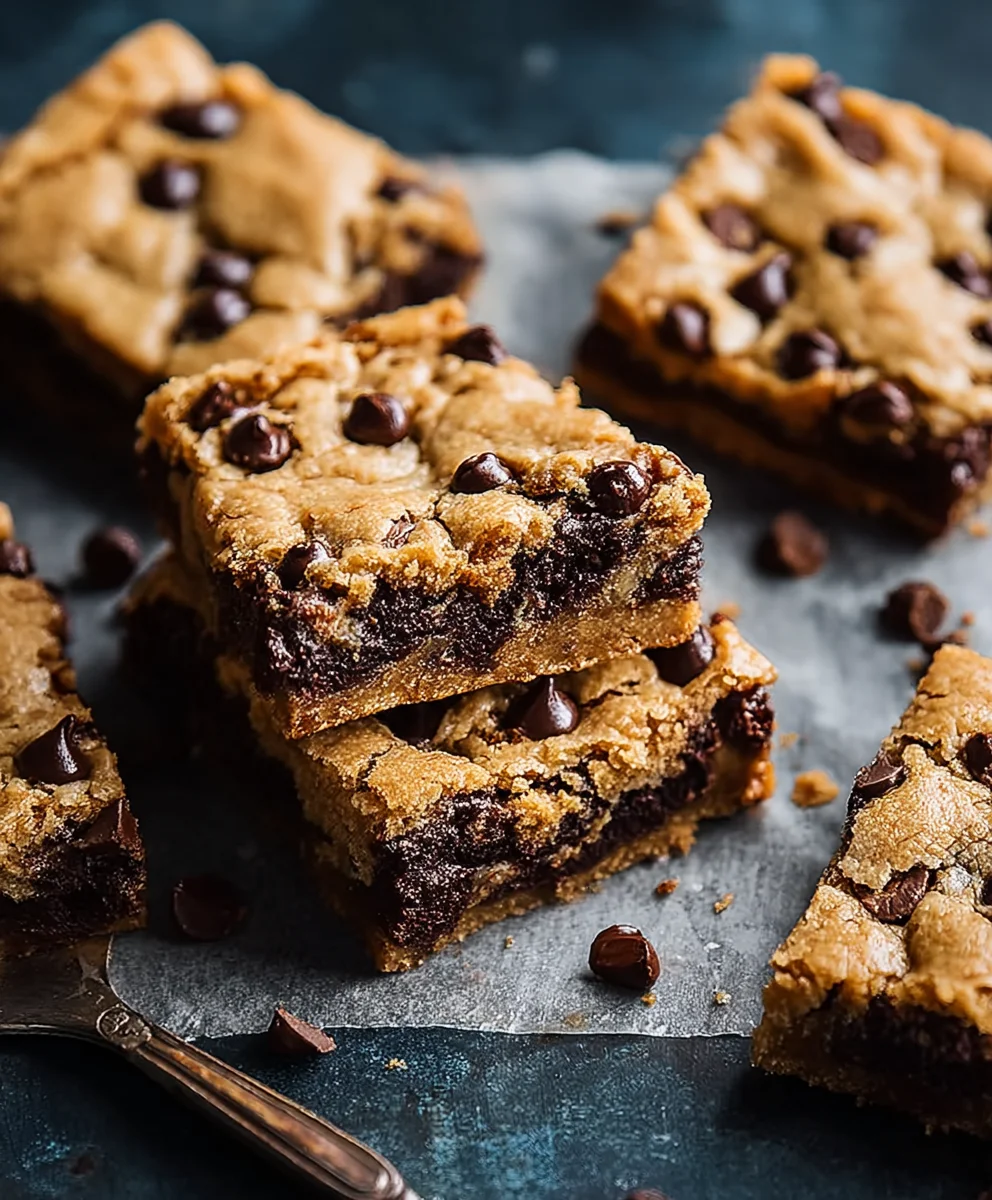
Gently fold in 2 cups of the dark or semi-sweet chocolate chips into the dough. Reserve the remaining ¼ cup of chocolate chips for topping. Distribute about two-thirds of the thick dough evenly into your prepared baking pan, pressing it down with your fingers or the back of a spoon to create an even layer. Then, scatter the remaining dough in small clumps over the first layer, and press down gently again to form a relatively even surface. Don’t worry about making it perfectly smooth; a slightly rustic look is charming. Sprinkle the reserved ¼ cup of chocolate chips evenly over the top of the dough. For an extra touch of gourmet appeal and a delightful textural contrast, lightly sprinkle flaky sea salt over the chocolate chips. Bake for 25-30 minutes, or until the edges are golden brown and the center is set but still looks slightly soft. Be careful not to overbake, as they will continue to cook slightly as they cool. Let them cool completely in the pan on a wire rack before cutting into bars. This cooling period is crucial for the bars to firm up properly.
Conclusion:
And there you have it – the wonderfully simple yet incredibly satisfying recipe for Classic Chocolate Chip Cookie Bars! We’ve walked through each step to create these delightful treats, from creaming the butter and sugar to folding in those irresistible chocolate chips. These bars are perfect for any occasion, whether it’s a weeknight craving, a potluck contribution, or simply a moment of self-indulgence. Their gooey centers and slightly crisp edges make them an instant crowd-pleaser.
I encourage you to give this recipe a try. It’s a forgiving and straightforward bake that promises delicious results every time. Don’t be afraid to experiment! Consider adding a sprinkle of sea salt on top before baking for an extra pop of flavor, or perhaps some chopped nuts like walnuts or pecans for added texture. They’re also fantastic served warm with a scoop of vanilla ice cream, or crum extractbled over yogurt for a sweet breakfast treat.
Frequently Asked Questions:
Can I make these Classic Chocolate Chip Cookie Bars ahead of time?
Absolutely! These bars store wonderfully in an airtight container at room temperature for up to 3-4 days. They might even taste better on the second day as the flavors meld together.
What’s the best way to store leftover Classic Chocolate Chip Cookie Bars?
To maintain their freshness and prevent them from drying out, store your Classic Chocolate Chip Cookie Bars in an airtight container. If you live in a warm climate, you might consider placing a piece of parchment paper between layers to prevent sticking. For longer storage, they can be frozen for up to 2-3 months.
Classic Chocolate Chip Cookie Bars
Easy and delicious chocolate chip cookie bars with a classic flavor and perfect chewy texture.
Ingredients
-
2 sticks (8 ounces) unsalted butter, melted and cooled
-
1 cup packed light brown sugar
-
½ cup granulated sugar
-
2 large eggs, at room temperature
-
2 teaspoons pure vanilla extract
-
2 cups all-purpose flour
-
1 teaspoon baking powder
-
¾ teaspoon salt
-
2¼ cups dark or semi-sweet chocolate chips
-
Flaky sea salt, for sprinkling (optional)
Instructions
-
Step 1
Preheat oven to 350°F (175°C). Line a 9×13 inch baking pan with parchment paper. In a large bowl, cream together melted butter, brown sugar, and granulated sugar until smooth and glossy. -
Step 2
Add eggs one at a time, beating well after each addition. Stir in vanilla extract. -
Step 3
In a separate bowl, whisk together flour, baking powder, and salt. -
Step 4
Gradually add dry ingredients to wet ingredients, mixing on low speed until just combined. Do not overmix. Fold in 2 cups of chocolate chips. -
Step 5
Spread two-thirds of the dough into the prepared pan. Scatter remaining dough in clumps over the first layer. Press gently to form an even surface. Sprinkle the reserved ¼ cup of chocolate chips and flaky sea salt (if using) over the top. Bake for 25-30 minutes, until edges are golden brown and the center is set but slightly soft. Cool completely before cutting.
Important Information
Nutrition Facts (Per Serving)
It is important to consider this information as approximate and not to use it as definitive health advice.
Allergy Information
Please check ingredients for potential allergens and consult a health professional if in doubt.