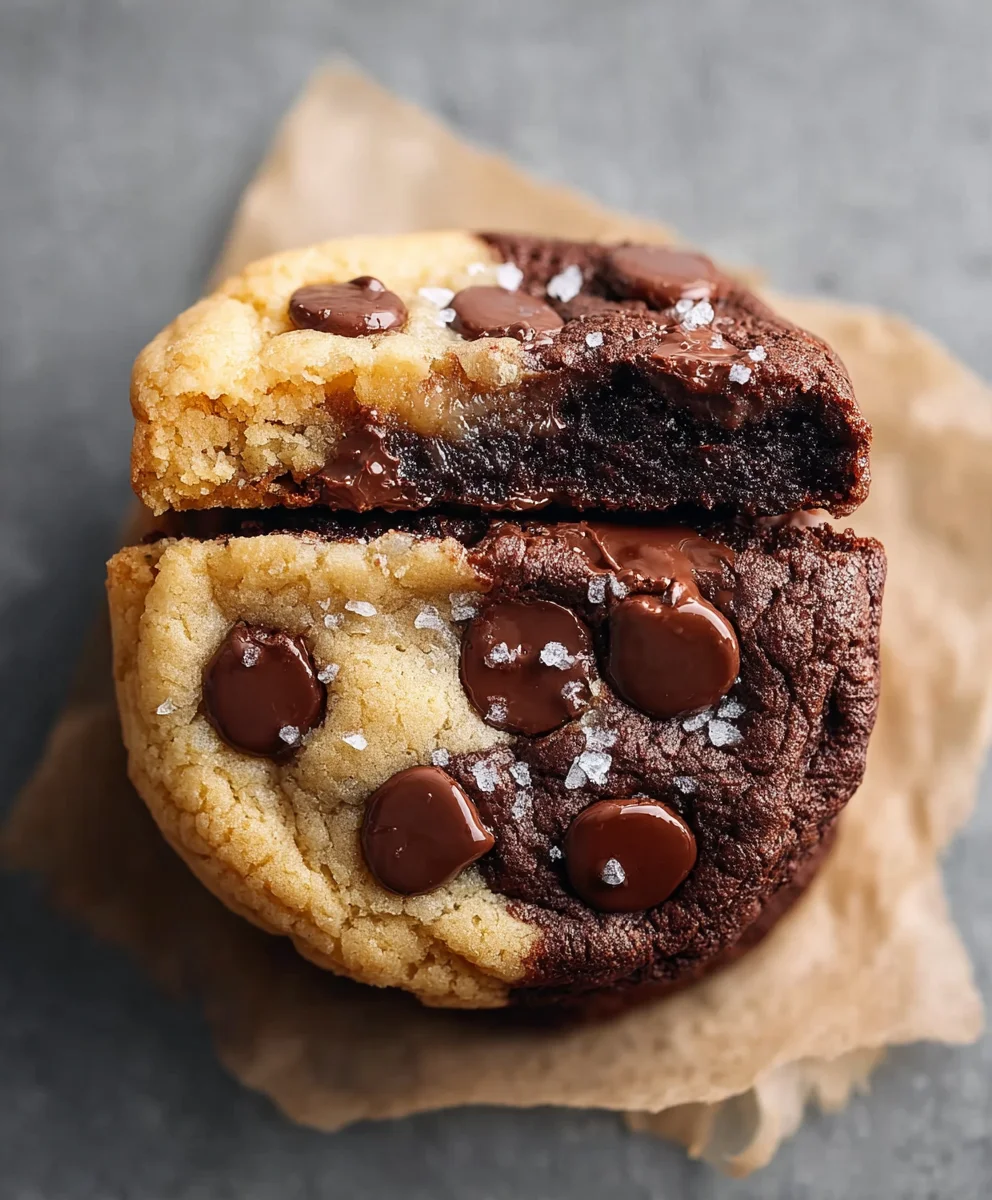
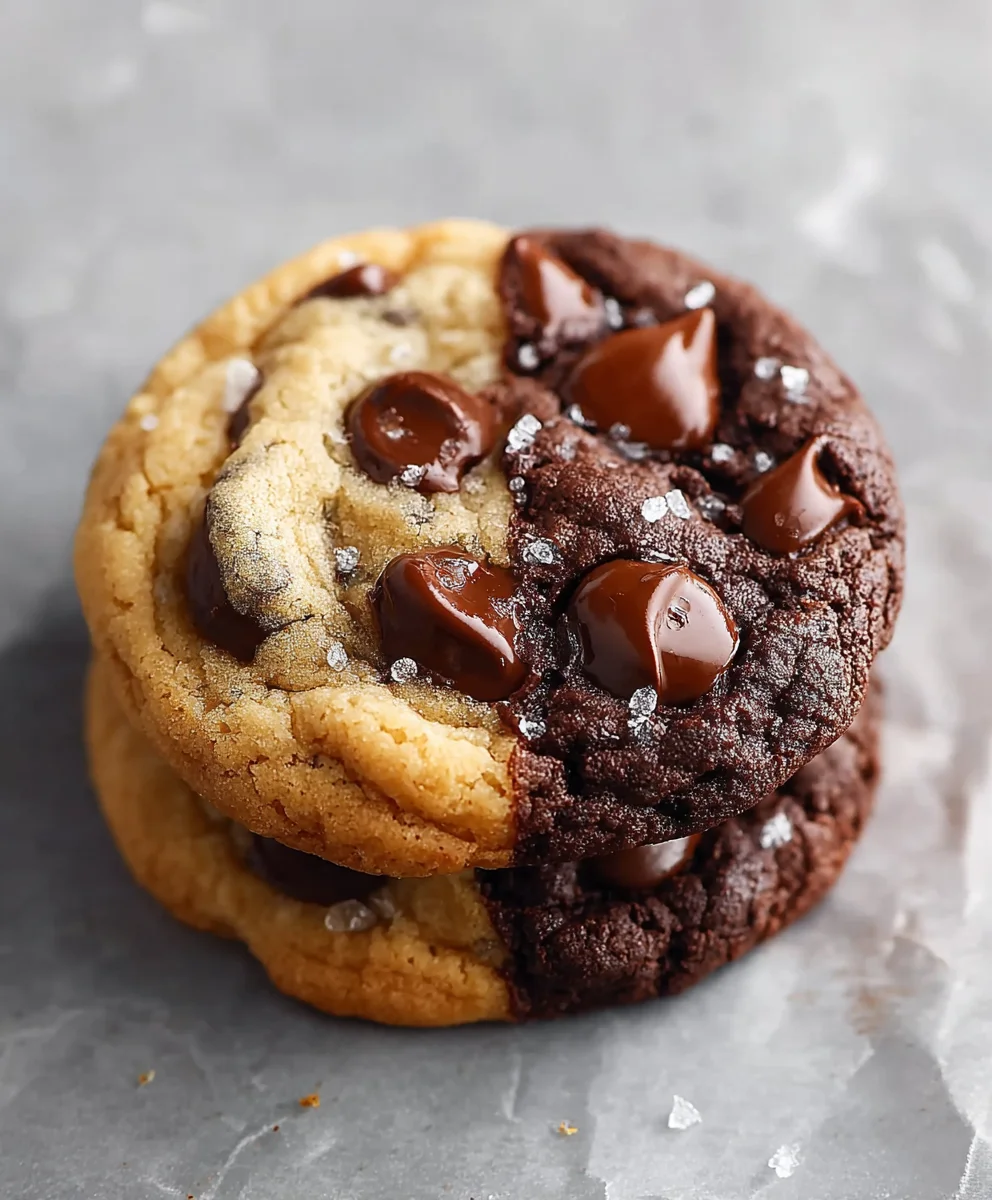
Delicious Brookie Cookies – The Best of Both Worlds
Brookie cookies are a dessert that has taken the internet by storm, and for good reason! This magical creation perfectly marries two beloved treats: the rich, fudgy brownie and the chewy, sweet chocolate chip cookie. Imagin extracte biting into a single cookie and experiencing that delightful contrast – the slightly crisp edge giving way to a gooey, chocolatey interior, all while enjoying the familiar comfort of a classic chocolate chip cookie. It’s this dual personality that makes brookie cookies so utterly irresistible. People are drawn to them not just for their incredible taste, but for the sheer joy and indulgence they represent. They’re a celebration of two decadent desserts coming together in perfect harmony, offering a truly unique and satisfying bite that’s more than the sum of its parts.
What makes this Brookie Cookie recipe special?
What sets this particular brookie cookie recipe apart is its ability to achieve that perfect balance without any fuss. We’ve perfected the ratio and technique to ensure you get that distinct brownie layer swirled into a delightful cookie base, creating a stunning visual and an even more incredible flavor profile. Get ready for a truly memorable baking experience!
Ingredients:
- 1 cup (226g) unsalted butter, cold and cubed (for the brownie layer)
- ¾ cup (150g) light brown sugar, packed (for the brownie layer)
- ¼ cup (50g) granulated sugar (for the brownie layer)
- 1 large egg, room temperature (for the brownie layer)
- 1 teaspoon vanilla extract (for the brownie layer)
- ⅓ cup Dutch-process cocoa powder (for the brownie layer)
- 1 cup (125g) all-purpose flour (for the brownie layer)
- ¾ teaspoon baking soda (for the brownie layer)
- ½ teaspoon salt (for the brownie layer)
- ⅔ cup semi-sweet chocolate chips (for the brownie layer)
- 2¾ cups (345g) all-purpose flour (for the cookie layer)
- 1 teaspoon cornstarch (for the cookie layer)
- 1 teaspoon baking soda (for the cookie layer)
- 1 teaspoon salt (for the cookie layer)
- ½ cup (113g) unsalted butter, room temperature (for the cookie layer)
Brownie Cookie Dough Preparation
Melting the Butter and Combining Sugars
Let’s start with the rich, fudgy brownie layer. You’ll need the 1 cup of cold, cubed unsalted butter for this part. Place this butter in a medium, heat-safe bowl. We’re going to melt it gently. You can do this in the microwave in 30-second intervals, stirring in between, until it’s completely liquid. Alternatively, you can melt it in a small saucepan over low heat on the stovetop, being careful not to let it brown. Once the butter is melted, immediately stir in the ¾ cup of packed light brown sugar and ¼ cup of granulated sugar. Whisk them together vigorously until the mixture is smooth and glossy. This combination of sugars will give our brownie layer that perfect chewy texture and deep caramel notes.
Incorporating Wet Ingredients and Cocoa
Now, let the butter and sugar mixture cool slightly for about 5 minutes. We don’t want to cook the egg. Once it’s cooled a bit, crack in your large egg and add the 1 teaspoon of vanilla extract. Whisk everything together until it’s well combined and emulsified. The mixture should look smooth and slightly thickened. Next, sift in the ⅓ cup of Dutch-process cocoa powder. Sifting is important here to break up any lumps and ensure a smooth, uniform chocolate flavor throughout the brownie dough. Gently fold the cocoa powder into the wet ingredients until just combined. Don’t overmix at this stage.
Adding Dry Ingredients to the Brownie Dough
In a separate small bowl, whisk together 1 cup of all-purpose flour, ¾ teaspoon of baking soda, and ½ teaspoon of salt. This ensures the leavening agents and salt are evenly distributed. Now, gradually add this dry ingredient mixture to the chocolate mixture, folding with a spatula until just incorporated. Be careful not to overmix the flour; we want to avoid developing too much gluten, which can make the brownie layer tough. Finally, fold in the ⅔ cup of semi-sweet chocolate chips. These chips will create delightful pockets of melted chocolate within the brownie cookie. Cover the bowl with plastic wrap and refrigerate the brownie dough for at least 30 minutes. This chilling step is crucial for allowing the flavors to meld and the dough to firm up, making it easier to scoop and manage.
Chocolate Chip Cookie Dough Preparation
Creaming Butter and Sugars for the Cookie Layer
While the brownie dough is chilling, let’s prepare the classic chocolate chip cookie dough that will crown our brookies. Take the ½ cup of room temperature unsalted butter and place it in a large mixing bowl. Add the remaining packed light brown sugar (from the overall ingredients list, if you made separate batches) and granulated sugar (if any remains). Using an electric mixer, cream the butter and sugars together on medium-high speed until light and fluffy, about 2-3 minutes. Scrape down the sides of the bowl occasionally to ensure everything is evenly incorporated. This creaming process incorporates air, which is vital for a tender cookie texture.
Adding Egg and Vanilla to the Cookie Dough
Once the butter and sugar are well creamed, add the large egg (if you have a second one, otherwise use the same one after the brownie dough has chilled sufficiently and you’ve washed your mixer bowl) and the remaining vanilla extract (if any is left from the brownie batch, or add another teaspoon). Beat on medium speed until thoroughly combined. The mixture should look smooth and glossy.
Combining Dry Ingredients for the Cookie Dough
In another medium bowl, whisk together the 2¾ cups of all-purpose flour, 1 teaspoon of cornstarch, 1 teaspoon of baking soda, and 1 teaspoon of salt. The cornstarch is a secret weapon here; it helps to create a wonderfully tender and slightly chewy cookie texture. Whisk these dry ingredients together until they are well combined and no streaks of flour remain.
Forming the Cookie Dough Base
Gradually add the dry ingredient mixture to the wet ingredients in the large mixing bowl. Mix on low speed or by hand with a spatula until just combined. Again, be careful not to overmix the flour. Overmixing can lead to tough cookies, and we’re aiming for soft and chewy. The dough should be thick and cohesive. At this point, you can fold in additional chocolate chips if you like, or any other mix-ins you desire, though the brookies as written are designed to have the brownie layer’s chocolate chips as the primary chocolate component in the cookie portion.
Assembling and Baking the Brookie Cookies
Layering the Doughs and Baking
Preheat your oven to 350°F (175°C). Line baking sheets with parchment paper. Now, for the magic! Take about 1-2 tablespoon-sized scoops of the chilled brownie dough and place them onto the prepared baking sheets, spacing them about 2 inches apart. Gently flatten each brownie dough ball slightly. Then, take about 1-2 tablespoon-sized scoops of the chocolate chip cookie dough and place them directly on top of each flattened brownie dough ball. You can either gently press the cookie dough down or swirl it slightly into the brownie dough with a toothpick or the back of a spoon to create that signature brookie swirl. The goal is to have roughly an equal amount of both doughs in each cookie.
Baking and Cooling
Bake for 10-13 minutes, or until the edges of the cookies are set and lightly golden brown, and the centers still look slightly soft. The brownie layer should be fudgy and the cookie layer should be baked through but still yielding. Avoid overbaking, as this will result in dry cookies. The key to a perfect brookie is that gooey, fudgy brownie center combined with a perfectly baked cookie crust. Once baked, let the brookies cool on the baking sheets for 5-10 minutes before carefully transferring them to a wire rack to cool completely. This resting period is essential as it allows the cookies to firm up and prevents them from falling apart when you move them. Enjoy these decadent treats!
Conclusion:
And there you have it – the ultimate guide to creating irresistible Brookie Cookies! We’ve walked through every step, from selecting the finest ingredients to achieving that perfect gooey brownie center and chewy cookie edge. These delightful treats are a fantastic way to satisfy both cookie and brownie cravings in one delicious bite. Imagin extracte serving these warm, fresh from the oven, perhaps with a scoop of vanilla bean ice cream for an extra layer of decadence. They’re perfect for potlucks, birthday parties, or simply as a special weekend indulgence. Don’t be afraid to experiment with variations; adding chocolate chips of different kinds, nuts, or even a swirl of caramel can elevate your Brookie Cookies even further. Remember, baking is about joy and creativity, so have fun with it! We hope you enjoy making and, more importantly, eating these amazing Brookie Cookies as much as we do.
Frequently Asked Questions about Brookie Cookies:
Q: How should I store leftover Brookie Cookies?
To keep your Brookie Cookies fresh and delicious, store them in an airtight container at room temperature for up to 3-4 days. If you plan to store them longer, they can be frozen individually wrapped for up to 3 months. Reheat gently in a low oven or microwave to enjoy them as if they were just baked.
Q: Can I make the brownie and cookie dough ahead of time?
Absolutely! You can prepare both the brownie batter and the cookie dough separately and store them in the refrigerator. The brownie batter can be kept for up to 2 days, and the cookie dough for up to 3 days. Ensure they are tightly covered to prevent drying out. This makes assembling and baking your Brookie Cookies even quicker on demand.
Q: My Brookie Cookies spread too much. What went wrong?
Excessive spreading can often be due to using too much butter in the cookie dough, or if the dough was too warm when baked. Ensure your butter is softened, not melted, for the cookie portion. Chilling the assembled Brookie Cookies for about 15-30 minutes before baking can also help them retain their shape and result in a thicker, chewier cookie.
Delicious Brookie Cookies – The Best of Both Worlds
A decadent cookie that combines the rich, fudgy texture of a brownie with the classic chewiness of a chocolate chip cookie.
Ingredients
-
1 cup (226g) unsalted butter, cold and cubed
-
¾ cup (150g) light brown sugar, packed
-
¼ cup (50g) granulated sugar
-
1 large egg, room temperature
-
1 teaspoon vanilla extract
-
⅓ cup Dutch-process cocoa powder
-
1 cup (125g) all-purpose flour
-
¾ teaspoon baking soda
-
½ teaspoon salt
-
⅔ cup semi-sweet chocolate chips
-
2¾ cups (345g) all-purpose flour
-
1 teaspoon cornstarch
-
1 teaspoon baking soda
-
1 teaspoon salt
-
½ cup (113g) unsalted butter, room temperature
Instructions
-
Step 1
For the brownie layer: Melt 1 cup of cold butter. Stir in brown sugar and granulated sugar until smooth and glossy. Let cool for 5 minutes. -
Step 2
Whisk in the egg and vanilla extract. Sift in cocoa powder and fold until just combined. Gradually add 1 cup of flour, baking soda, and salt, folding until just incorporated. Fold in chocolate chips. Cover and refrigerate for at least 30 minutes. -
Step 3
For the cookie layer: Cream ½ cup of room temperature butter with the remaining brown and granulated sugar until light and fluffy. -
Step 4
Beat in the egg and vanilla extract. In a separate bowl, whisk together 2¾ cups of flour, cornstarch, baking soda, and salt. Gradually add this to the wet ingredients, mixing until just combined. Do not overmix. -
Step 5
Preheat oven to 350°F (175°C). Line baking sheets with parchment paper. Scoop 1-2 tablespoon-sized portions of brownie dough and flatten slightly. Top each with 1-2 tablespoon-sized portions of cookie dough, swirling slightly to combine. -
Step 6
Bake for 10-13 minutes, until edges are set and centers are soft. Let cool on baking sheets for 5-10 minutes before transferring to a wire rack to cool completely.
Important Information
Nutrition Facts (Per Serving)
It is important to consider this information as approximate and not to use it as definitive health advice.
Allergy Information
Please check ingredients for potential allergens and consult a health professional if in doubt.