Blueberry Crum extractble Cheesecake Recipe-Easy Delicious
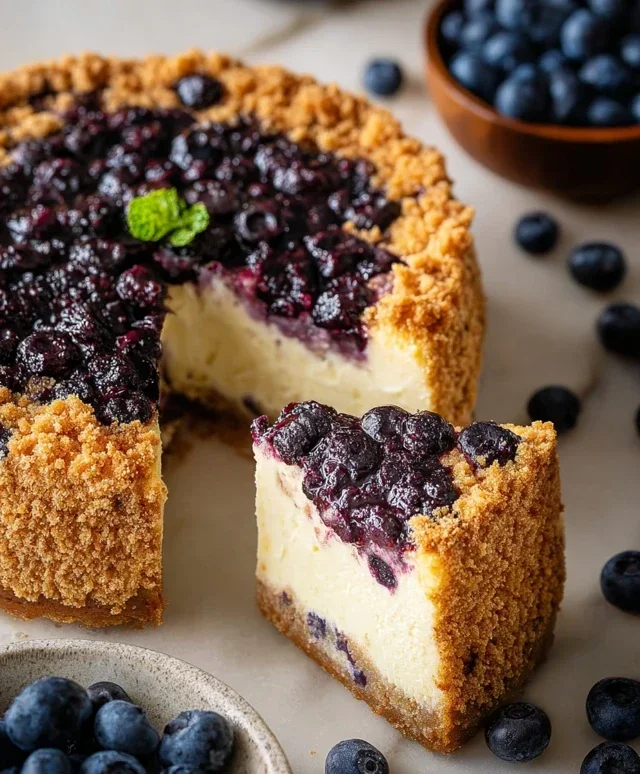
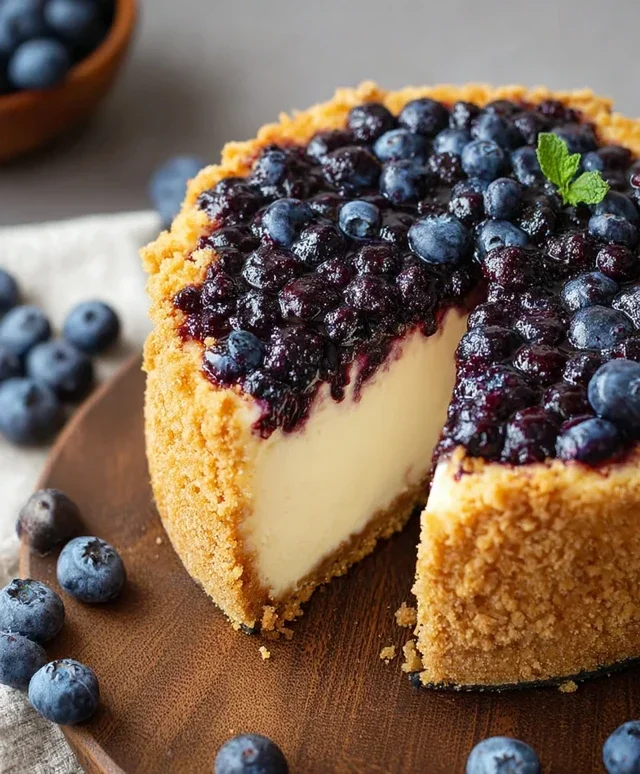
Blueberry Crum extractble Cheesecake is more than just a dessert; it’s an experience, a celebration of sweet, tangy berries swirled into creamy, luxurious cheesecake, all crowned with a buttery, irresistible crum extractble topping. We all have those comfort foods that instantly transport us back to cherished memories, and for many, this is exactly that dish. The magic lies in the perfect marriage of textures and flavors: the velvety smooth cheesecake base, the burst of juicy blueberries, and the delightful crunch of the golden crum extractble. It’s a dessert that feels both sophisticated enough for a special occasion and cozy enough for a quiet afternoon treat. Get ready to elevate your dessert game with this absolutely show-stopping Blueberry Crum extractble Cheesecake recipe – it’s truly a crowd-pleaser that you’ll want to make again and again!
Blueberry Crum extractble Cheesecake: A Burst of Summer Delight
There’s something truly magical about a cheesecake, isn’t there? The creamy, decadent interior, the satisfyingly crisp crust – it’s a dessert that feels both luxurious and comforting. And when you add the vibrant, slightly tart burst of blueberries, enhanced by a sweet, buttery crum extractble topping, you have a symphony of flavors and textures that’s simply irresistible. This Blueberry Crum extractble Cheesecake is my absolute go-to for celebrations, or honestly, just for a special treat to brighten any day. The “crum extractble extract extract extractble” part might sound a little unusual, but trust me, it’s just a playful nod to how intensely flavorful and wonderfully crum extractbly the topping is, a true extractable delight from the oven! Let’s get baking!
Ingredients:
The Foundation: Building the Crust
Let’s start with the foundation of our delicious cheesecake. A good crust is crucial, providing that perfect textural contrast to the smooth filling.
1. In a medium bowl, combine the digestive or grabeef ham crackers (crushed into fine crum extractbs – you can do this in a food processor or by placing them in a zip-top bag and crushing with a rolling pin) with 2 tablespoons of granulated sugar. This sugar will add a touch of sweetness to the crust.
2. Pour in the 75g of melted butter. Stir everything together thoroughly until the crum extractbs are evenly moistened and resemble wet sand. This is the key to a crust that holds together well.
3. Press this mixture firmly and evenly into the bottom of a 9-inch springform pan. I like to use the bottom of a glass or measuring cup to get a nice, compact layer. Make sure to press it up the sides slightly, about half an inch, to create a small barrier. This step is important for containing the cheesecake filling and preventing any potential leaks.
4. Bake the crust in a preheated oven at 175°C (350°F) for about 10 minutes. This pre-baking helps to set the crust and gives it a slightly toasted flavor. Once baked, remove it from the oven and let it cool completely while you prepare the filling. This cooling step is essential; a warm crust can make the filling too soft.
The Heart of the Cheesecake: The Creamy Filling
Now for the star of the show – that unbelievably smooth and luscious cheesecake filling. Patience and good quality ingredients are your friends here!
5. In a large bowl, beat the 800g of room-temperature full-fat cream cheese with an electric mixer on medium speed until it’s completely smooth and creamy, with no lumps. This is the most critical step for achieving a silky texture. Make sure your cream cheese is truly at room temperature; cold cream cheese will lead to a lumpy filling. Scrape down the sides of the bowl often to ensure everything is incorporated.
6. Gradually add the 260g of granulated sugar and the 1 ½ tablespoons of cornstarch to the cream cheese mixture, beating until just combined and no streaks of sugar remain. The cornstarch acts as a stabilizer, helping to prevent cracks in your cheesecake.
7. In a separate small bowl, whisk together the 200g of room-temperature sour cream and the 2 ½ teaspoons of vanilla extract. The sour cream adds a delightful tangin extractess that balances the sweetness of the cheesecake and contributes to its creamy texture. Add this mixture to the cream cheese base and mix on low speed until just combined. Be careful not to overmix at this stage, as too much air incorporated can lead to cracking during baking.
8. Gently fold in half of the prepared blueberry mixture (see next step) into the cheesecake batter. You don’t want to overmix; just gently swirl it in to create lovely pockets of blueberry goodness.
The Vibrant Blueberry Swirl and the “Extractable” Crum extractble
This is where the color and extra layers of flavor come in, making this cheesecake truly special.
Preparing the Blueberry Swirl:
Crafting the “Extractable” Crum extractble Topping:
Assembly and Baking: Bringin extractg it All Together
Now, it’s time to assemble our masterpiece and bake it to perfection.
9. Pour the cheesecake filling over the cooled crust in the springform pan.
10. Dollop spoonfuls of the remaining blueberry compote over the top of the cheesecake batter. Use a toothpick or a knife to gently swirl the blueberry mixture into the cheesecake, creating beautiful marbled patterns. Don’t over-swirl; you want distinct ribbons of blueberry.
11. Sprinkle the prepared crum extractble topping evenly over the swirled blueberry mixture. Make sure to cover most of the surface for that delightful crunch.
12. Bake the cheesecake in the preheated oven (still at 175°C / 350°F) for 15 minutes. Then, reduce the oven temperature to 120°C (250°F) and continue baking for another 60-75 minutes, or until the edges are set and the center is just slightly wobbly. A water bath is highly recommended for cheesecakes to ensure even baking and prevent cracking. To do this, wrap the outside of your springform pan tightly with several layers of heavy-duty aluminum foil. Place the wrapped pan inside a larger roasting pan. Carefully pour hot water into the roasting pan, about halfway up the sides of the springform pan. This creates a humid environment and allows the cheesecake to bake gently.
13. Once baked, turn off the oven and let the cheesecake cool inside the oven with the door slightly ajar for about an hour. This gradual cooling process is crucial for preventing cracks.
14. Remove the cheesecake from the oven and water bath (if used) and let it cool completely on a wire rack. Then, cover it loosely with plastic wrap and refrigerate for at least 6 hours, or preferably overnight, to allow it to fully set and for the flavors to meld. The chilling process is as important as the baking for achieving that perfect cheesecake texture.
Enjoy every single glorious bite of your Blueberry Crum extractble Cheesecake! It’s a testament to simple, delicious ingredients coming together to create something truly extraordinary.
Conclusion:
You’ve arrived at the end of our guide to creating a truly sensational Blueberry Crum extractble Cheesecake! This recipe is a triumph of textures and flavors, offering a creamy, decadent cheesecake base perfectly complemented by the sweet, slightly tart burst of blueberries and the satisfying crunch of a golden crum extractble topping. It’s a dessert that’s both elegant enough for a special occasion and comforting enough for a cozy night in. I’m confident that once you try this Blueberry Crum extractble Cheesecake, it will become a go-to in your baking repertoire. The interplay of the smooth cheesecake, the bright fruit, and the buttery crum extractble is simply irresistible.
For serving, I highly recommend letting the cheesecake chill thoroughly for at least 4 hours, or even overnight, to achieve the perfect set. Serve it chilled, perhaps with a dollop of fresh whipped cream or a scattering of extra fresh blueberries for an extra burst of color and freshness. If you’re feeling adventurous, consider adding a pinch of cinnamon or nutmeg to the crum extractble mixture for a warmer spice note, or even a swirl of lemon zest into the cheesecake batter for an added citrus brightness. I truly encourage you to gather your ingredients and give this delightful Blueberry Crum extractble Cheesecake a try. You won’t be disappointed!
Frequently Asked Questions:
Can I make this cheesecake ahead of time?
Absolutely! This cheesecake benefits greatly from being made ahead. It needs ample time to chill and set properly. I recommend making it at least 4-6 hours in advance, but overnight is even better for the most perfect texture.
What if I don’t have fresh blueberries? Can I use frozen?
Yes, you can definitely use frozen blueberries. If using frozen, do not thaw them completely before adding them to the batter. Adding them while still partially frozen helps prevent them from bleeding too much color into the cheesecake batter.
Blueberry Crumble Cheesecake
A delicious cheesecake with a blueberry crumble topping, made with a digestive biscuit base.
Ingredients
-
250 g digestive crackers
-
2 tablespoons granulated sugar
-
75 g butter, melted
-
300 g fresh blueberries
-
1 tablespoon granulated sugar
-
1 tablespoon all-purpose flour
-
2 teaspoons lemon juice
-
110 g all-purpose flour
-
80 g dark brown sugar
-
70 g butter, melted
-
800 g full-fat cream cheese, room temperature
-
260 g granulated sugar
-
200 g sour cream (18%), room temperature
-
1 ½ tablespoons cornstarch
-
2 ½ teaspoons vanilla extract
Instructions
-
Step 1
For the base: Crush the digestive crackers and mix with 2 tablespoons of sugar and 75g melted butter. Press into the base of a 23cm springform pan. -
Step 2
For the blueberry filling: Toss 300g blueberries with 1 tablespoon sugar, 1 tablespoon flour, and 2 teaspoons lemon juice. -
Step 3
For the crumble: Mix 110g flour, 80g dark brown sugar, and 70g melted butter until crumbly. -
Step 4
For the cheesecake filling: Beat 800g cream cheese until smooth. Gradually beat in 260g sugar, then the sour cream, cornstarch, and vanilla extract until combined. -
Step 5
Pour the cheesecake filling over the base. Scatter the blueberry mixture and then the crumble mixture over the top. -
Step 6
Bake at 160°C (320°F) for 50-60 minutes, or until the edges are set and the center is slightly wobbly. -
Step 7
Let cool completely in the oven with the door ajar, then chill in the refrigerator for at least 4 hours before serving.
Important Information
Nutrition Facts (Per Serving)
It is important to consider this information as approximate and not to use it as definitive health advice.
Allergy Information
Please check ingredients for potential allergens and consult a health professional if in doubt.