Easy Homemade Bread Recipe- Simple & Delicious
Easy Homemade Bread is more than just a recipe; it’s an invitation to a simpler, more satisfying way of life. There’s a primal joy in transforming humble ingredients – flour, water, yeast, and salt – into a warm, fragrant loaf that fills your kitchen with an irresistible aroma. For generations, people have found comfort and delight in baking their own bread. It’s the perfect canvas for butter, jam, or cheese, and the foundation for countless delicious sandwiches. What makes this particular recipe for easy homemade bread so special is its foolproof nature. Even if you’ve never baked a single thing in your life, you’ll be amazed at how effortlessly you can achieve a beautifully golden crust and a tender, airy interior. Forget the intimidating complexities you might associate with bread making; this recipe is designed for ultimate simplicity and maximum reward. Get ready to experience the pure satisfaction of creating your very own, truly delicious loaf of easy homemade bread.
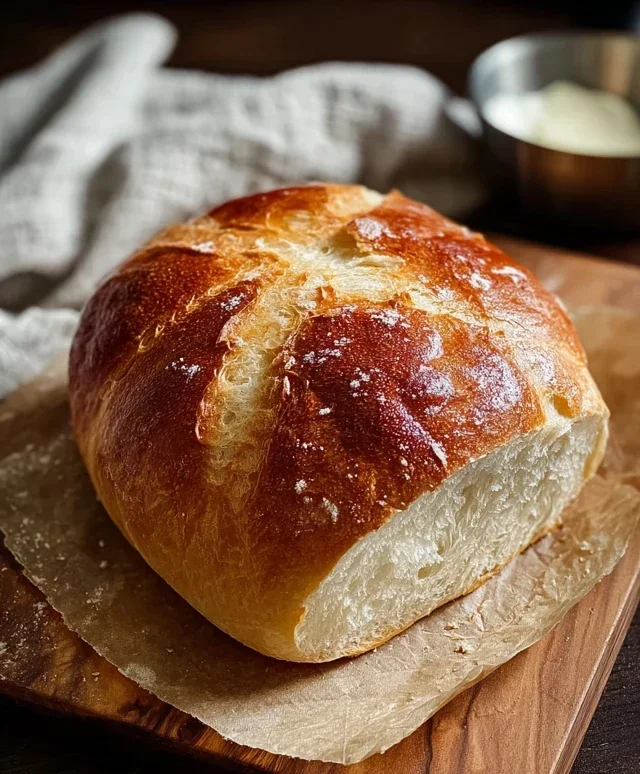
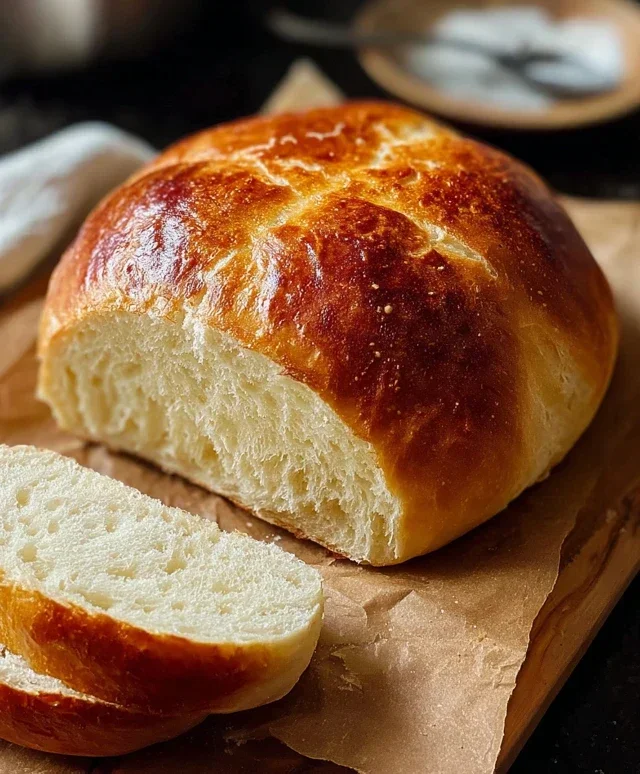
Easy Homemade Bread
There’s something incredibly satisfying about pulling a warm, crusty loaf of homemade bread from your oven. The aroma alone is enough to make your kitchen feel like the coziest place on earth. Many people are intimidated by bread making, thinking it’s a complex and time-consuming process. But I’m here to tell you that it doesn’t have to be! This recipe for Easy Homemade Bread is designed for begin extractners and busy individuals alike. With just a few simple ingredients and some basic steps, you can create a delicious loaf that rivals anything you’d buy at the bakery. Forget the store-bought stuff; this is the real deal, made with love and your own two hands.
This recipe is incredibly forgiving, which is perfect when you’re just starting out. You don’t need any special equipment, just a bowl, a baking sheet, and your oven. The ingredients are pantry staples for many, making it a convenient option for a spontaneous baking project. The magic of yeast, flour, water, and salt coming together to form a beautiful, airy bread is truly wonderful to witness. Let’s get baking!
Ingredients:
Getting Started: Mixing Your Dough
The first step in making your easy homemade bread is to activate the yeast and get our dough started. This process is surprisingly simple and sets the stage for a beautifully risen loaf.
1. Activate the Yeast: In a large mixing bowl, combine the 1 ½ cups of warm water with the 1 packet (2 ¼ teaspoons) of instant yeast. Give it a gentle stir. It’s important to use warm water – not hot, as that can kill the yeast, and not cold, as that won’t activate it effectively. Aim for water that feels comfortably warm to the touch, similar to bathwater for a baby. Let this mixture sit for about 5-10 minutes. You should see the yeast begin extract to bloom, creating a foamy layer on the surface of the water. This is a sign that your yeast is alive and ready to work its magic. If you don’t see any foam, your yeast might be expired, and you should start with a fresh packet.
2. Combine Dry Ingredients and Add to Yeast: Once your yeast is foamy, add the 3 cups of bread flour and the 2 ½ teaspoons of kosher salt to the same bowl. Bread flour has a higher protein content than all-purpose flour, which develops gluten better and results in a chewier texture and a better rise. However, all-purpose flour will absolutely work if that’s what you have on hand; your loaf might just be a little less chewy. The kosher salt is crucial for flavor and also helps control the yeast’s activity, preventing it from fermenting too quickly.
3. Mix and Form the Dough: Using a sturdy spoon or a spatula, stir the ingredients together until they just start to come together into a shaggy dough. Don’t overmix at this stage. The goal is to incorporate all the flour. Once it’s too difficult to stir with the spoon, it’s time to get your hands involved. Lightly flour your hands and begin extract to knead the dough directly in the bowl. You can also turn the dough out onto a lightly floured surface if you prefer. Knead for about 5-7 minutes. You’re not looking for a perfectly smooth dough yet; just bring it together until it’s less sticky and more cohesive. If the dough is too sticky, add a tablespoon of flour at a time. If it feels too dry, add a teaspoon of warm water.
First Rise: Letting the Dough Do Its Thing
Now comes the magical part where the yeast does its work, creating air pockets and making our dough rise. Patience is key here!
4. First Proofing: Lightly grease the mixing bowl with a little oil or cooking spray. Place the kneaded dough back into the bowl, turning it to coat all sides with the oil. Cover the bowl tightly with plastic wrap or a damp kitchen towel. Place the bowl in a warm, draft-free spot in your kitchen. This could be on top of your refrigerator, near a pilot light on your stove (if you have one), or simply in a slightly warmed oven that has been turned off. Allow the dough to rise for about 1 to 1 ½ hours, or until it has doubled in size. The time can vary depending on the temperature of your kitchen. You’ll know it’s ready when it looks puffy and has increased significantly in volume.
Shaping and Baking: The Final Stages
Once your dough has had its glorious first rise, it’s time to shape it and get it ready for the oven.
5. Shaping the Loaf and Second Proofing: Gently punch down the risen dough to release the air. Turn the dough out onto a lightly floured surface. You can shape it into a round loaf (boule) or a more traditional oblong loaf. For a boule, gently round it out into a ball. For an oblong loaf, gently flatten it into a rectangle and then roll it up tightly from one end, pinching the seams closed. Place your shaped loaf onto a baking sheet that has been lined with parchment paper or lightly greased. Cover the loaf loosely with plastic wrap or a clean kitchen towel and let it rest in a warm place for another 30-45 minutes, or until it has puffed up again and looks noticeably larger. While the dough is proofing for the second time, preheat your oven to 425°F (220°C).
6. Baking Your Bread: Once your oven is preheated and your loaf has completed its second rise, it’s time to bake! For an extra-crispy crust, you can create steam in your oven. One way to do this is to place a shallow pan on the bottom rack of your oven during preheating, and carefully pour about a cup of hot water into it right before you put your bread in. Bake the bread for 25-35 minutes, or until it is golden brown and sounds hollow when you tap the bottom. If you’re unsure, you can use an instant-read thermometer; the internal temperature should be around 200-210°F (93-99°C).
Once baked, carefully remove the bread from the oven and transfer it to a wire rack to cool completely. Resist the urge to slice into it immediately; letting it cool allows the interior to finish setting and develop its best texture. Enjoy your delicious, homemade bread!
Conclusion:
So there you have it! This easy homemade bread recipe is truly a game-changer. We’ve proven that baking your own delicious, crusty loaf doesn’t have to be complicated or time-consuming. The simplicity of the ingredients and the straightforward steps make it perfect for begin extractners and busy home cooks alike. Imagin extracte the aroma filling your kitchen as it bakes – it’s incredibly rewarding! This versatile bread is fantastic served warm with a smear of butter, as the base for gourmet sandwiches, or alongside your favorite soups and stews. Don’t be afraid to get creative with variations! Consider adding herbs like rosemary or thyme to the dough, or perhaps some cheese for a savory twist. You could even try incorporating a touch of honey or molasses for a hint of sweetness.
I truly hope you’ll give this recipe a try. The satisfaction of pulling a perfectly baked loaf from your own oven is unparalleled. Happy baking!
Frequently Asked Questions:
Q: My dough didn’t rise much. What could be the problem?
A: Several factors can affect dough rise. Ensure your yeast is fresh and active; test it in warm water with a pinch of sugar if you’re unsure. Also, make sure your water temperature was lukewarm (around 105-115°F or 40-46°C), not too hot which can kill the yeast, or too cold to activate it. Consistent ambient temperature during proofing is also crucial; try placing your dough in a slightly warm oven (turned off!) or a sunny spot.
Q: Can I freeze this homemade bread?
A: Absolutely! Once the bread has cooled completely, wrap it tightly in plastic wrap, then in aluminum foil, or place it in a freezer-safe bag. It should stay fresh for up to 2-3 months. Thaw at room temperature or gently reheat slices in the oven or toaster.
Easy Homemade Bread
A simple and delicious recipe for homemade bread that requires minimal effort.
Ingredients
-
1 ½ cups warm water
-
3 cups bread flour (all-purpose works too!)
-
1 packet (2 ¼ teaspoons) Instant Yeast
-
2 ½ tsp kosher salt
-
1 tablespoon olive oil
-
1 teaspoon sugar
Instructions
-
Step 1
In a large bowl, combine warm water and sugar. Sprinkle the instant yeast over the water and let it sit for 5-10 minutes until foamy. -
Step 2
Add the flour, salt, and olive oil to the yeast mixture. Stir with a spoon or spatula until a shaggy dough forms. -
Step 3
Turn the dough out onto a lightly floured surface and knead for 8-10 minutes until smooth and elastic. -
Step 4
Place the dough in a lightly oiled bowl, cover with plastic wrap or a damp towel, and let it rise in a warm place for 1-1.5 hours, or until doubled in size. -
Step 5
Punch down the dough and shape it into a loaf. Place the loaf on a baking sheet lined with parchment paper or in a greased loaf pan. -
Step 6
Cover the loaf loosely and let it rise for another 30-45 minutes. -
Step 7
Preheat your oven to 375°F (190°C). -
Step 8
Bake the bread for 30-35 minutes, or until golden brown and sounds hollow when tapped on the bottom. -
Step 9
Let the bread cool on a wire rack before slicing and serving.
Important Information
Nutrition Facts (Per Serving)
It is important to consider this information as approximate and not to use it as definitive health advice.
Allergy Information
Please check ingredients for potential allergens and consult a health professional if in doubt.