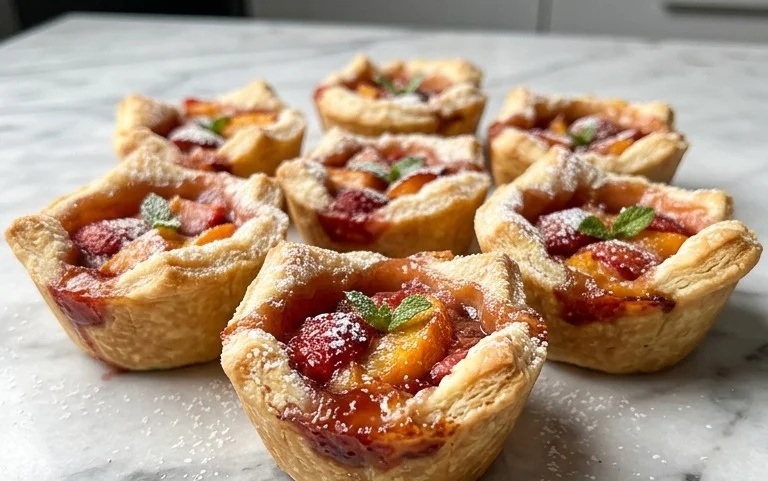
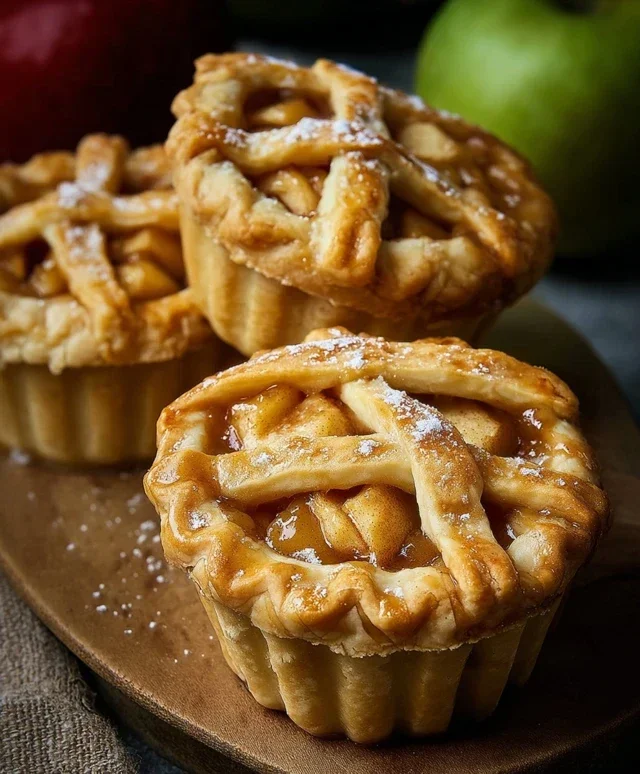
Easy Mini Apple Pies – Delicious Dessert Treat
Mini apple pies are undeniably one of the most charming and delightful desserts you can whip up. There’s something inherently magical about these perfectly portioned pastries, aren’t there? They capture all the comforting, nostalgic essence of a full-sized apple pie but present it in an adorable, bite-sized package. We all adore the classic combination of tender, spiced apples nestled within a flaky, buttery crust, and mini apple pies deliver that beloved flavor profile with an extra dose of convenience and cuteness. What makes these mini marvels truly special is their versatility; they’re perfect for individual servings at parties, a sweet treat for packed lunches, or simply a delightful way to satisfy a craving without the commitment of a whole pie. Get ready to fall in love all over again with these irresistible mini apple pies!
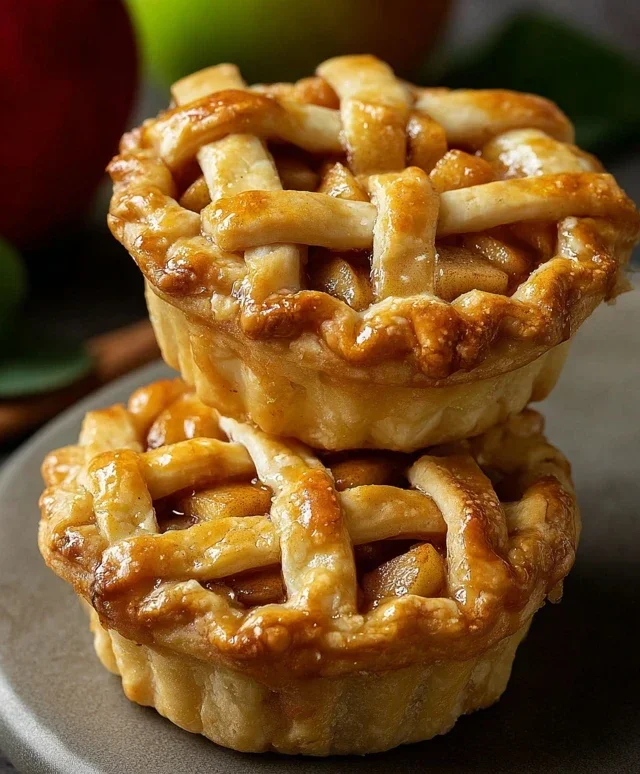
Mini Apple Pies
There’s something incredibly charming and satisfying about miniature desserts. They’re perfectly portioned, impossibly cute, and just beggin extractg to be devoured. And when it comes to classic comfort food, nothing quite beats the warm, spiced embrace of an apple pie. Combining these two delightful concepts, we arrive at these utterly delightful Mini Apple Pies. These individual delights are perfect for parties, a special treat for the family, or simply when you want a taste of apple pie heaven without committing to a whole large pie. They bake up beautifully, filling your kitchen with that irresistible aroma of cinnamon and baked apples. Let’s get baking!
Ingredients:
Getting Started: Preparing Your Apple Filling
The heart of any great apple pie is, of course, the apples. For these mini pies, we’ll be using Granny Smith apples. Their tartness provides a wonderful balance to the sweetness of the filling, and they hold their shape beautifully when baked. You’ll want to peel, core, and chop your apples into small, bite-sized pieces. Aim for pieces that are roughly 1/2 inch in size, ensuring they cook evenly within the small pastry shells.
In a large bowl, combine the chopped apples with both granulated sugar and light brown sugar. The combination of sugars contributes both sweetness and a lovely depth of flavor. Next, we’ll add our warming spices: ground cinnamon and ground nutmeg. These classic pie spices are essential for that quintessential apple pie taste. Finally, to help thicken the juices released from the apples as they bake, we’ll stir in the all-purpose flour. This crucial step prevents a watery filling, resulting in perfectly custardy pockets of apple goodness. For an extra layer of aromatic complexity, add the vanilla extract. Give everything a good stir until the apples are evenly coated with the sugar, spice, and flour mixture. Set this aside while you prepare your pie crusts.
Assembling Your Mini Marvels
Now, let’s get these little pies ready for their baking debut. Open your refrigerated pie crusts and lay them flat. You’ll want to use a round cookie cutter or even a wide glass to cut out circles from each crust. The size of your circles will depend on the size of the muffin tin or tart tins you plan to use. Aim for a size that will comfortably line the bottom and sides of your chosen vessel with a little overhang. You should be able to get about 6-8 circles from each crust, giving you plenty for your mini pies.
Carefully press the pie crust circles into the wells of a greased muffin tin or individual tart molds. Gently push the dough up the sides to create a neat little cup. Don’t worry if the edges aren’t perfectly smooth; a little rustic charm is part of their appeal! Once your crusts are in place, divide the prepared apple filling evenly among them. Try to get a good balance of apple pieces and the syrupy juice in each one. Don’t overfill them, as this can lead to spillage during baking.
The Finishing Touches and Baking Time
Before these beauties go into the oven, we need to prepare an egg wash. In a small bowl, whisk together the egg and the tablespoon of water. This simple mixture will be brushed over the edges of your mini pies. This egg wash not only gives the crust a beautiful golden-brown sheen but also helps any decorative pie crust cutouts (if you choose to add them) adhere securely. If you have any leftover pie dough, you can cut out small decorative shapes like leaves or tiny stars to place on top of the filling. Brush these decorative elements with the egg wash as well. For an extra touch of sparkle and crunch, lightly sprinkle the tops with sanding sugar, if using. This is purely optional but adds a lovely visual and textural element.
Now, it’s time to bake! Preheat your oven to 375 degrees Fahrenheit (190 degrees Celsius). Place your muffin tin or tart molds onto a baking sheet. This is a good practice to catch any potential drips and makes it easier to move the hot tin in and out of the oven. Bake for approximately 20-25 minutes, or until the crust is golden brown and the apple filling is bubbling. The exact baking time can vary depending on your oven, so keep an eye on them. If the crust starts to brown too quickly, you can loosely tent the tops with aluminum foil.
Cooling and Enjoying Your Creations
Once your mini apple pies are baked to perfection, remove them from the oven and let them cool in the muffin tin or tart molds for about 10-15 minutes. This allows the filling to set up properly. After this initial cooling period, carefully remove the mini pies from the tin. You can use a small offset spatula or a butter knife to gently loosen them from the sides if needed. Transfer them to a wire rack to cool completely, or enjoy them warm – the choice is yours! These mini apple pies are wonderful served on their own, but they are truly elevated with a dollop of whipped cream or a scoop of vanilla ice cream. The contrast of the warm, spiced apple filling with the cool, creamy topping is simply divine. Enjoy every single bite of these delightful, miniature masterpieces!
Conclusion:
There you have it! These mini apple pies are a truly delightful treat that’s perfect for any occasion. Their individual portions make them incredibly easy to serve, and the balance of sweet, tender apples and flaky, buttery crust is simply irresistible. Whether you’re looking for a charming dessert for a dinner party, a comforting indulgence on a cozy evening, or a fun baking project with loved ones, these little pies are sure to impress. I encourage you to give this recipe a try; you won’t be disappointed by the joy they bring!
For serving, consider topping your warm mini apple pies with a scoop of vanilla ice cream, a dollop of whipped cream, or a drizzle of caramel sauce. They also pair beautifully with a warm mug of apple cider or a cup of tea. Don’t be afraid to get creative with variations! You could add a pinch of nutmeg to the filling for extra warmth, incorporate a handful of chopped walnuts or pecans for added crunch, or even use a different fruit like pears or a mix of berries. The possibilities are endless, and each variation promises a unique and delicious experience.
Frequently Asked Questions:
Can I make these mini apple pies ahead of time?
Yes, absolutely! You can assemble the mini apple pies a day in advance and refrigerate them. For the best crust, it’s recommended to bake them fresh. However, if you need to bake them ahead, let them cool completely and then store them in an airtight container at room temperature for up to two days, or freeze them for longer storage.
What kind of apples are best for mini apple pies?
A mix of apples works best to achieve a good balance of sweet and tart flavors, and to ensure the filling holds its shape well. Varieties like Granny Smith (for tartness), Honeycrisp, Fuji, Gala, or McIntosh are excellent choices. Avoid overly soft apples that tend to turn mushy when baked.
How do I prevent the bottom crust from becoming soggy?
To prevent a soggy bottom crust, ensure your apples are not overly juicy by allowing them to drain after chopping. You can also lightly pre-bake the bottom crust for about 5-7 minutes before adding the filling, or sprinkle a thin layer of breadcrum extractbs or finely ground nuts on the bottom of the crust before adding the apple mixture. This absorbs excess moisture.
Mini Apple Pies
Delightful individual apple pies perfect for any occasion.
Ingredients
-
2 refrigerated pie crusts
-
3 cups chopped Granny Smith apples
-
1/4 cup granulated sugar
-
1/4 cup light brown sugar
-
1 teaspoon ground cinnamon
-
1/4 teaspoon ground nutmeg
-
2 tablespoons all-purpose flour
-
1 teaspoon vanilla extract
-
1 egg
-
1 tablespoon water
-
Sanding sugar (optional)
Instructions
-
Step 1
Preheat oven to 375°F (190°C). Lightly grease a 12-cup muffin tin. -
Step 2
In a large bowl, combine chopped apples, granulated sugar, brown sugar, cinnamon, nutmeg, flour, and vanilla extract. Toss to coat. -
Step 3
Unroll pie crusts. Use a 3-inch round cutter to cut out 12 circles from the crusts. Press 6 circles into the bottom of the prepared muffin tin cups. -
Step 4
Divide the apple filling evenly among the crust-lined muffin cups. -
Step 5
In a small bowl, whisk together the egg and water. Brush the edges of the bottom crusts with the egg wash. -
Step 6
Place the remaining 6 crust circles over the apple filling. Crimp the edges to seal. If desired, cut small vents in the top crusts. Brush the tops with the remaining egg wash and sprinkle with sanding sugar. -
Step 7
Bake for 20-25 minutes, or until the crusts are golden brown and the filling is bubbly. -
Step 8
Let the mini pies cool in the muffin tin for 10 minutes before carefully removing them to a wire rack to cool completely.
Important Information
Nutrition Facts (Per Serving)
It is important to consider this information as approximate and not to use it as definitive health advice.
Allergy Information
Please check ingredients for potential allergens and consult a health professional if in doubt.