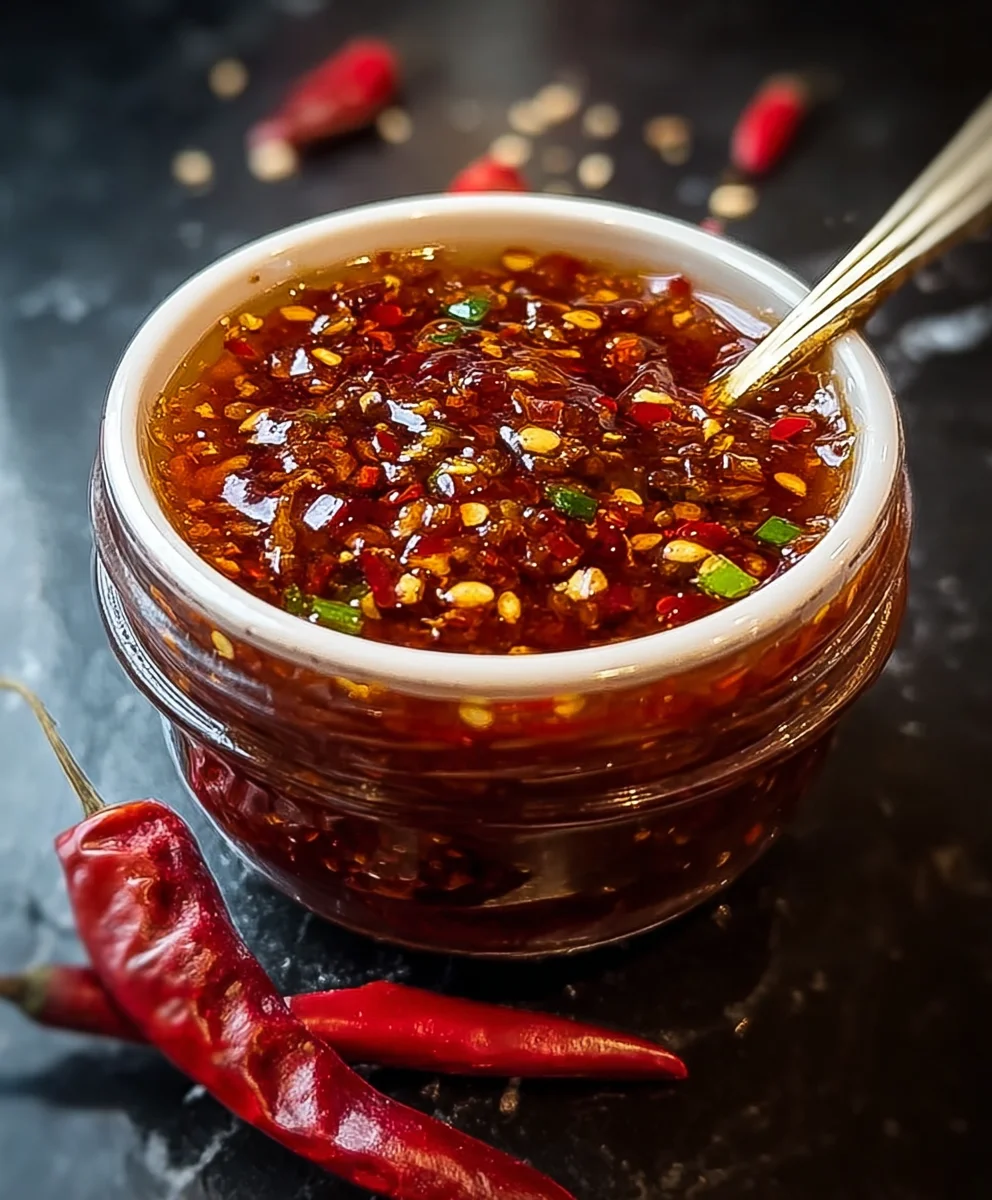
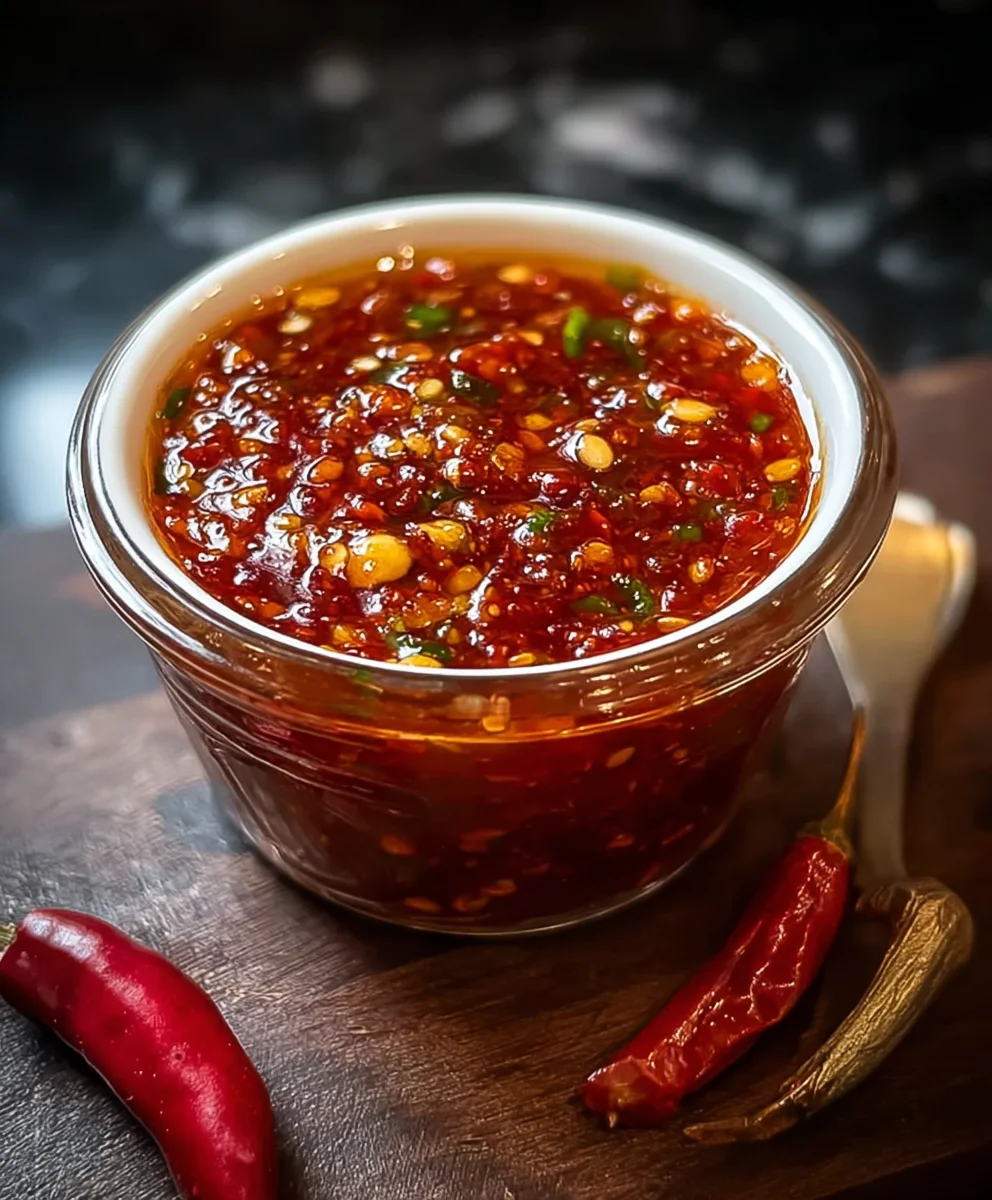
Homemade Chili Garlic Sauce – Spicy & Flavorful
Homemade Chili Garlic Sauce is one of those magical condiments that can transform a simple meal into something spectacular. It’s that perfect balance of heat, savoriness, and a hint of sweetness that makes you want to drizzle it on absolutely everything – from stir-fries and dumplings to eggs and even pizza! What’s not to love about a sauce that brings such vibrant flavor and satisfying warmth to your plate? People adore this homemade version because it allows for complete control over the ingredients, meaning you can tailor the spice level precisely to your liking and avoid any unnecessary additives often found in store-bought varieties. The beauty of making your own Homemade Chili Garlic Sauce lies in its versatility and the incredible aroma that fills your kitchen as it simmers, promising a depth of flavor that’s simply unbeatable.
Why You’ll Love This Recipe
This isn’t just any chili garlic sauce; it’s a flavor bomb crafted with love. We’re talking about a rich, intensely savory experience with a delightful kick that lingers just long enough to make you crave another bite. What sets this recipe apart is the careful layering of fresh ingredients, ensuring a complex profile that’s both spicy and incredibly satisfying. It’s the secret weapon in our culinary arsenal, ready to elevate your everyday cooking from good to absolutely unforgettable. Prepare to impress yourself and anyone lucky enough to share your table!
Ingredients:
- 5-6 fresh red chilies (such as Thai bird’s eye or Fresno for a good kick)
- 4 cloves garlic
- 1 tablespoon white vinegar or rice vinegar
- 1 tablespoon olive oil or vegetable oil
- 1/2 teaspoon salt
- 1/2 teaspoon sugar (optional, for a touch of sweetness to balance the heat)
Preparing Your Ingredients
Chilies
The star of our Homemade Chili Garlic Sauce is, of course, the chilies! For this recipe, I recommend using 5-6 fresh red chilies. The type of chili you choose will significantly impact the heat level. If you’re looking for a fiery experience, Thai bird’s eye chilies are an excellent choice. For a more moderate heat with a fruity undertone, Fresno chilies are a fantastic option. You can also experiment with other red chilies like jalapeños (for milder heat) or habaneros (for a serious challenge!).
Before we get to cooking, we need to prepare the chilies. You have a few options here depending on your preference for heat and texture. For a smoother sauce, you’ll want to remove the seeds and membranes, as these are where most of the capsaicin (the compound responsible for spiciness) resides. To do this, simply slice the chilies in half lengthwise and carefully scrape out the seeds and white pith with a small spoon or the tip of a knife. If you don’t mind a bit more heat and want a chunkier sauce, you can leave some or all of the seeds in. For safety and to avoid irritating your skin, it’s always a good idea to wear gloves when handling chilies, especially spicier varieties. After deseeding (if you choose to do so), finely chop the chilies. Aim for a very fine dice so they meld well into the sauce.
Garlic
Next up is the garlic. We’ll be using 4 cloves of garlic. For the best flavor infusion, mince the garlic as finely as possible. You can use a knife to do this or a garlic press. Freshly minced garlic will provide a much more potent and aromatic flavor than pre-minced varieties. The combination of fresh chili and fresh garlic is what gives this sauce its incredible depth and punch.
Other Essentials
We also need 1 tablespoon of vinegar. White vinegar provides a clean, sharp acidity that cuts through the richness and heat, while rice vinegar offers a slightly milder and fruitier note. Whichever you choose, it will help to balance the flavors and act as a preservative. For the cooking fat, you’ll need 1 tablespoon of olive oil or vegetable oil. Olive oil will impart a subtle fruity flavor, while vegetable oil is more neutral. Finally, we’ll add 1/2 teaspoon of salt to enhance all the flavors. An optional ingredient is 1/2 teaspoon of sugar. This isn’t strictly necessary, but it can be a game-changer if you find your chili garlic sauce a little too sharp. It helps to round out the flavors and create a more harmonious taste profile.
Cooking Your Homemade Chili Garlic Sauce
Sautéing the Aromatics
Let’s get cooking! We’ll start by heating our oil in a small saucepan or skillet over medium-low heat. It’s important to use a lower heat for this step to prevent burning the garlic and chilies, which can result in a bitter flavor. Once the oil is warm (but not smoking), add the minced garlic and the chopped fresh red chilies. Stir them gently with a wooden spoon or spatula, allowing them to cook for about 2-3 minutes. We’re not looking to brown them deeply here; we just want to soften them slightly and release their fragrant oils. You’ll notice a wonderful aroma filling your kitchen – that’s the magic starting to happen! Keep stirring to ensure even cooking and prevent any sticking.
Building the Flavor Base
After sautéing the garlic and chilies for a few minutes, it’s time to add the salt and the optional sugar. Stir them in well to distribute them evenly throughout the mixture. If you’re using sugar, you’ll notice it starts to dissolve into the oil and chili mixture. Continue to cook for another minute or two, stirring constantly. This brief cooking period helps to meld the flavors together and slightly intensify the chili’s heat as it cooks.
Deglazing and Simmering
Now, we’ll add the vinegar. Pour the tablespoon of white or rice vinegar into the pan. It will sizzle and steam as it hits the hot mixture. This is called deglazing and it helps to lift any flavorful bits that may have stuck to the bottom of the pan. Stir everything together vigorously for about 30 seconds. This step also helps to cook off some of the sharpest notes of the vinegar, leaving behind its beneficial acidity.
Reducing and Thickening
Once the vinegar has been incorporated, reduce the heat to low. Let the mixture simmer gently for about 5-7 minutes, stirring occasionally. During this time, the sauce will start to thicken slightly as the chilies soften further and the flavors continue to meld. The goal is to achieve a consistency that is saucy but not watery. You can test the consistency by dipping your spoon in; it should coat the back of the spoon nicely. If it seems too thick, you can add a tiny splash of water or more vinegar, but be careful not to make it too thin.
Cooling and Storing
Once your Homemade Chili Garlic Sauce has reached your desired consistency and the flavors have developed, remove the pan from the heat. Let the sauce cool down completely in the pan. This is a crucial step because hot sauces can continue to cook and develop different flavors as they cool. Once cooled, you can transfer the sauce to a clean, airtight glass jar or container. For the best flavor and to preserve its potency, store your Homemade Chili Garlic Sauce in the refrigerator. It should keep well for at least 2-3 weeks, and the flavors will likely continue to deepen over time. Enjoy experimenting with it on everything from noodles and stir-fries to eggs and grilled meats!
Conclusion:
I hope you’ve enjoyed learning how to make your very own Homemade Chili Garlic Sauce! This recipe is incredibly rewarding, transforming simple ingredients into a vibrant, flavor-packed condiment that will elevate any dish. The beauty of this sauce lies in its adaptability, allowing you to fine-tune the heat and garlic intensity to your personal preference. Once you’ve made a batch, you’ll wonder how you ever lived without it. Drizzle it over noodles, add it to stir-fries, spread it on sandwiches, or use it as a dipping sauce for dumplings and spring rolls. Get creative and enjoy the explosion of savory, spicy, and garlicky goodness!
Frequently Asked Questions:
How can I adjust the spiciness of the Homemade Chili Garlic Sauce?
The spice level primarily comes from the types and quantities of chili peppers you use. For a milder sauce, opt for less spicier chilies like Fresno or even red bell peppers with a small amount of a spicier chili. For an extra kick, incorporate hotter peppers like Thai chilies, habaneros, or ghost peppers (use with extreme caution!). You can also adjust the amount of chili flakes for a more controlled heat increase.
Can I store the Homemade Chili Garlic Sauce for a long time?
Yes, absolutely! When stored properly in an airtight container in the refrigerator, your Homemade Chili Garlic Sauce can last for several weeks, even up to a couple of months. The garlic and chili oils act as natural preservatives. Always ensure the sauce is fully cooled before refrigerating, and use clean utensils to scoop it out to maintain its freshness and prevent contamination.
Homemade Chili Garlic Sauce – Spicy & Flavorful
A quick and easy recipe for a spicy and flavorful homemade chili garlic sauce, perfect for adding a kick to any dish.
Ingredients
-
5-6 fresh red chilies
-
4 cloves garlic, minced
-
1 tablespoon white vinegar
-
1 tablespoon olive oil
-
1/2 teaspoon salt
-
1/2 teaspoon sugar
Instructions
-
Step 1
Prepare the chilies by deseeding and finely chopping them. Mince the garlic finely. -
Step 2
Heat the olive oil in a small saucepan over medium-low heat. Add the minced garlic and chopped chilies, sautéing for 2-3 minutes until softened. -
Step 3
Stir in the salt and optional sugar, cooking for another 1-2 minutes. -
Step 4
Pour in the white vinegar and stir vigorously for 30 seconds to deglaze the pan. -
Step 5
Reduce heat to low and simmer gently for 5-7 minutes, stirring occasionally, until the sauce thickens slightly. -
Step 6
Remove from heat and let the sauce cool completely. Transfer to an airtight container and store in the refrigerator.
Important Information
Nutrition Facts (Per Serving)
It is important to consider this information as approximate and not to use it as definitive health advice.
Allergy Information
Please check ingredients for potential allergens and consult a health professional if in doubt.