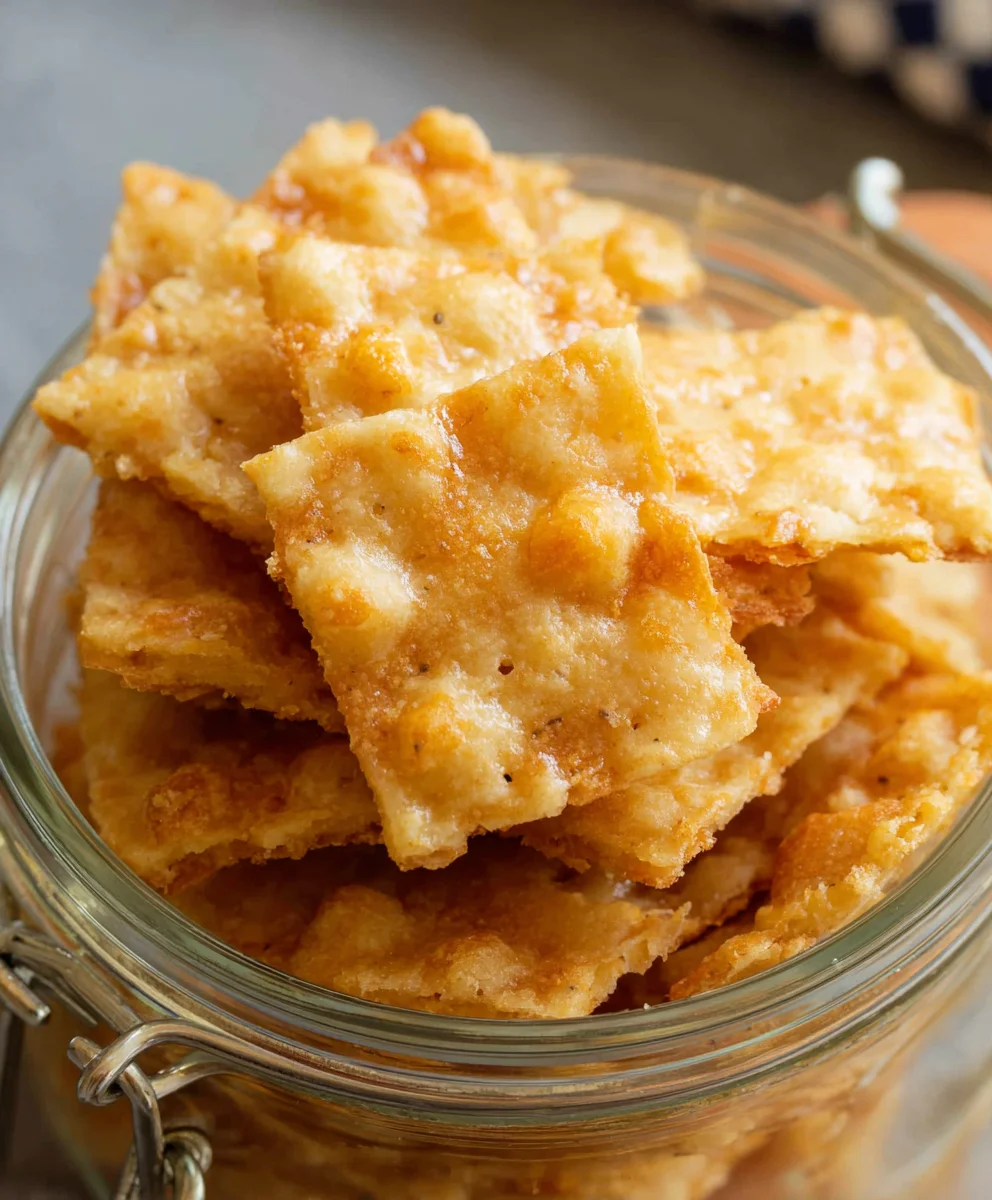
Cheesy Sourdough Cheddar Crackers – Easy Homemade Recipe
Sourdough Cheddar Crackers are more than just a snack; they are a testament to the magic of fermentation and the pure joy of simple, delicious ingredients. We all crave that perfect crunch, that savory burst of cheese, and that subtle tang that only a well-crafted sourdough can deliver. These aren’t your average store-bought crackers. What makes our Sourdough Cheddar Crackers so special is the depth of flavor developed through the slow, natural leavening process of our sourdough starter. This gives them a delightful chegrape juicess on the inside and an irresistible crispness on the outside. People adore them because they elevate any occasion, from a casual afternoon tea to a sophisticated cheese board. They’re wonderfully versatile, perfect for dipping, topping, or simply enjoying on their own. Prepare to fall in love with the unparalleled taste and texture of homemade Sourdough Cheddar Crackers.
Ingredients:
- 2 tablespoons unsalted butter, softened
- 1 cup all-purpose flour
- ¾ cup active sourdough starter (discard is perfectly fine here)
- ¾ cup shredded sharp cheddar cheese
- Kosher salt, for sprinkling
Preparing the Dough
Mixing the Dough
Let’s get started on these delightful Sourdough Cheddar Crackers! The foundation of these crackers lies in a simple yet flavorful dough, brought to life by the magic of sourdough discard. First, ensure your butter is softened to room temperature. This makes it much easier to incorporate into the dry ingredients. In a medium-sized mixing bowl, combine the 1 cup of all-purpose flour with the softened 2 tablespoons of butter. Using your fingertips, a pastry blender, or even a fork, work the butter into the flour until the mixture resembles coarse crum extractbs. You want to break down the butter into small pieces, similar to making a pie crust. This step is crucial for creating a tender cracker with a pleasant texture.
Next, add the ¾ cup of active sourdough starter to the flour and butter mixture. If you’re using sourdough discard, it should have a pleasant tangy aroma. Gently bring the ingredients together. You can use a fork or a spatula at this stage. Don’t overmix! The goal is simply to get the ingredients to start combining. The dough will be quite sticky and shaggy at this point, and that’s perfectly normal. Think of it as the initial stage of building flavor and structure. The wild yeasts in the starter will begin extract their work, contributing to the unique character of your crackers.
Incorporating the Cheese
Now for the star of the show – the cheese! Add the ¾ cup of shredded sharp cheddar cheese to the dough. Again, use a fork or a spatula to gently fold the cheese into the mixture. Try to distribute it as evenly as possible. The cheese will melt slightly as you work, helping to bind the dough together. Continue to mix until the cheese is mostly incorporated. You might see some larger pockets of cheese, which will be wonderful when the crackers bake, creating little gooey bursts of flavor. Avoid vigorous kneading; we’re not developing gluten like we would for bread. The aim is a cohesive dough with pockets of cheese throughout.
Shaping and Baking
Chilling the Dough
Once the cheese is incorporated, the dough will still be a bit sticky, but it should be starting to come together into a cohesive mass. Turn the dough out onto a lightly floured surface. Gently bring it together into a rough ball or disc. It’s important not to overwork the dough at this stage. You want to handle it as little as possible to keep the crackers tender. Now, flatten the dough slightly into a disc, wrap it tightly in plastic wrap, and refrigerate it for at least 30 minutes. Chilling the dough is an essential step. It firms up the butter, making the dough easier to roll out thinly and preventing it from spreading too much during baking. This chilling period also allows the flavors to meld together.
Rolling and Cutting
After the dough has chilled sufficiently, unwrap it and place it back onto a lightly floured surface. You can also lightly flour your rollinggin extractn. Begin rolling out the dough to your desired thickness. For crispier crackers, aim for a thinner dough, around 1/16 to 1/8 of an inch. If you prefer slightly thicker, chewier crackers, you can roll it a bit thicker. Work from the center outwards, rotating the dough occasionally to ensure even rolling and prevent sticking. Once you have rolled the dough to your desired thickness, you can cut it into your preferred cracker shapes. A pizza cutter or a sharp knife works well for creating squares, rectangles, or even rustic shapes. You can also use cookie cutters for more intricate designs.
Baking to Perfection
Preheat your oven to 375°F (190°C). Line a baking sheet with parchment paper. Carefully transfer the cut cracker shapes onto the prepared baking sheet, leaving a little space between them. Now, for that finishing touch: generously sprinkle the tops of the crackers with Kosher salt. The coarse salt crystals will adhere beautifully to the dough and provide a lovely contrast in texture and flavor to the sharp cheddar. You can also lightly prick each cracker with a fork a few times. This helps to prevent them from puffing up too much during baking and ensures a crispier result. Bake the crackers for 12-18 minutes, or until they are golden brown around the edges and firm to the touch. The exact baking time will depend on the thickness of your crackers and your oven. Keep a close eye on them during the last few minutes, as they can go from perfectly baked to burnt quite quickly.
Cooling and Storing
Once baked to a beautiful golden hue, carefully remove the baking sheet from the oven. Let the crackers cool on the baking sheet for a few minutes. They will continue to crisp up as they cool. Then, transfer them to a wire rack to cool completely. This ensures air circulation around the crackers, prgin extractnting any sogginess. Once they are entirely cool, store your Sourdough Cheddar Crackers in an airtight container at room temperature. They should stay delightfully crispy for several days, though I doubt they’ll last that long!

Conclusion:
We hope you’ve enjoyed learning how to make these delicious Sourdough Cheddar Crackers! This recipe offers a fantastic way to use up active sourdough starter while creating a satisfyingly crisp and cheesy snack. The tang of the sourdough combined with the sharp cheddar results in a flavor profile that’s truly addictive. These crackers are perfect for sharing with friends, packing in lunches, or simply enjoying as a delightful solo treat.
For serving suggestions, these Sourdough Cheddar Crackers are wonderful on their own, but they also pair beautifully with a variety of dips like hummus, guacamole, or a creamy spinach artichoke dip. They make an excellent base for small appetizers, topped with cream cheese and chives or a sliver of beef prosciutto. Feel free to experiment with variations; adding a pinch of cayenne pepper for a bit of heat or incorporating finely chopped herbs like rosemary or chives can elevate the flavor even further. Don’t be afraid to play with different types of cheese too! Give these Sourdough Cheddar Crackers a try – we’re confident you’ll love them!
Frequently Asked Questions:
What kind of sourdough starter should I use?
You can use any active sourdough starter for these Sourdough Cheddar Crackers. Whether it’s a rye, whole wheat, or all-purpose flour starter, it will contribute its characteristic tang to the crackers. Ensure it’s bubbly and has been fed within the last 4-12 hours for optimal leavening.
How long do these crackers stay fresh?
Once cooled completely, store your Sourdough Cheddar Crackers in an airtight container at room temperature. They should stay crisp and delicious for up to a week. If they lose some crispness, you can briefly refresh them in a low oven (around 250°F or 120°C) for a few minutes.
Can I make these crackers gluten-free?
While this recipe is designed for traditional flour, adapting it for gluten-free baking would require significant adjustments to the flour blend and possibly the hydration levels. It would likely require a specialized gluten-free sourdough starter and a different binder to achieve a similar texture. It’s best to look for a specifically developed gluten-free sourdough cracker recipe.
Cheesy Sourdough Cheddar Crackers
An easy homemade recipe for delicious and cheesy sourdough cheddar crackers using discard starter.
Ingredients
-
2 tablespoons unsalted butter, softened
-
1 cup all-purpose flour
-
3/4 cup active sourdough starter (discard is perfectly fine here)
-
3/4 cup shredded sharp cheddar cheese
-
Kosher salt, for sprinkling
Instructions
-
Step 1
In a medium-sized mixing bowl, combine the all-purpose flour with the softened butter. Use your fingertips or a pastry blender to work the butter into the flour until the mixture resembles coarse crumbs. -
Step 2
Add the active sourdough starter to the flour and butter mixture. Gently bring the ingredients together with a fork or spatula until just combined. The dough will be sticky and shaggy. -
Step 3
Incorporate the shredded sharp cheddar cheese by gently folding it into the dough with a fork or spatula until mostly distributed. Avoid vigorous kneading. -
Step 4
Turn the dough out onto a lightly floured surface, gently form it into a disc, wrap tightly in plastic wrap, and refrigerate for at least 30 minutes to firm up. -
Step 5
Preheat your oven to 375°F (190°C). Line a baking sheet with parchment paper. Roll out the chilled dough to your desired thickness (1/16 to 1/8 inch for crispier crackers). Cut into desired shapes. -
Step 6
Transfer the cut cracker shapes to the prepared baking sheet. Generously sprinkle with Kosher salt. Lightly prick each cracker with a fork a few times. Bake for 12-18 minutes, or until golden brown and firm. -
Step 7
Let the crackers cool on the baking sheet for a few minutes, then transfer to a wire rack to cool completely before storing in an airtight container.
Important Information
Nutrition Facts (Per Serving)
It is important to consider this information as approximate and not to use it as definitive health advice.
Allergy Information
Please check ingredients for potential allergens and consult a health professional if in doubt.