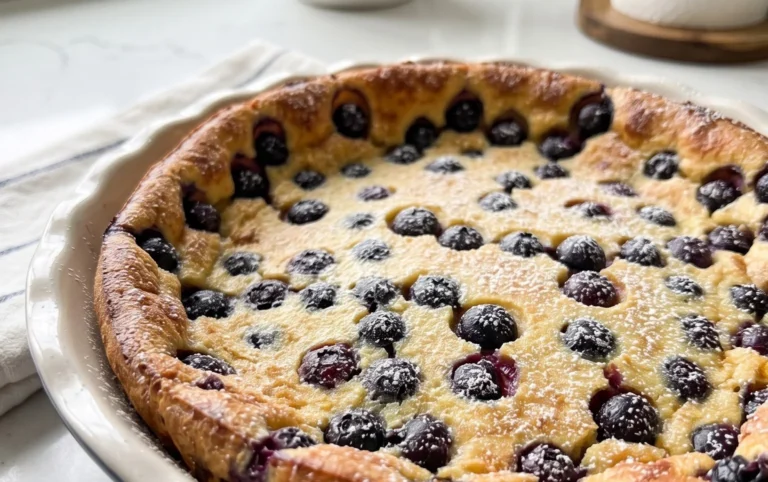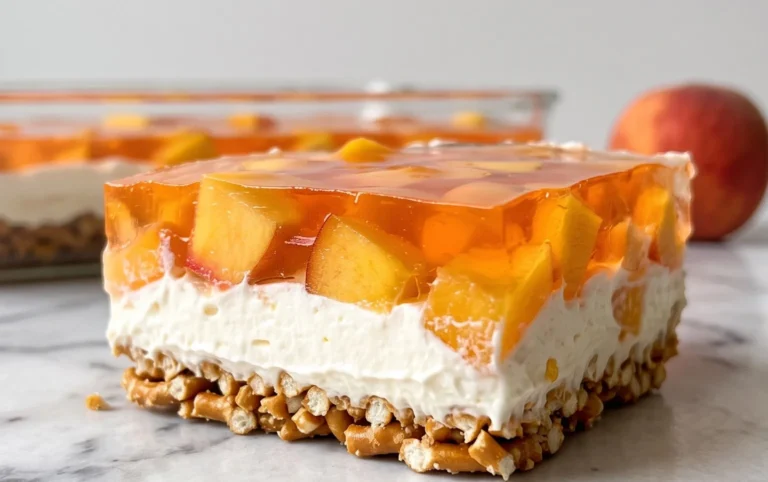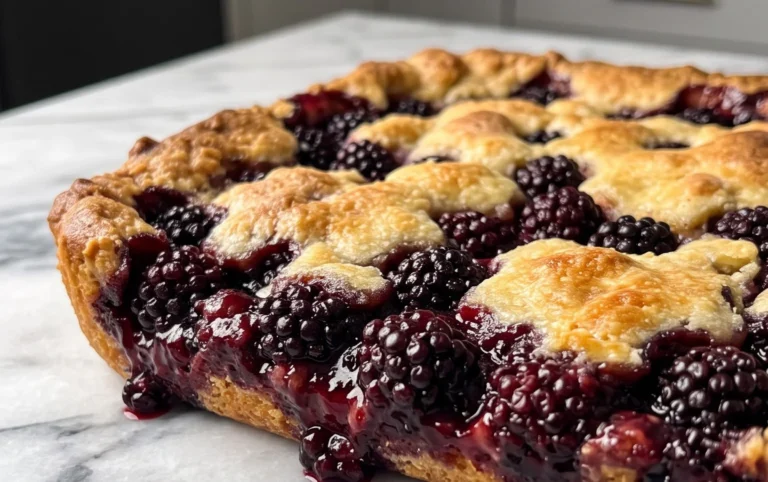
Peaches and Cream Pie- Easy Summertime Dessert
Peaches and Cream Pie. There’s something utterly magical about that simple combination, isn’t there? It evokes lazy summer afternoons, the sweet scent of ripe fruit wafting from the kitchen, and the pure joy of a dessert that’s both comforting and incredibly elegant. This Peaches and Cream Pie is a celebration of those quintessential flavors, a harmonious dance between juicy, sun-kissed peaches and a velvety, luscious cream filling. It’s the kind of dessert that brings smiles to faces and makes any occasion feel a little more special. What truly sets this pie apart is its ability to capture the very essence of peak peach season, transforming humble ingredients into a showstopper. Forget complicated techniques; we’re focusing on pure, unadulterated deliciousness that will have everyone asking for seconds.

Peaches and Cream Pie
There’s something undeniably comforting about a slice of homemade pie, and when that pie involves the sweet, summery essence of peaches mingled with a luscious, creamy filling, you know you’re in for a treat. This Peaches and Cream Pie is a true classic, a delightful symphony of textures and flavors that will transport you to a sun-drenched orchard with every bite. It’s surprisingly simple to make, yet it yields a dessert that tastes like it came from a high-end bakery. We’ll be layering a tender, cake-like crust with juicy peaches and a decadent cream cheese topping.
This recipe is perfect for showcasing fresh, ripe peaches when they’re in season, but a good quality canned peach filling also works beautifully, making this a delightful treat any time of year. The beauty of this pie lies in its distinct layers, each contributing its own unique element to the overall experience. The base offers a hint of almond richness (thanks to the vanilla pudding mix), the peaches provide a burst of fruity sweetness, and the cream cheese topping adds a velvety, tangy counterpoint. Let’s get started!
Ingredients:
Cooking Instructions:
Creating this Peaches and Cream Pie is a delightful journey, broken down into manageable steps that build upon each other to create pure dessert magic. We’ll start by preparing our base, then introduce the peachy goodness, and finally, crown it all with our creamy topping.
Step 1: Preparing the Pie Base
First things first, let’s preheat your oven to 350 degrees Fahrenheit (175 degrees Celsius). This is crucial for ensuring an even bake and a perfectly golden crust. Now, in a medium mixing bowl, whisk together the all-purpose flour, salt, and baking powder. These dry ingredients are the foundation of our crust, providing structure and lift. Next, add the contents of the non-instant vanilla pudding mix to the dry ingredients. It might seem unusual to add pudding mix here, but it imparts a wonderfully subtle vanilla flavor and a tender texture to the base, making it almost cake-like.
Once your dry ingredients are well combined, add the softened butter. It’s important that the butter is softened, not melted, as this allows it to be incorporated more easily and evenly into the flour mixture, creating a texture similar to a crum extractb topping or biscuit dough. You can use a pastry blender, your fingertips, or even a fork to cut the butter into the dry ingredients until the mixture resembles coarse crum extractbs. This step is key to achieving a tender, crum extractbly base.
Step 2: Forming the Batter and First Layer
Now, in a separate small bowl, whisk together the egg and milk until they are just combined. This liquid mixture will bring our base together. Pour this wet mixture into the bowl with the flour and butter crum extractbs. Stir gently until a thick, batter-like consistency is achieved. Don’t overmix; we’re just aiming to combine the ingredients. This batter will form the first, delicious layer of our pie.
Take a 9-inch pie plate and either grease it lightly or line it with parchment paper for easy removal. Spoon the batter into the prepared pie plate and spread it evenly across the bottom and slightly up the sides to create a crust. This might feel a bit sticky, but just press it down with the back of a spoon or a spatula. This layer will bake into a wonderfully tender, cake-like crust that perfectly complements the fruity and creamy elements to come.
Step 3: Adding the Peaches and Initial Bake
Before we introduce the star of the show – the peaches – ensure you’ve drained them and saved the juice. If you’re using canned peaches, carefully pour them into a colander set over a bowl to catch all that delicious juice. If you’re using fresh peaches, you’ll want to peel them, pit them, and slice them. For this recipe, about 3 medium fresh peaches will be equivnon-alcoholic alent to one 28-ounce can. Arrange the drained peach slices evenly over the batter in the pie plate. Try to distribute them in a single layer as much as possible, ensuring each slice of pie will have a good amount of peach.
Now, it’s time for a partial bake. Place the pie into your preheated oven (350 degrees Fahrenheit/175 degrees Celsius) and bake for about 20-25 minutes. We are not baking it completely at this stage; we’re just giving the base a head start and slightly softening the peaches. This partial bake will help prevent the bottom crust from becoming soggy once we add the creamy topping.
Step 4: Crafting the Creamy Topping
While the pie is in its initial bake, let’s prepare the luscious cream cheese topping. In a medium mixing bowl, combine the softened cream cheese and granulated sugar. It’s essential that the cream cheese is softened to room temperature; this will allow it to whip up smoothly without any lumps, creating a velvety texture. Use an electric mixer on medium speed, or a whisk and some good old-fashioned arm power, to beat the cream cheese and sugar together until they are light, fluffy, and well combined. This process should take a couple of minutes.
Once the cream cheese mixture is smooth and creamy, gradually add the reserved peach juice. Start with a tablespoon or two and mix it in. Add the remaining tablespoon of juice and continue to beat until the topping is smooth and has a pourable, yet still thick, consistency. This juice not only adds a subtle peachy flavor to the topping but also helps to lighten it and ensure it spreads easily over the peaches.
Step 5: Assembling and Final Bake
After the initial 20-25 minutes of baking, carefully remove the pie from the oven. The base should be starting to turn golden around the edges, and the peaches should look slightly softened. Now, gently pour and spread the cream cheese mixture evenly over the peaches. Try to cover all the peaches with the creamy topping, creating a beautiful, smooth surface.
Return the pie to the oven and continue baking for another 25-30 minutes, or until the cream cheese topping is set and lightly golden brown around the edges. You’ll know it’s ready when the center is no longer jiggly. Once baked, carefully remove the pie from the oven and let it cool completely on a wire rack. This cooling process is very important for the pie to set properly. Rushing this step can result in a pie that’s too soft to slice neatly. For the best flavor and texture, I highly recommend chilling the pie in the refrigerator for at least 2-3 hours, or even overnight, before serving. This allows the flavors to meld and the creamy topping to firm up beautifully. Serve chilled and enjoy every delightful bite of this Peaches and Cream Pie!

Conclusion:
There you have it – the ultimate guide to creating a divine Peaches and Cream Pie! This recipe truly shines because it balances the natural sweetness of ripe peaches with the luscious, velvety texture of a creamy filling, all nestled within a flaky, buttery crust. It’s a dessert that evokes warmth and nostalgia, perfect for any occasion, from a casual family gathering to a more formal dessert offering. The aroma alone as it bakes is enough to make your mouth water!
This delightful Peaches and Cream Pie is incredibly versatile. Serve it warm, perhaps with a dollop of extra whipped cream or a scoop of vanilla bean ice cream for an extra layer of indulgence. For a refreshing twist, enjoy it chilled on a warm afternoon. Want to experiment? Consider adding a pinch of cinnamon or nutmeg to the peach filling for a warmer spice note, or perhaps a splash of bourbon extract for an adult-friendly variation. Don’t be afraid to get creative! I truly encourage you to try this recipe; it’s a crowd-pleaser and surprisingly simple to master. Your taste buds will thank you!
Frequently Asked Questions:
Can I use frozen peaches for this recipe?
Absolutely! If fresh peaches are out of season or you’re short on time, frozen peaches work wonderfully. Make sure to thaw them completely and drain off any excess liquid before proceeding with the recipe to avoid a watery filling.
What kind of crust is best for a Peaches and Cream Pie?
A classic flaky pastry crust is ideal, as it provides a delightful contrast to the soft filling. You can use a store-bought crust for convenience, or make your own homemade pie crust for that extra special touch. A grabeef ham cracker crust can also be a delicious alternative for a different texture and flavor profile.
How should I store leftover Peaches and Cream Pie?
Leftover pie should be stored loosely covered in the refrigerator for up to 3-4 days. Because of the creamy filling, it’s best to keep it chilled to maintain its texture and prevent spoilage.
Peaches and Cream Pie
A delightful pie with a flaky crust, creamy filling, and sweet peach layers.
Ingredients
-
3/4 cup all purpose flour
-
1/2 teaspoon salt
-
1 teaspoon baking powder
-
1 (3 ounce) package non-instant vanilla pudding mix
-
3 Tablespoons butter, softened
-
1 egg
-
1/2 cup milk
-
1 (28 ounce) can sliced peaches, drained
-
1 (8 ounce) package cream cheese, softened
-
1/2 cup granulated sugar
-
3 Tablespoons reserved peach juice
Instructions
-
Step 1
Preheat oven to 350°F (175°C). Grease and flour a 9-inch pie plate. -
Step 2
In a medium bowl, whisk together flour, salt, and baking powder. Stir in the vanilla pudding mix. -
Step 3
Cut in the softened butter until the mixture resembles coarse crumbs. In a small bowl, whisk together the egg and milk. -
Step 4
Add the wet ingredients to the dry ingredients and mix until just combined. Spread this mixture evenly into the prepared pie plate to form the crust. -
Step 5
Arrange the drained sliced peaches over the crust layer. -
Step 6
In a separate bowl, beat the softened cream cheese and granulated sugar until smooth. Stir in the reserved peach juice. -
Step 7
Spread the cream cheese mixture evenly over the peaches. -
Step 8
Bake for 35-40 minutes, or until the filling is set and lightly golden. Let cool completely before serving.
Important Information
Nutrition Facts (Per Serving)
It is important to consider this information as approximate and not to use it as definitive health advice.
Allergy Information
Please check ingredients for potential allergens and consult a health professional if in doubt.