Bubblegum Ice Cream Recipe – Fun & Easy Homemade Treat
Bubblegum ice cream isn’t just a flavor; it’s a portal to childhood nostalgia and pure, unadulterated fun. Who doesn’t remember the delight of unwrapping a pack of bubblegum, the sweet, artificial scent promising endless entertainment? This beloved treat captures that very essence in a creamy, dreamy dessert. We love bubblegum ice cream because it’s bold, unapologetically pink, and tastes like happy memories. It’s the ultimate indulgence when you’re craving something whimsical and utterly delicious. What truly sets this bubblegum ice cream apart is its ability to transport you back to simpler times with every spoonful. It’s a taste of pure joy, and today, we’re going to show you how to recreate that magic in your own kitchen.
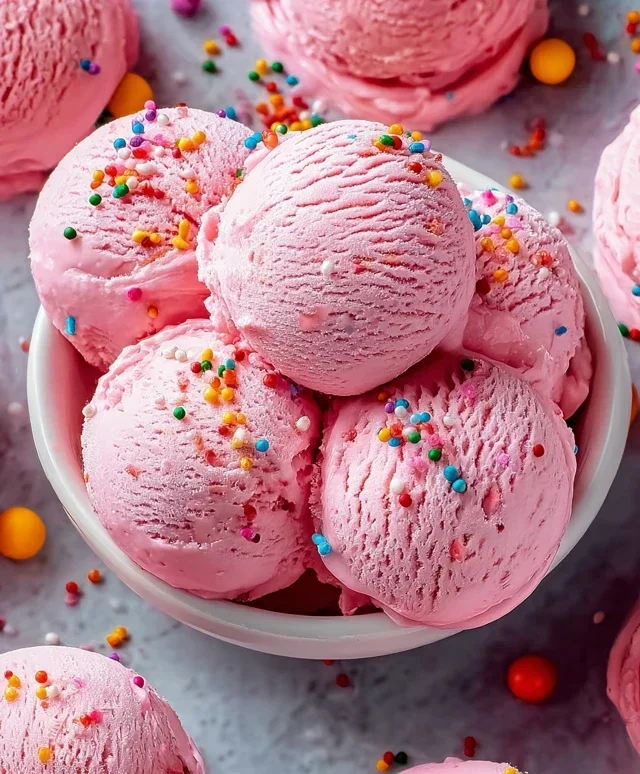
Bubblegum Ice Cream
Get ready for a trip down memory lane with this delightful Bubblegum Ice Cream recipe! This isn’t just any ice cream; it’s a vibrant, fun, and utterly delicious blast from the past that’s surprisingly easy to make right in your own kitchen. Imagin extracte the sweet, nostalgic flavor of your favorite bubblegum, transformed into a creamy, dreamy frozen treat. Perfect for parties, a fun family activity, or just a special indulgence, this ice cream is sure to bring smiles all around. The vibrant pink color and cheerful confetti sprinkles make it a visual as well as a culinary delight. Don’t be intimidated if you’ve never made ice cream from scratch before; this recipe is designed for success, and the results are absolutely worth it. We’re going to create a smooth, rich base that perfectly captures that unmistakable bubblegum essence. Let’s get started on this sweet adventure!
Ingredients:
Making the Bubblegum Base
The first step to creating our magical bubblegum ice cream is to prepare the custard base. This process ensures a smooth and creamy texture that prevents ice crystals from forming. We want every spoonful to be luscious and rich, and a properly prepared base is key to achieving that.
1. In a medium saucepan, combine the whole milk and granulated sugar. Place the saucepan over medium heat. Stir continuously until the sugar is completely dissolved and the milk is warm, but not boiling. You’ll notice the sugar crystals disappearing, leaving a smooth liquid. This gentle heating and stirring is crucial to prevent the sugar from settling at the bottom and potentially scorching. Once the sugar has dissolved, remove the saucepan from the heat. This warm milk and sugar mixture is the foundation of our ice cream’s sweetness and texture.
2. In a separate large bowl, whisk together the heavy cream, bubblegum flavoring, vanilla extract, and kosher salt. The bubblegum flavoring is where we get that signature taste, so don’t skimp on it! Vanilla extract is added to complement and enhance the bubblegum flavor, adding a layer of complexity. The salt might seem odd in a sweet dessert, but it actually acts as a flavor enhancer, balancing the sweetness and making all the other flavors pop.
3. Slowly and gradually, pour the warm milk and sugar mixture into the bowl with the heavy cream mixture. Whisk constantly as you pour. This process is called tempering, and it’s important because it gently raises the temperature of the cream mixture without cooking it too quickly, which could result in scrambled eggs if you were using them (though we aren’t in this simple recipe). Continue whisking until everything is thoroughly combined and smooth.
Chilling and Coloring the Base
Once our base is mixed, it’s time to get that iconic bubblegum color and ensure it’s perfectly chilled for churning.
4. Now comes the fun part: adding the color! Add a few drops of pink or red food coloring to the mixture. Stir gently and observe the color. You can add more drops until you achieve your desired shade of bubblegum pink. Remember, the color will lighten slightly when the ice cream is churned and frozen, so aim for a slightly more intense hue than you think you’ll need. Once you’re happy with the color, stir in half of the confetti sprinkles. These will be suspended in the ice cream, adding delightful pops of color and texture.
5. Cover the bowl tightly with plastic wrap, ensuring the plastic wrap touches the surface of the ice cream base. This prevents a skin from forming on top. Refrigerate the base for at least 4 hours, or preferably overnight. The longer the base chills, the better it will churn. A thoroughly chilled base allows the ice cream maker to do its job efficiently, resulting in a creamier final product. This resting period also allows the flavors to meld together beautifully.
Churning and Finishing
With our base perfectly chilled, we’re ready to churn it into creamy ice cream and add the final touches.
6. Prepare your ice cream maker according to the manufacturer’s instructions. Typically, this involves pre-freezing the bowl for at least 24 hours. Once your ice cream maker is ready, pour the chilled bubblegum ice cream base into the frozen bowl. Churn the ice cream until it reaches a soft-serve consistency. This usually takes about 20-30 minutes, depending on your machine. You’ll see the mixture thicken and become wonderfully creamy.
7. Once the ice cream has churned to your desired consistency, carefully fold in the remaining confetti sprinkles. Gently stir them in to distribute them evenly throughout the ice cream. This is your chance to add more visual appeal and textural contrast.
8. Transfer the churned ice cream to an airtight container. To decorate the top and create that signature look, you can strategically place the gumballs on top of the ice cream in the container before sealing it. You can also mix some of the gumballs into the ice cream during the last few minutes of churning if you prefer them throughout, though they can be quite hard when frozen solid. For the best texture and flavor, press plastic wrap directly onto the surface of the ice cream before putting the lid on the container. This helps prevent ice crystals from forming.
9. Freeze the ice cream for at least 4-6 hours, or until it’s firm and scoopable. Patience is key here! The longer it freezes, the firmer it will become. Once it’s fully hardened, scoop it into bowls or cones and enjoy your homemade Bubblegum Ice Cream! You can garnish with extra gumballs or a few more sprinkles for an extra festive touch. It’s the perfect treat for a hot day or any occasion that calls for a little bit of fun and a whole lot of flavor.
Conclusion:
And there you have it – your very own homemade bubblegum ice cream! I hope you’re as excited as I am to dive into this delightful, nostalgic treat. This recipe truly captures the fun and vibrant essence of bubblegum, offering a delightful sweetness with that unmistakable pink hue. It’s surprisingly simple to make and the result is a creamy, dreamy ice cream that’s perfect for a summer day or any time you need a burst of cheerful flavor. I really encourage you to give this bubblegum ice cream a try; it’s a fantastic way to bring a bit of playful joy to your kitchen.
Serving this delightful bubblegum ice cream is almost as fun as making it! It’s wonderful on its own, but consider topping it with extra sprinkles, a dollop of whipped cream, or even some gummy candies for an extra pop of fun. For a delightful variation, try adding a swirl of strawberry jam during the churning process for a strawberry-bubblegum fusion, or incorporate some mini marshmallows for added texture.
Frequently Asked Questions:
Can I make this bubblegum ice cream without an ice cream maker?
Absolutely! You can adapt this recipe for a no-churn method. After mixing your base ingredients, pour it into a freezer-safe container. Stir vigorously every 30-45 minutes for the first 2-3 hours to break up ice crystals. It won’t be quite as smooth as machine-churned, but it will still be delicious!
What kind of bubblegum flavoring should I use?
For the best and most authentic bubblegum flavor, I recommend using a dedicated bubblegum extract or flavoring oil. You can usually find these in specialty baking stores or online. Start with a smaller amount and add more to taste, as flavorings can vary in strength.
Can I make this recipe dairy-free?
Yes, you can create a dairy-free version. Substitute the heavy cream and milk with full-fat coconut milk or a dairy-free alternative like cashew cream. Ensure your bubblegum flavoring is also dairy-free.
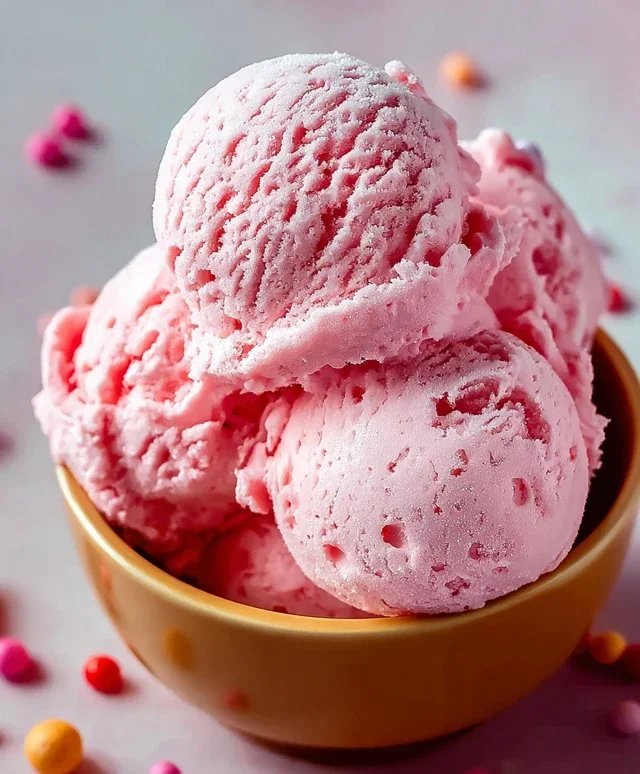
Bubblegum Ice Cream
A fun and colorful homemade ice cream with the sweet flavor of bubblegum, loaded with sprinkles and gumballs.
Ingredients
-
2 cups heavy cream
-
1 cup whole milk
-
¾ cup granulated sugar
-
2 teaspoons bubblegum flavoring
-
1 teaspoon vanilla extract
-
¼ teaspoon kosher salt
-
Pink or red food coloring (to taste)
-
½ cup confetti sprinkles, divided
-
1 cup gumballs (for decoration)
Instructions
-
Step 1
In a medium bowl, whisk together the granulated sugar, kosher salt, and whole milk until the sugar is dissolved. Stir in the bubblegum flavoring and vanilla extract. -
Step 2
Pour the heavy cream into a separate large bowl. Gradually whisk the milk mixture into the heavy cream until well combined. Add food coloring to achieve your desired pink or red hue. -
Step 3
Chill the ice cream base in the refrigerator for at least 2 hours, or preferably overnight. -
Step 4
Once chilled, churn the ice cream base in an ice cream maker according to the manufacturer’s instructions. During the last few minutes of churning, add ¼ cup of the confetti sprinkles. -
Step 5
Transfer the churned ice cream to an airtight container. Gently fold in the remaining ¼ cup of confetti sprinkles and the gumballs. -
Step 6
Freeze for at least 4 hours, or until firm, before serving.
Important Information
Nutrition Facts (Per Serving)
It is important to consider this information as approximate and not to use it as definitive health advice.
Allergy Information
Please check ingredients for potential allergens and consult a health professional if in doubt.