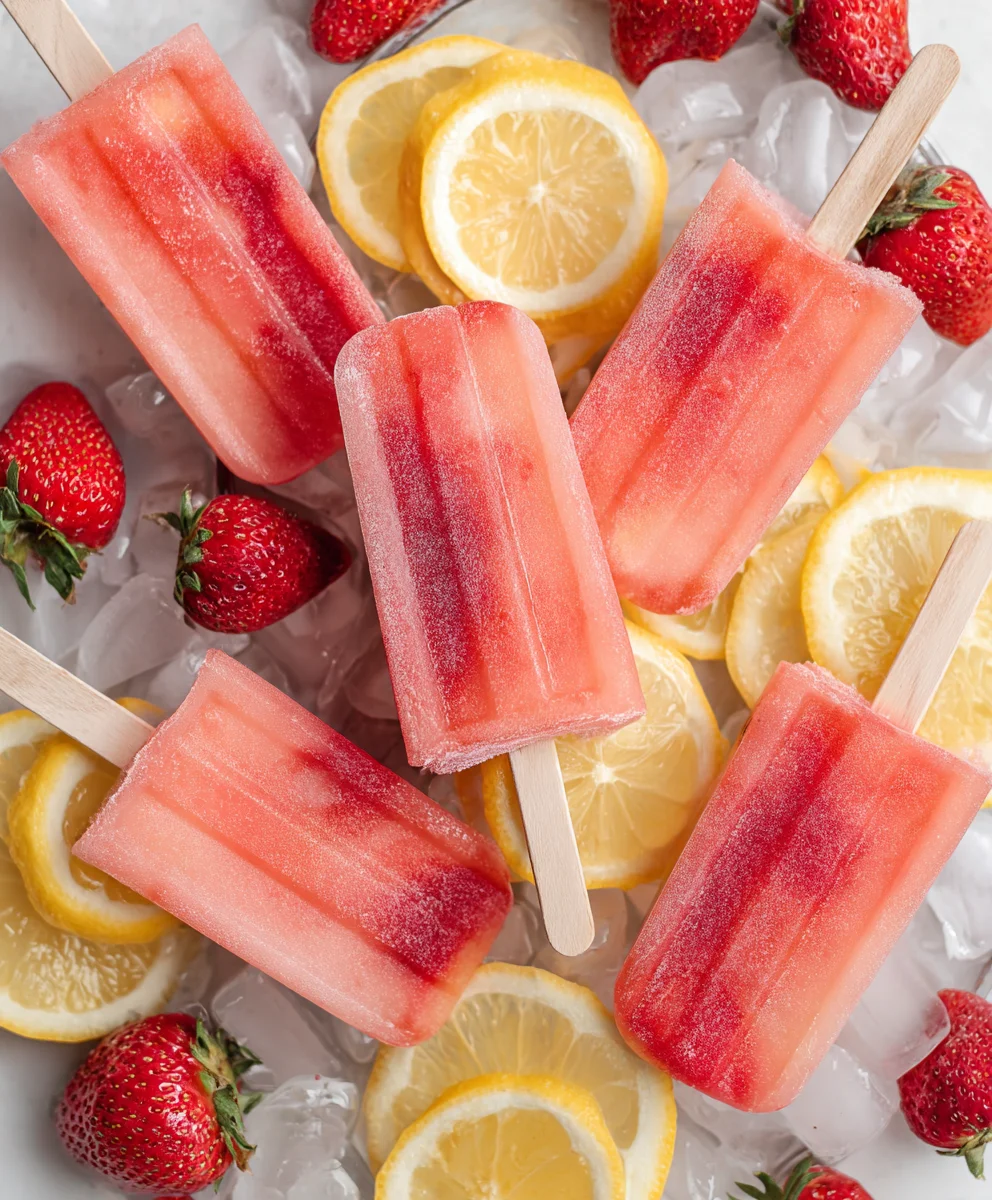
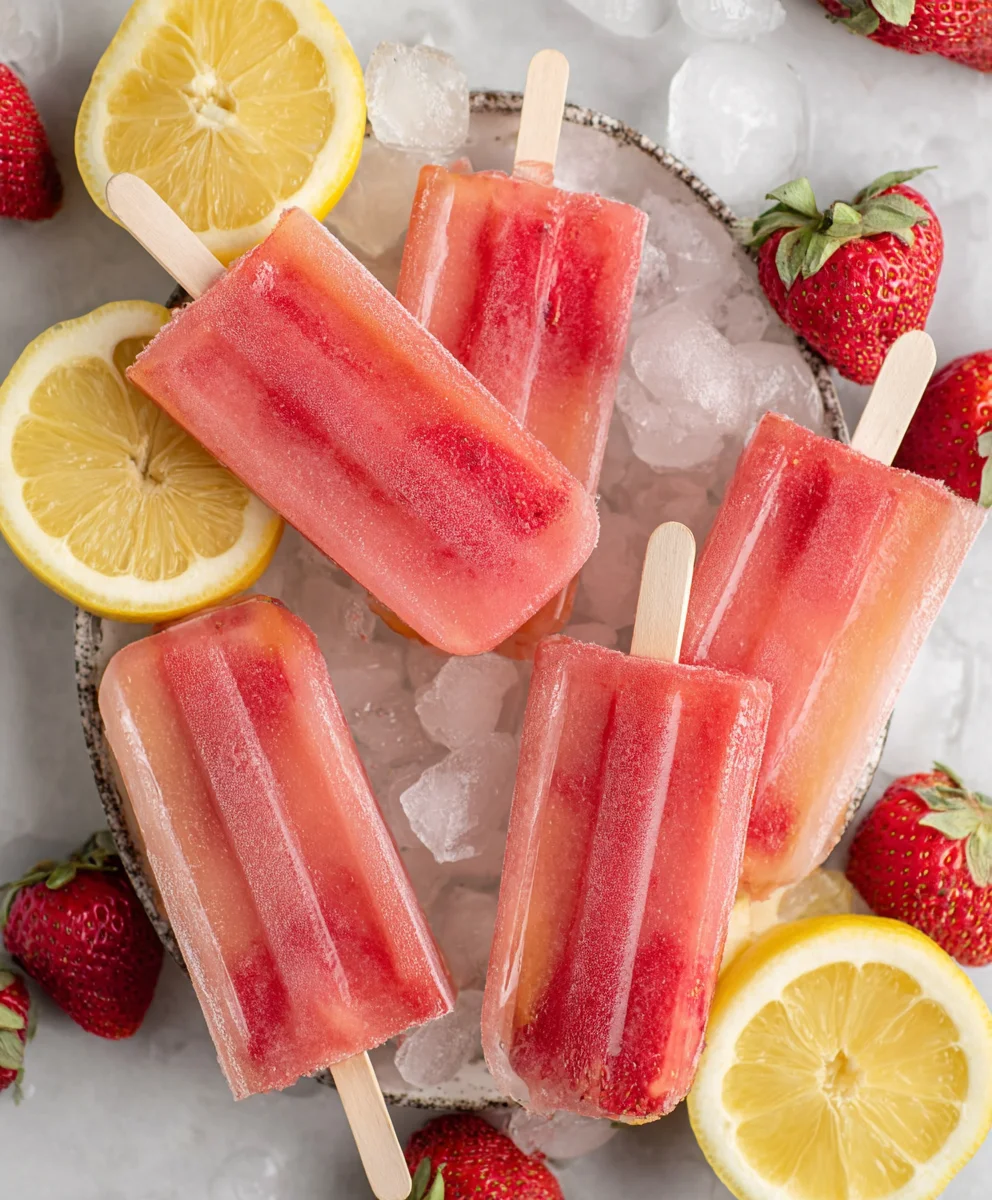
Strawberry Lemonade Popsicles-Cool Refreshing Treat
Strawberry Lemonade Popsicles are more than just a frozen treat; they are a nostalgic portal to sun-drenched afternoons and carefree days. There’s something undeniably magical about the perfect balance of sweet, juicy strawberries and zesty, tart lemonade captured in a refreshing, icy bite. This is why so many of us instantly fall in love with these vibrant delights! They’re incredibly simple to make, yet deliver an explosion of flavor that’s both invigorating and comforting. What truly makes our Strawberry Lemonade Popsicles special is the commitment to using fresh, ripe strawberries and freshly squeezed lemon juice, avoiding artificial flavors and excessive sugar, ensuring every lick is bursting with authentic, garden-fresh goodness. Get ready to create your own batch of these delightful frozen masterpieces and transport yourself back to summer bliss with every delightful, fruity sensation.
Ingredients:
- 1 container (59 fluid ounces) Simply Lemonade
- 1 cup fresh strawberries, hulled and finely diced
- 1 tablespoon granulated sugar
Preparing the Popsicle Mixture
Step 1: Sweeten the Strawberries
Begin extract by preparing your strawberries. Ensure they are washed, hulled, and then finely diced. The smaller the dice, the more evenly the strawberry flavor and texture will distribute throughout your popsicles. In a small bowl, combine the diced strawberries with the 1 tablespoon of granulated sugar. Gently stir them together. The sugar will help draw out the natural juices from the strawberries, creating a more intense strawberry syrup as it sits. Let this mixture rest for about 10 to 15 minutes. This resting period is crucial for maximizing the strawberry flavor. You’ll notice the strawberries start to glisten and release their vibrant red juices, mingling with the sugar. This step ensures that each bite of your Strawberry Lemonade Popsicle will have a delightful burst of fresh strawberry goodness, not just a hint.
Step 2: Infuse the Lemonade
Now, it’s time to combine our key elements. Pour the entire container of Simply Lemonade into a larger mixing bowl or pitcher. Once the strawberries have had a chance to macerate with the sugar, gently spoon the sweetened strawberry mixture, including all the released juices, into the lemonade. Stir everything together thoroughly but gently. You want to distribute the strawberries evenly without breaking them down too much, as you’ll want to see those lovely little red flecks in your finished popsicles. Give it a good stir for about a minute, ensuring the sugar from the strawberries is fully dissolved into the lemonade. Taste the mixture at this stage. If you prefer a sweeter popsicle, you can add a little more sugar, about ½ a teaspoon at a time, stirring well after each addition until your desired sweetness is reached. Remember, the sweetness will be slightly less pronounced when frozen, so it’s often best to make it a touch sweeter than you think you need.
Freezing the Popsicles
Step 3: Filling the Popsicle Molds
With your delicious strawberry lemonade mixture ready, the next step is to fill your popsicle molds. If you are using standard-sized popsicle molds, you can typically pour the mixture directly from your pitcher or bowl. For the best aesthetic appeal and even distribution of the strawberry pieces, try to spoon some of the diced strawberries into each mold first, then fill the rest with the lemonade mixture. This ensures that every popsicle has a good amount of strawberry bits. Be careful not to overfill the molds, as the liquid will expand slightly as it freezes. Leave a small space at the top, about ¼ inch, to accommodate this expansion. If you don’t have specialized popsicle molds, you can also use small paper or plastic cups. Fill them most of the way, then place a popsicle stick in the center once they’ve started to freeze a little (around 30-60 minutes in the freezer) so the stick stands upright.
Step 4: Initial Freezing
Once your popsicle molds are filled, carefully place them onto a stable surface in your freezer. It’s a good idea to place them on a small baking sheet or tray. This serves two purposes: it catches any potential drips and makes it easier to move the molds into and out of the freezer without disturbing the liquid. Allow the popsicles to freeze for at least 1 to 2 hours. During this initial freezing period, the mixturegin extractll begin to thicken and solidify. This intermediate step is particularly helpful if you want to ensure the strawberry pieces are evenly distributed throughout the popsicle rather than sinking to the bottom. If you opted for the cup method, this is when you would insert your popsicle sticks.
Step 5: Completing the Freeze
After the initial freezing period, remove the baking sheet with the popsicle molds from the freezer. The popsicles should be partially frozen, firm enough to hold their shape. If you notice any strawberry pieces have floated to the top, you can gently push them down with a clean spoon or toothpick to redistribute them. Now, return the molds to the freezer. Continue to freeze for another 2 to 4 hours, or until the popsicles are completely solid. The total freezing time can vary depending on the size and type of your popsicle molds and the temperature of your freezer. For best results, aim for a total freezing time of at least 4-6 hours. To check if they are ready, try to gently wiggle a popsicle stick; it should feel completely firm and immovable.
Serving Your Strawberry Lemonade Popsicles
When your Strawberry Lemonade Popsicles are fully frozen and ready to be enjoyed, you’ll need a little trick to get them out of the molds easily. If your molds are silicone, this is usually quite straightforward. For rigid plastic molds, it can be a bit trickier. The easiest method is to run the outside of the mold under warm (not hot) water for about 10 to 20 seconds. This slight warming will loosen the popsicle from the mold without melting it. Gently pull on the popsicle stick to release it. Serve immediately and enjoy the refreshing, fruity, and tangy burst of flavor! These popsicles are a perfect treat for a hot summer day, a delightful homemade alternative to store-bought frozen treats, and a fantastic way to use fresh strawberries.
Conclusion:
You’ve now learned how to create these delightfully refreshing Strawberry Lemonade Popsicles! This recipe is wonderfully simple, making it an ideal activity for a hot summer day or a fun project to do with kids. The balance of sweet strawberries and tangy lemon creates a perfectly balanced flavor that’s truly irresistible. I encourage you to give these a try; you won’t be disappointed with the vibrant taste and cool relief they offer.
For serving, these Strawberry Lemonade Popsicles are best enjoyed straight from the freezer on a warm afternoon. They make a fantastic addition to backyard barbecues, birthday parties, or simply as a healthy, homemade treat. You can serve them in their individual molds or unmold them onto a plate for a more elegant presentation. Consider pairing them with a light summer salad or grilled chicken for a complete warm-weather meal.
Don’t be afraid to experiment with variations! For a creamier texture, you could blend in a tablespoon or two of plain yogurt or coconut milk. If you prefer a sweeter popsicle, simply add a touch more sugar or honey to the mixture before freezing. You can also add a sprig of fresh mint to each mold for an extra burst of flavor and aroma.
Frequently Asked Questions about Strawberry Lemonade Popsicles:
Q1: Can I make these Strawberry Lemonade Popsicles without a popsicle mold?
Absolutely! If you don’t have popsicle molds, you can use small paper or plastic cups. Pour the mixture into the cups, cover the tops tightly with plastic wrap, and insert popsicle sticks through the plastic wrap to hold them upright as they freeze. Once frozen, you can peel away the cups.
Q2: How long do Strawberry Lemonade Popsicles typically take to freeze?
Generally, these popsicles will need at least 4-6 hours to freeze completely. For the best results and to ensure they are solid, it’s often recommended to leave them in the freezer overnight. This ensures they are firm and don’t melt too quickly once removed.
Strawberry Lemonade Popsicles
Cool and refreshing homemade strawberry lemonade popsicles, perfect for a hot summer day.
Ingredients
-
1 container (59 fluid ounces) Simply Lemonade
-
1 cup fresh strawberries, hulled and finely diced
-
1 tablespoon granulated sugar
Instructions
-
Step 1
Wash, hull, and finely dice the strawberries. In a small bowl, combine the diced strawberries with 1 tablespoon of granulated sugar. Gently stir and let rest for 10 to 15 minutes to draw out juices. -
Step 2
Pour the Simply Lemonade into a mixing bowl or pitcher. Gently spoon the sweetened strawberry mixture, including juices, into the lemonade. Stir thoroughly for about a minute to dissolve sugar. Taste and adjust sweetness if desired. -
Step 3
Fill popsicle molds, distributing strawberry pieces evenly by spooning some into each mold first, then filling with the lemonade mixture. Leave about 1/4 inch of space at the top of each mold for expansion. -
Step 4
Place filled popsicle molds on a baking sheet or tray and carefully place in the freezer for 1 to 2 hours for initial freezing. -
Step 5
Remove from freezer, redistribute any floating strawberry pieces if necessary. Return to freezer and continue freezing for another 2 to 4 hours, or until completely solid (total freezing time of 4-6 hours recommended). -
Step 6
To serve, run the outside of the mold under warm water for 10-20 seconds to loosen the popsicle. Gently pull on the stick to release. Serve immediately.
Important Information
Nutrition Facts (Per Serving)
It is important to consider this information as approximate and not to use it as definitive health advice.
Allergy Information
Please check ingredients for potential allergens and consult a health professional if in doubt.